EDIT (07-Mar-15): If you own version 12 of the ESP8266 or any version where more GPIO are exposed read here about some additional info for flashing the firmware.
So, I'm guessing that if you stumbled upon this page,
You are probably a fan of the blog ;) or you already know what the ESP8266 is.
For those of you who don't know what a ESP8266 is, it's a small WiFi module with an arm processor and it has all the functionality of WiFi excluding ssl.
Also it's Arduino compatible and it's the most cheap arduino compatible WiFi module there is.
But on this post we are not going to mention arduino (more than we have to at-least).
The topic today is how to burn on the ESP8266 a custom rom named the NodeMCU. Burning this rom will makes it possible to use all the great features of the ESP8266 micro-controller, such as SPI,UART,I2C,PWM,GPIO and more...
So how do we load this firmware on the ESP8266 chip:
Actually it's pretty simple, we just need to go to :
https://github.com/nodemcu/nodemcu-flasher and download the nodemcu-flasher
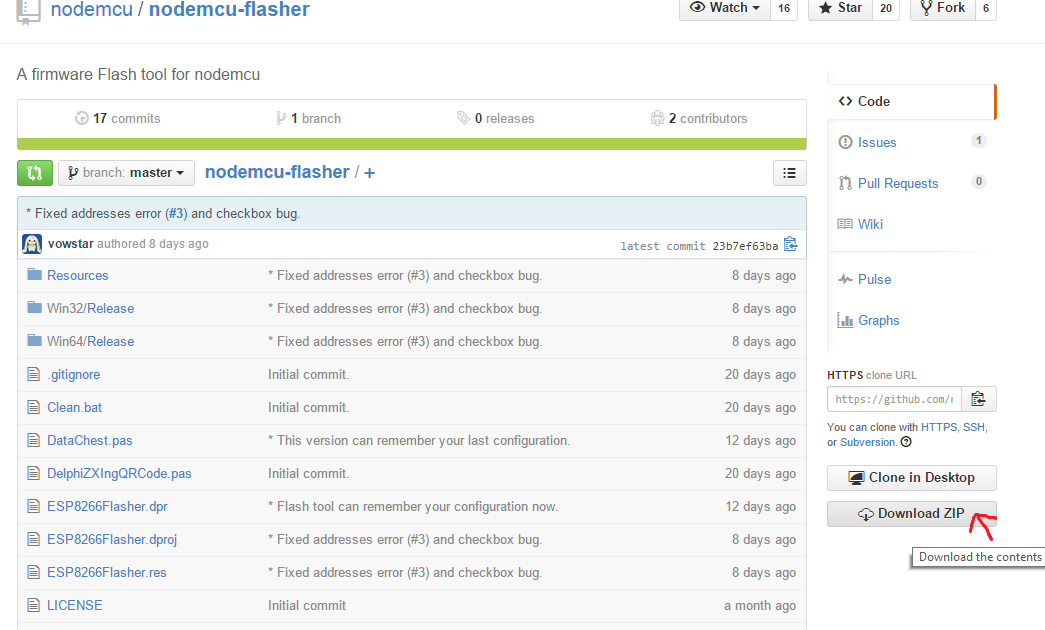
extract the content from the zip file
Inside the folders there is a Win32 version and a Win64 version, choose the one that suits your os version (how to check if the os version is 32bit or 64bit http://windows.microsoft.com/en-us/windows7/find-out-32-or-64-bit )
Now we need to connect the ESP8266 to an TTL-USB of some sort, I'm using the FTDI232 but there are alot of options out there, Have a look on ebay
To connect the ESP8266 you first need to understand what version of ESP8266-XX you have - The basic 01 version with 2 gpio(0,2), or a more complicated version. You should find the pinout of this board and the connections are:
ESP SIDE - > UART SIDE :
VCC - > 3.3V
GND - > GND
RX - > TX (depends on the uart module.. if not working try to switch)
TX - > RX (same ...)
CH_PD- > 3.3V
GPIO0- > GND ( Only for when loading the firmware because this pin is what decides if to boot in firmware load mode or regular mode)After connecting the ESP8266 to the UART you simply push the FLASH button in the nodemcu-flasher and that's it it should start flash the firmware to the ESP.
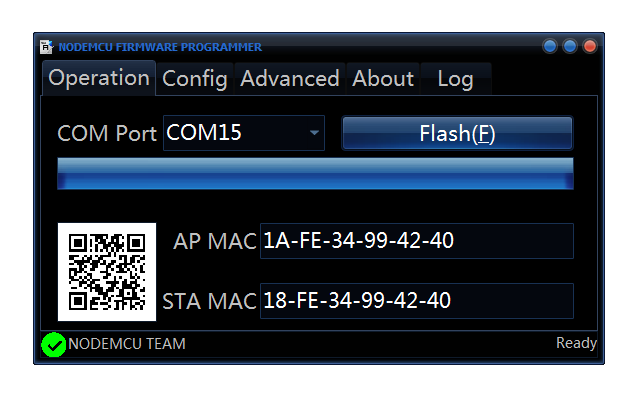
Note that if it doesn't start after a minute or less you probably have a problem with the connections or with the driver to the UART(TTL), also maybe the flash tool doesn't know what com port to use when flashing the firmware.
After the flash finishes disconnect the gpio0 pin from GND and you can connect to it using putty or any other way and check if it works :)
Some simple usages are connecting the ESP8266 to your home WiFi network (One time deal! after that no need to config it again it saves the connection for the following boots)
Connect wifi script
or create a hotspot so you could connect to it without the need of routers with wifi and so forth :
Create hotspiot script
and some more useful scripts that we would talk about in another post :
More useful scripts
For more practical use of the ESP8266, this firmware and some lua scripts check the more posts on this blog -