After four years of inattention, it was certainly time to refresh the Raspberry Pi boards located in my residence.
The older Pi, shown below, was at least 5 generations behind in hardware with hand-wired sensors located on a prototyping HAT (Hardware Attached on Top). The setup looked old and cobbled together. The larger SD card - left over from the first generation Pi - sticks out, along with a WiFi adapter.

AstroPi
This is the story of AstroPi and the Raspberry Sense HAT.
The AstroPi Project was a teaching device and STEM emersion course which allowed EU students the amazing opportunity to conduct scientific investigations in space, by writing programs that run on the AstroPi aboard the International Space Station. Hundreds of students wrote programs that ran in space, and thousands of students learned about Pi and Python programming.
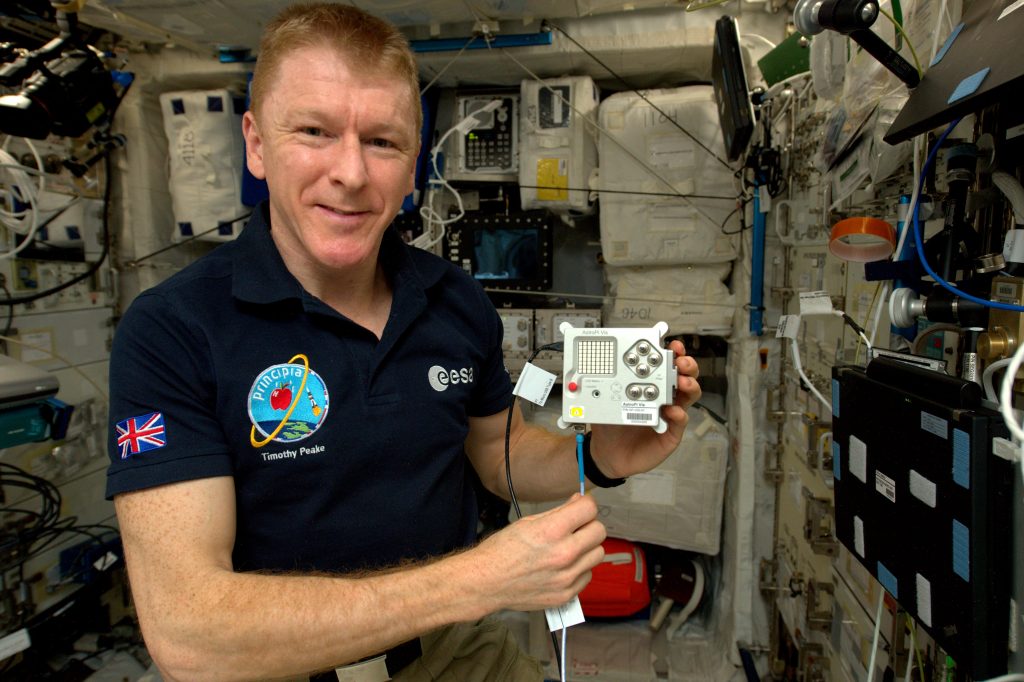
Astronaut Tim Peake using a Raspberry Pi aboard the International Space Station. Image Credit: ESA (European Space Agency)
The Astro Pi HAT has now been accepted as a popular RasPi extension, now known as the Raspberry Sense HAT. I decided to learn to program the Sense HAT, and upgrade my first generation Pi to the latest model.
So, time to upgrade. Here is my shopping list:
| item | source | price |
|---|---|---|
| Raspberry Pi 3 B+ board | Amazon | $39.00 |
| Raspberry Pi SenseHAT | Amazon | $37.83 |
| Raspberry Pi HAT Enclosure | Amazon | $10.99 |
| USB 2.0 A-Male to Micro B Cable | Amazon | $4.99 |
Through Amazon Prime, these parts were received the next day and quickly assembled. Voila!
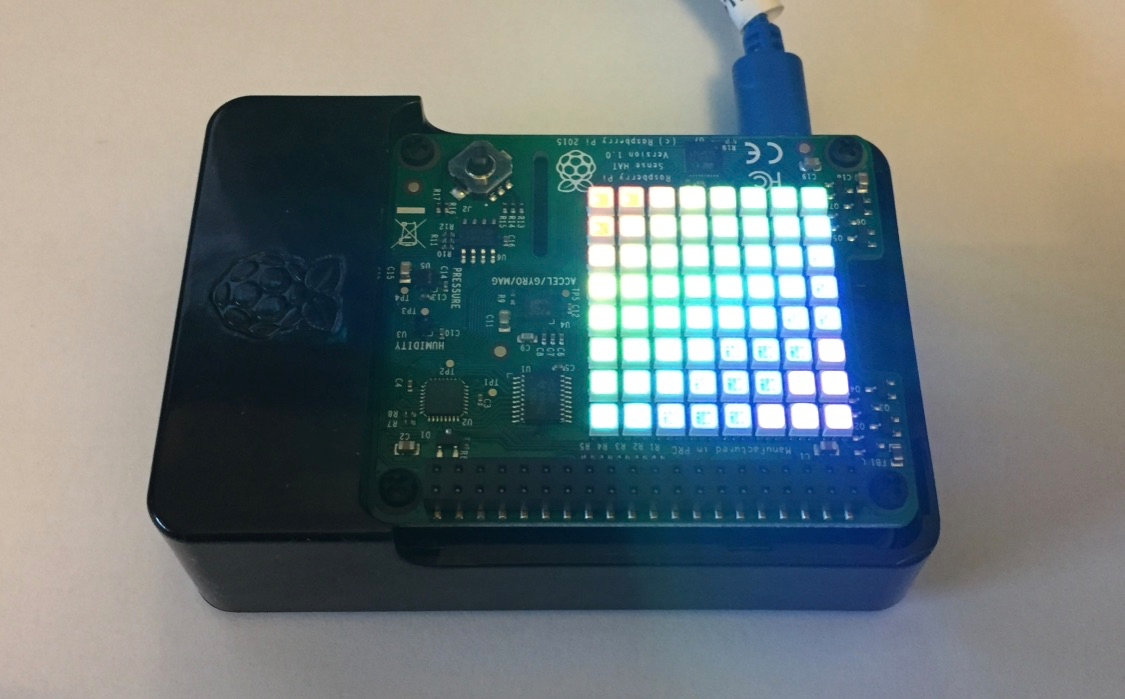
No WiFi adapter is needed as it’s built in to the Pi. The Sense Hat comes with stand-offs and a custom case, which packages neatly the entire assembly.
What is the Sense Hat? It is a marvelous integration of environmental sensors and color LEDs, that enables you to use the Raspberry Pi in a number of novel ways. The Sense HAT features an 8x8 RGB LED matrix, a mini joystick and the following sensors:
- Gyroscope
- Accelerometer
- Magnetometer
- Temperature
- Relative Humidity
- Barometric pressure
One can build all types of interesting applications with these sensors, including hand-held games, weather instruments, science experiments, novel displays, etc.
Creating the micro SD-card
Now we are ready to install the software.
First, we have to build the micro-SD card. The best way to do so is to download the image of the latest Raspbian OS.
(Editor: There was an update in November 2018 and there are now three images. I suggest using Raspbian Stretch with Desktop - that doesn’t include tons of software that most of us don’t use.)
Next, on my MacBook, we insert an 8GB or 16GB micro-SD card in carrier and run ApplePi-Baker.
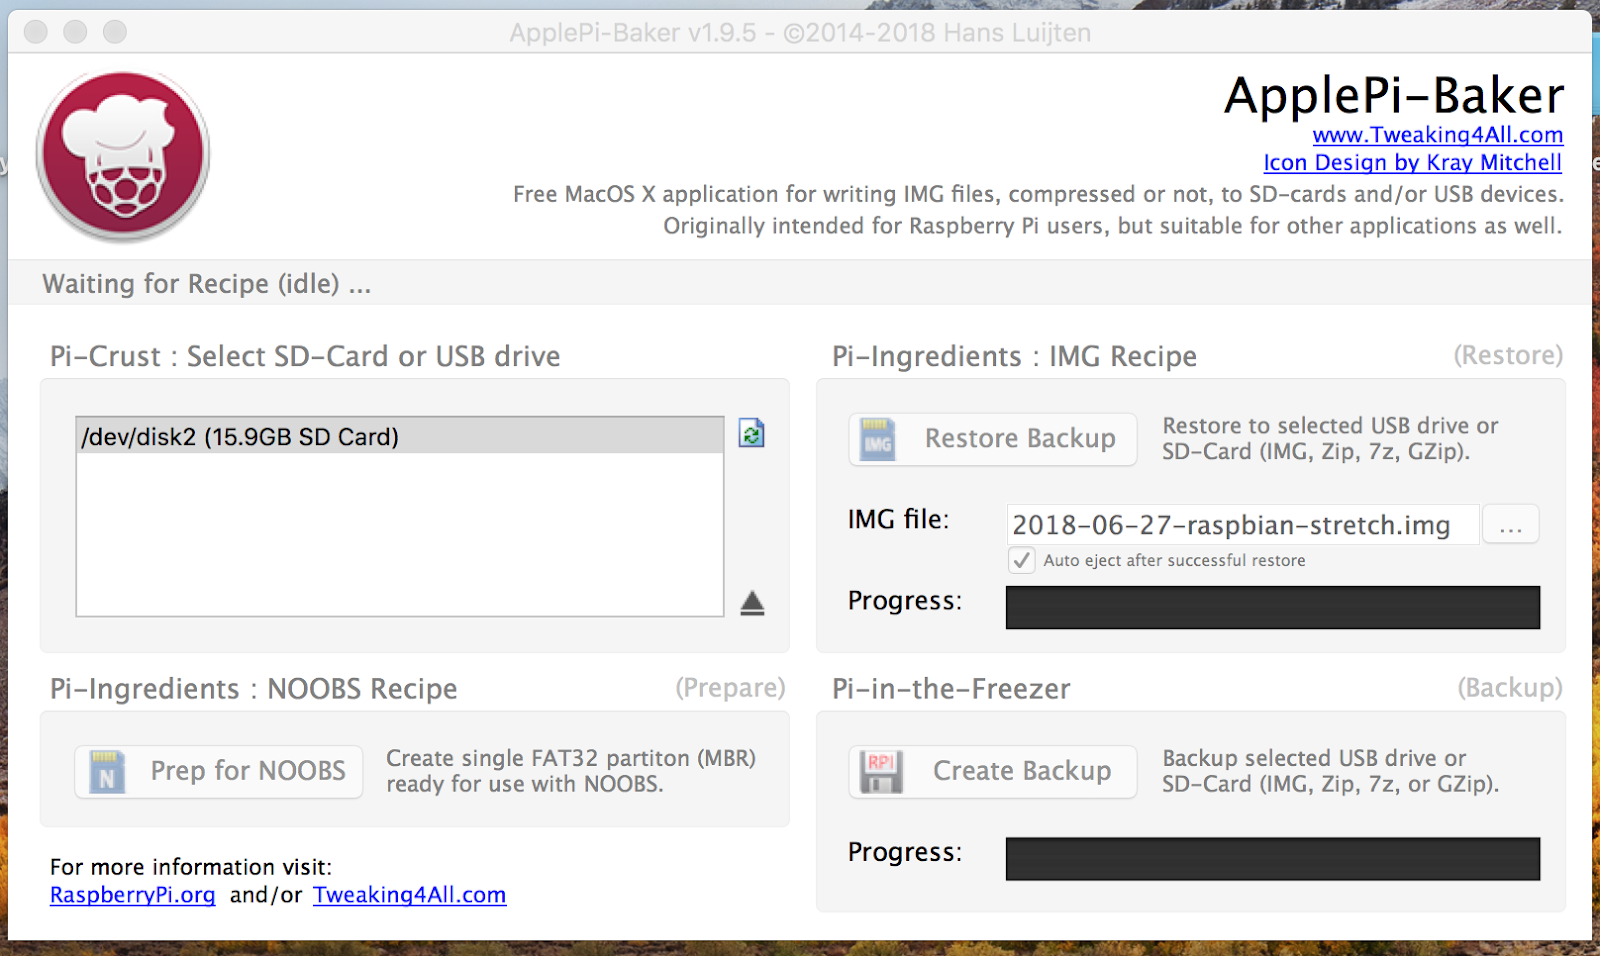
Select the SD-card - it comes up as /dev/disk2 on my MacBook.
Select the IMG file: First, again, we go to the Raspbian download site and select the latest. Notice I’ve selected 2018-06-27-raspbian-stretch.img, which was in my downloads directory.
Next, click Restore Backup. I noticed that this took 3 minutes on my most recently purchased SD cards, 6 minutes on a few older cards, and 12 minutes on an even older card. It can be concluded that the underlying SD card technology has evolved and improved over the past couple of years. It is time to retire those older/slower SD cards. The Restore Backup command provides a good metric for figuring out which SD cards are poorer performers.
After the Restore operation is completed, the ApplePi-Baker is done, the volume has been created and finally, unmounted. We need to remount the volume to do a few additional commands. Therefore, pull out and then reinsert the SD card. It should automatically mount on the MacBook desktop as “boot.” Open a Terminal window, and then do these additional commands:
cd /Volumes/boot
touch ssh
This ensures that the ssh daemon runs, (see additional documentation). Therefore, we will be able to ssh into the RasPi.
Second, we want to create the file wpa_supplicant.conf that enables the Pi to connect to your wifi at first startup. (see additional documentation). This is created to specify the WiFi network that the Raspberry Pi will use. I have a copy of wpa_supplicant.conf saved in my home directory. The contents are:
country=US
ctrl_interface=DIR=/var/run/wpa_supplicant GROUP=netdev
update_config=1

network={
        ssid="mySSID"
        psk="myPassword"
        proto=RSN
        key_mgmt=WPA-PSK
        pairwise=CCMP
        auth_alg=OPEN
}
Except, of course, mySSID and myPassword are replaced with my actual WiFi login credentials.
From the Terminal Window, place a copy of wpa_supplicant.conf in the root directory of the boot volume with the cp command.
cd /Volumes/boot
cp ~/wpa_supplicant.conf .
The third item to modify is the file config.txt (see additional documentation), which specifies the attributes of the display buffer. Uncomment and change the 2 lines as I have done below:
# uncomment to force a console size. By default it will be display's
# size minus overscan.
framebuffer_width=1024
framebuffer_height=768
As a result of this change, a reasonably sized, 1024 x 768 display is seen, when we VNC into the Raspberry Pi.
Next, we eject the SD card volume, remove it from the MacBook and place the micro-SD card into the Raspberry Pi. We apply power and watch it boot. In no more than two minutes, it is up on the network. But what’s the IP address?
To determine the IP address – so we can connect to it – we use a Network Scanner.
My preferred network scanner is an iPhone iOS app called iNet. Launch iNet, touch Network Scanner, touch refresh and we can see this:
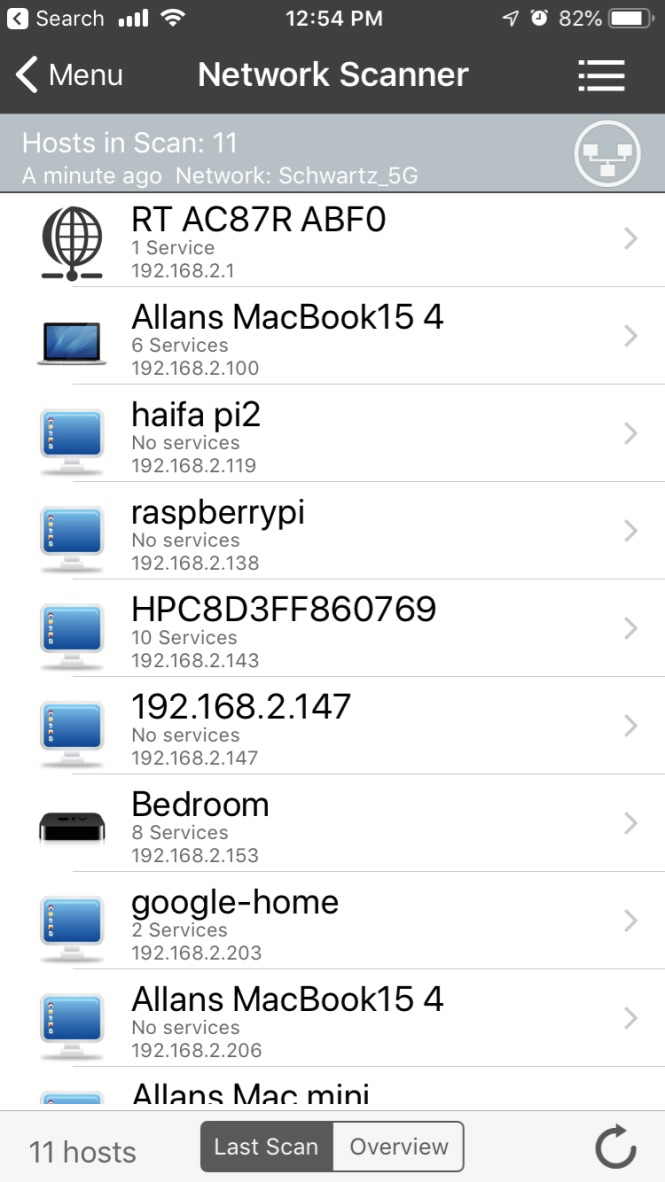
The hostname is raspberrypi, and we see its IP address is 192.168.2.138.
Next we ssh to the raspberrypi
ssh -l pi 192.168.2.138
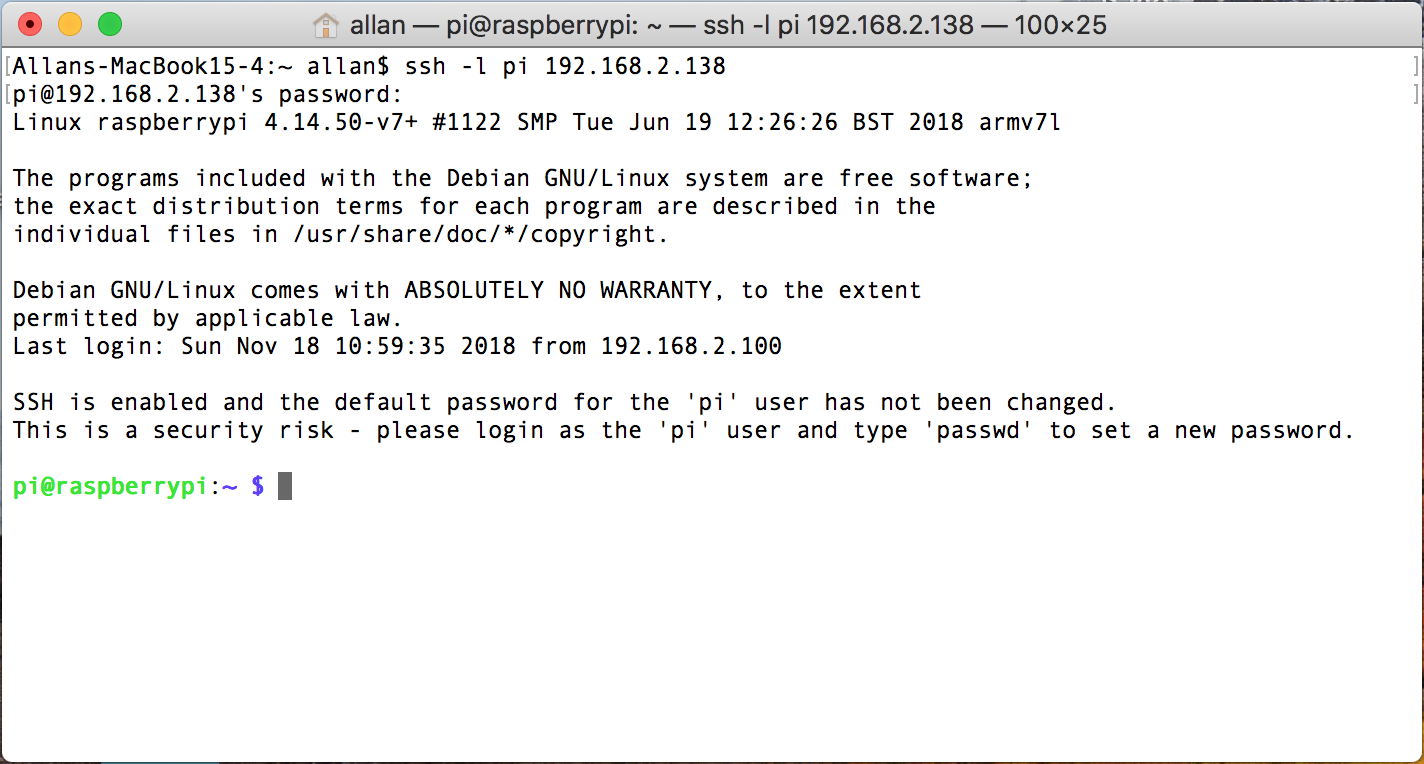
Perfect. The next step is to run raspi-conf.
sudo raspi-conf
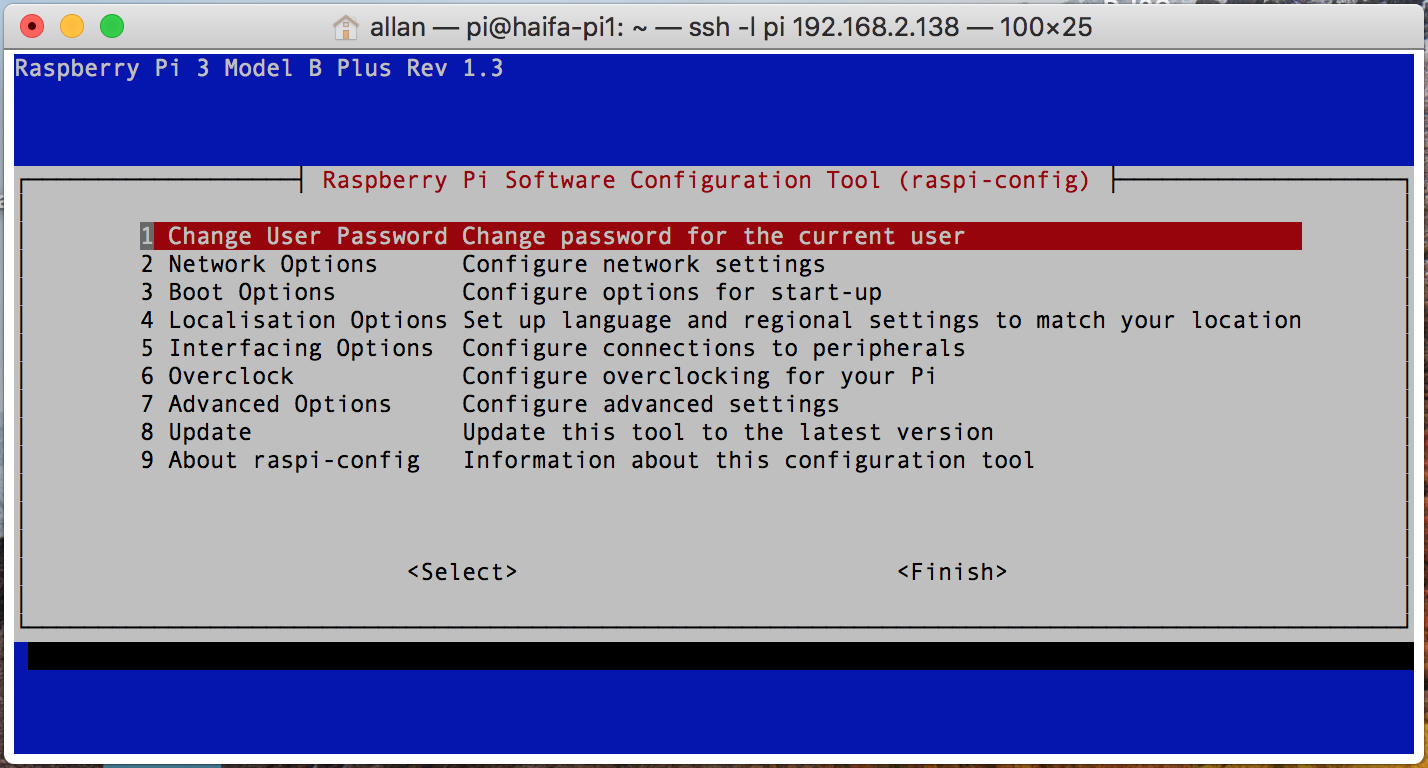
Using raspi-conf, perform the following steps:
- Change the User Password
- Under Network Options, change the Hostname … to personalize or differentiate from all of your RasPi boards.
- Under Interfacing options, Enable SSH, Enable VNC, and Enable I2C
- Exit raspi-conf
Normally, the Raspberry Pi reboots at this point. Wait for it to reboot, and then connect to it again via ssh.
The first thing I always load on my Raspberry Pi is RealVNC. This enables me to connect using VNC, from the local network, or using RealVNC for outside the local network.
Issue the commands:
sudo apt-get update
sudo apt-get install realvnc-vnc-server
Since we earlier enabled VNC (from raspi-conf), we will be able to connect to our Raspberry Pi using VNC. However, first we reboot.
sudo reboot
After a minute of reboot time, we can connect using VNC. There are several VNC client alternatives to create a connection. One alternative is to use the RealVNC application on the MacBook or RealVNC iOS app for iPad. I like to use the VNC Viewer for Google Chrome to connect. After installing, run it from the Apps pulldown (top left side of the Chrome bookmarks bar). It pops up a new window, as seen below.

Just enter the IP address and connect on in. After logging in, you will see the desktop of the Raspberry Pi:
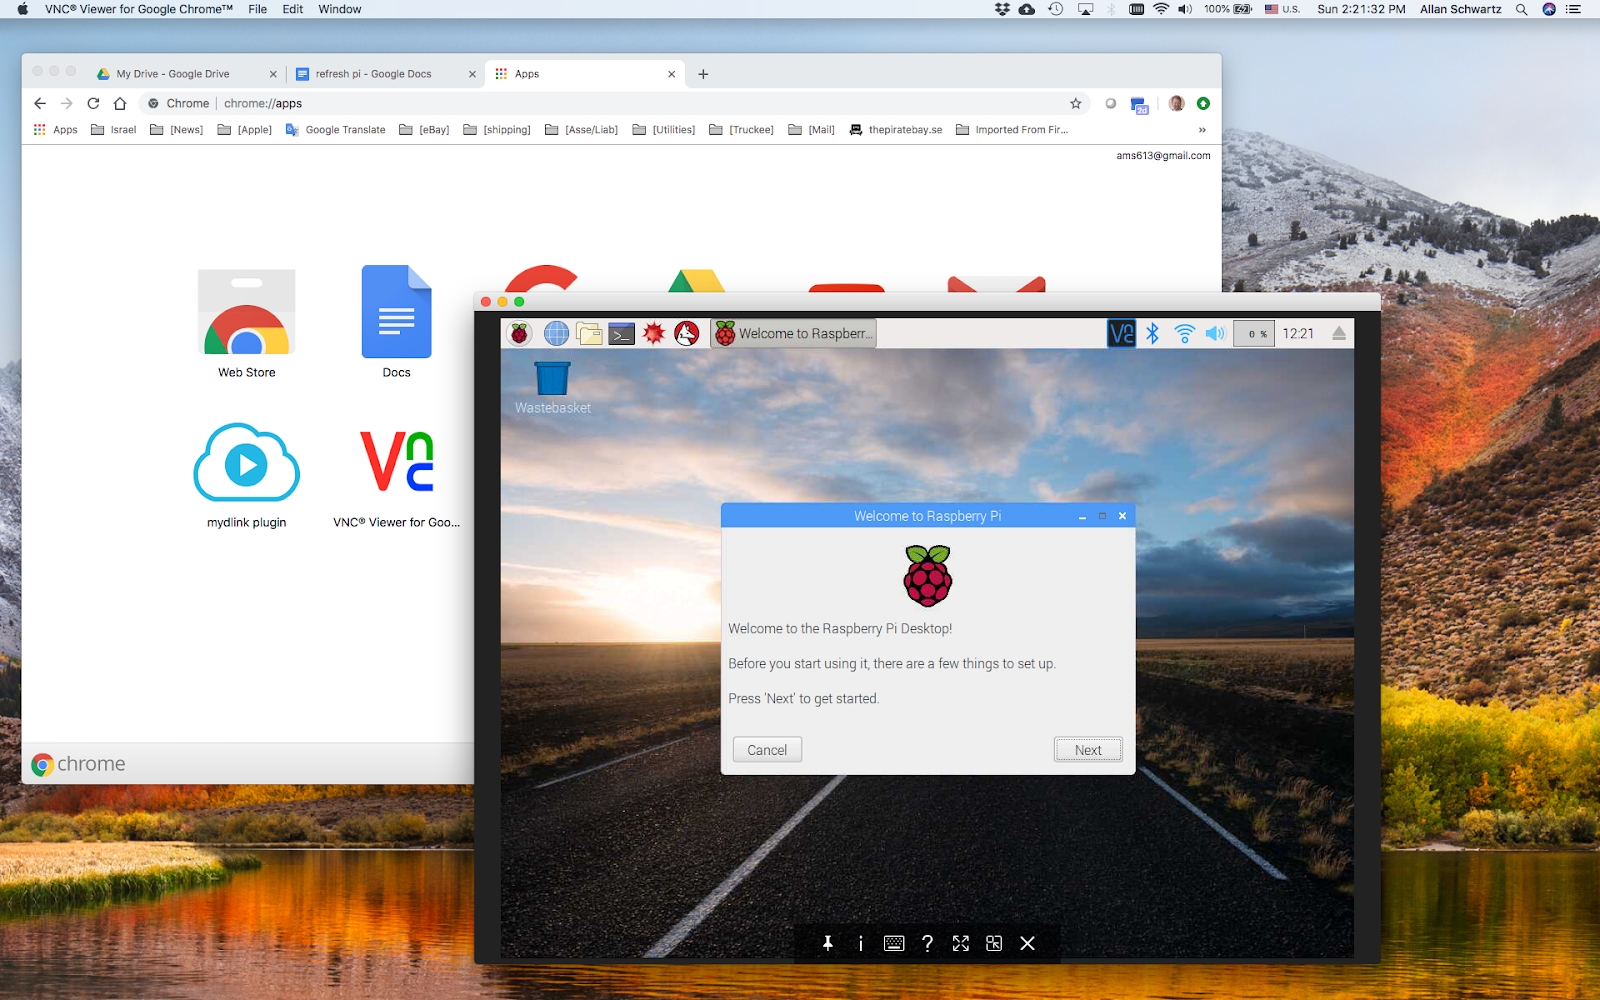
It is advisable to run the Welcome To Raspberry Pi dialog.
This is the easiest way to set the locale and timezone options.
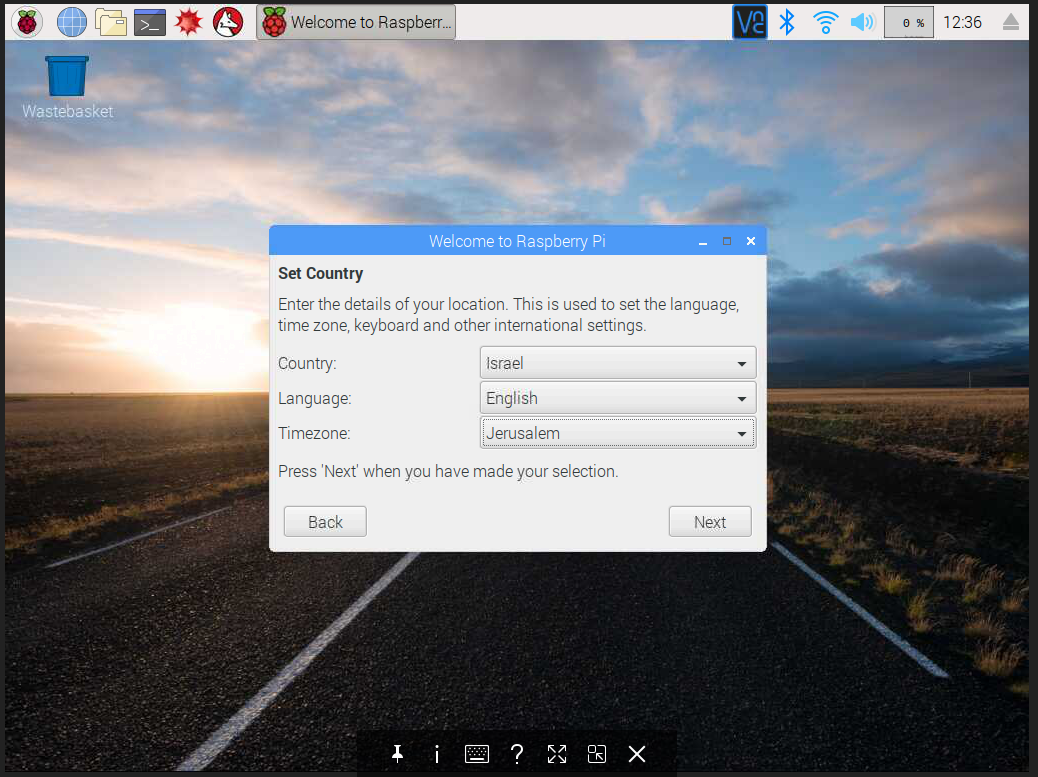
You are now asked to change the password (again). The welcome-to script is not aware that we previously did that in raspi-conf. Click Next. Then, skip the WiFi network step, because we obviously are connected on the WiFi network. Do the Updates step, even though this seems to overlap with what we did in the previous ssh shell; there is no harm in doing it again. However, it takes 20 minutes to update, so this Updates step is clearly doing more.
Finally, the Raspberry Pi reboots yet again.
There are a number of additional steps you could do at this point. For example, you can set up the RealVNC server on the Raspberry Pi to login to your RealVNC account, and therefore allow connections from outside your network.
However, the main thing I want to do now is play with my Sense Hat. So let’s get into that.
Sense-HAT application
Now, we are ready to build our Sense-HAT application.
Using the Raspberry Sensor HAT turns out to be very, very straight forward.
First, issue this command:
sudo apt-get install sense-hat
What should my application do? My first idea is to simply display the Time and Temperature every minute. To do so, we put the following code in a file called every_minute.py in the home directory of pi.
#! /usr/bin/python3

from sense_hat import SenseHat
import datetime

sense = SenseHat()

now = datetime.datetime.now()
tempC = sense.get_temperature()
tempC = round(tempC, 1)
message = now.strftime("%H:%M") + ", " + str(tempC) + " C"

sense.show_message(message)
Then run it:
python3 every_minute.py
Once you satisfied with this result, make a crontab entry
so this command runs once a minute.
crontab -e
Add the line:
* * * * * python3 /home/pi/every_minute.py
That's all it takes. Now every_minute.py runs once-a-minute. Somewhat satisfying to watch. I made a video showing this simplistic display.

However, I shared this with fellow maker and blogger Michael Diamond, and his reply was:
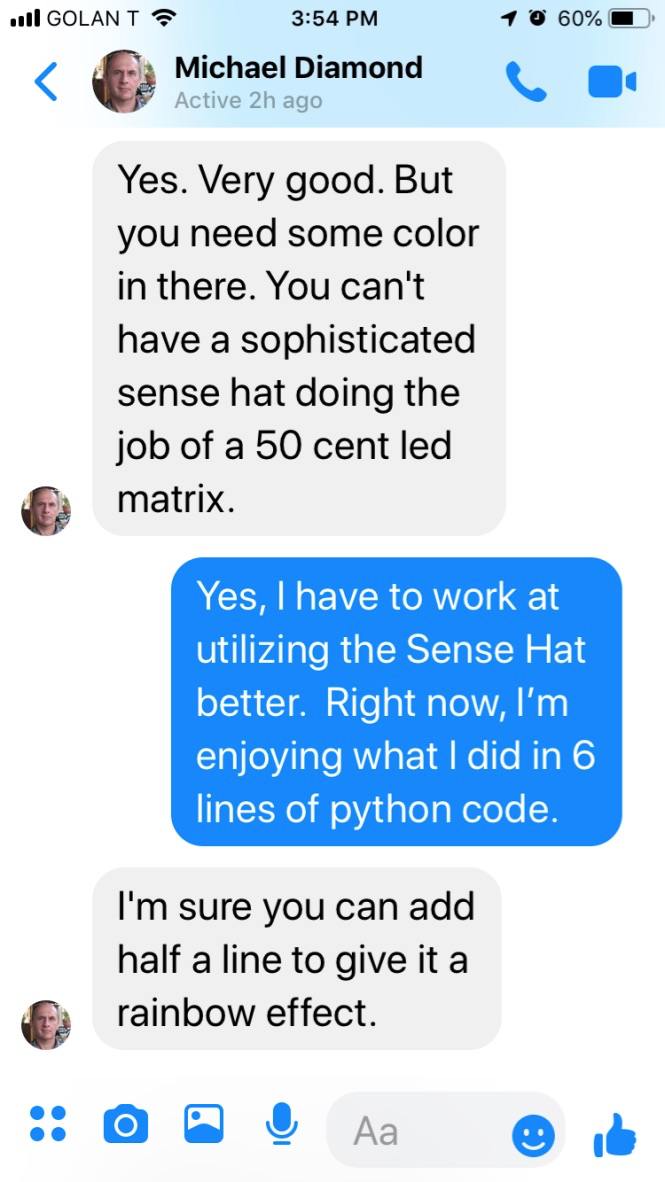
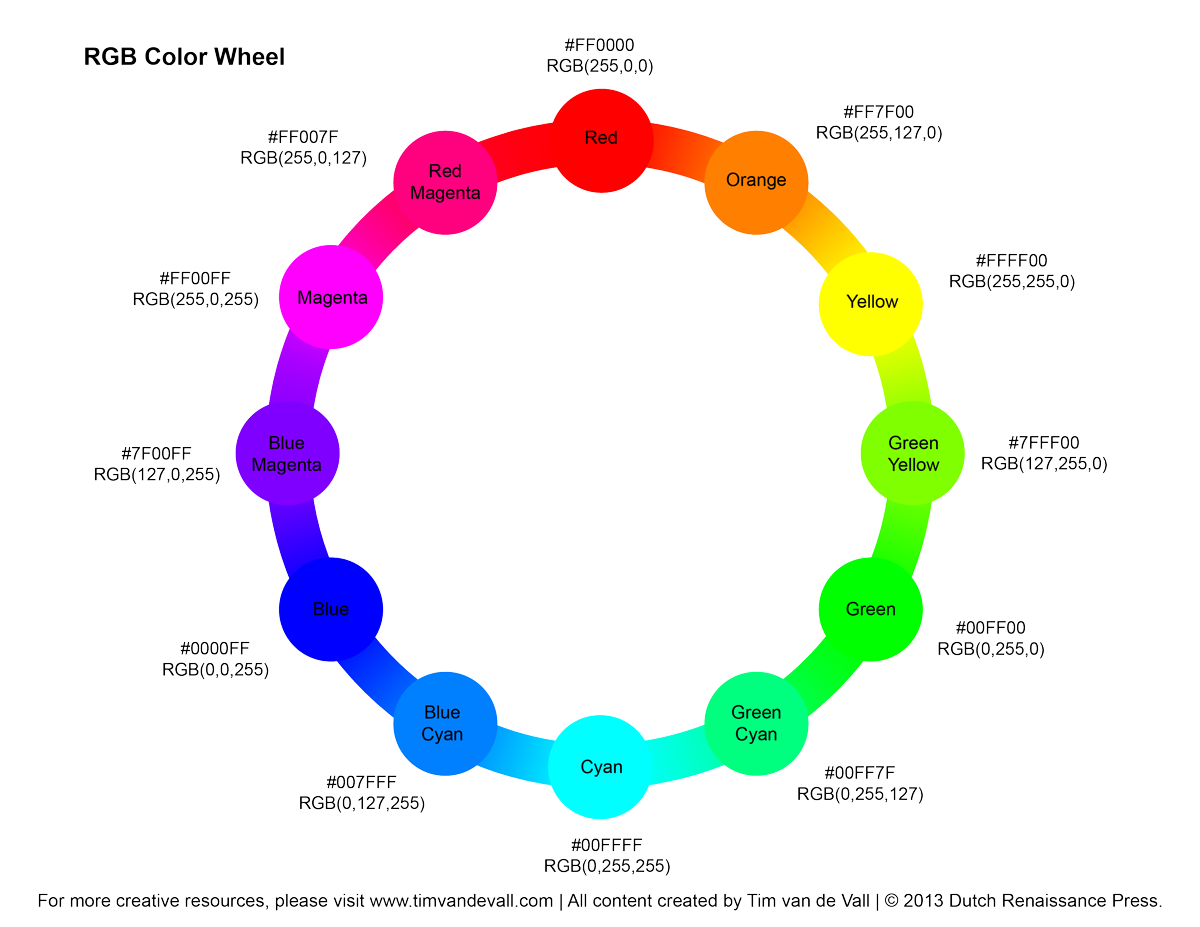
Wow. That’s a little harsh. Thus, the gauntlet was thrown down and I readily accepted. I will change the program to display a rainbow, then display the time-of-day, with a background color a color gradient of the rainbow, (each minute a different color), using this color wheel (the rainbow colors):
Also, my application will utilize more sensors, and display the Temperature, Pressure, Relative Humidity every minute.
Easy-Peasy, done in about 100 lines of Python. Here is the new code:
#! /usr/bin/python3

from sense_hat import SenseHat
import datetime
import time
import math

def compass_to_rgb(h, s=1, v=1):
    h = float(h)
    s = float(s)
    v = float(v)
    h60 = h / 60.0
    h60f = math.floor(h60)
    hi = int(h60f) % 6
    f = h60 - h60f
    p = v * (1 - s)
    q = v * (1 - f * s)
    t = v * (1 - (1 - f) * s)
    r, g, b = 0, 0, 0
    if hi == 0: r, g, b = v, t, p
    elif hi == 1: r, g, b = q, v, p
    elif hi == 2: r, g, b = p, v, t
    elif hi == 3: r, g, b = p, q, v
    elif hi == 4: r, g, b = t, p, v
    elif hi == 5: r, g, b = v, p, q
    r, g, b = int(r * 255), int(g * 255), int(b * 255)
    return r, g, b

def sensor_message():
    # Take readings from all three sensors
    t = sense.get_temperature()
    p = sense.get_pressure()
    h = sense.get_humidity()

    # Round the values to one decimal place
    t = round(t, 1)
    p = round(p, 1)
    h = round(h, 1)

    # Create the message
    message = "Temp.: " + str(t) + " Pressure: " + str(p) + " Humidity: " + str(h)
    return message

def rainbow():
    R =  [255, 0, 0] # red
    O =  [255,127,0] # orange
    Y =  [255,255,0] # yellow
    GY = [127,255,0] # green-yellow
    G =  [0, 255, 0] # green
    GC = [0,255,127] # green-cyan
    C  = [0,255,255] # cyan
    BC = [0,127,255] # blue-cyan
    B =  [0, 0, 255] # blue
    BM = [127,0,255] # blue-magenta
    M =  [255,0,255] # magenta
    RM = [255,0,127] # red-magenta

    pixel_list = [
    R,  R,  O,  Y,  GY, G,  GC, C,
    R,  O,  Y,  GY, G,  GC, C,  BC,
    O,  Y,  GY, G,  GC, C,  BC, B,
    Y,  GY, G,  GC, C,  BC, B,  BM,
    GY, G,  GC, C,  BC, B,  BM, M,
    G,  GC, C,  BC, B,  BM, M,  RM,
    GC, C,  BC, B,  BM, M,  RM, R,
    C,  BC, B,  BM, M,  RM, R,  R
    ]
    return pixel_list

sense = SenseHat()
sense.set_rotation(180)
sense.low_light = True

# grab attention by showing the rainbow for a couple of seconds
sense.set_pixels(rainbow())
time.sleep(2.5)

# first message is the Time
now = datetime.datetime.now()
message = now.strftime("%H:%M")

# the background color is a gradient of the rainbow
background = compass_to_rgb(now.minute*6)
sense.show_message(message, back_colour=background, scroll_speed=0.08)
time.sleep(1)

# second message is the sensor readings
sense.show_message(sensor_message(), scroll_speed=0.06)

# conclude the program with the LED array cleared
sense.clear( (0,0,0) )
Here is a video of this program running:
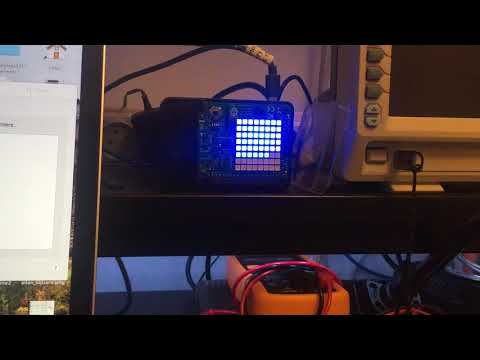
Sorry, it is difficult for my cell-phone camera to capture the true colors or true brilliance of the display. You will just have to build this project, in order to see for yourself.
For the reader’s reference, a fantastic tutorial on using the Sense Hat is at this URL.
A concise Python API reference for the Sense Hat is at this URL
Conclusion
What is my conclusion? Programming the Raspberry Pi is fun. Python is great. The Sense Hat is a set of environmental sensors and display elements that we can use to make all kinds of fun toys or devices. I think the process of introducing both the Raspberry Pi and Python and Space to students was laudable and successful.