One of the best RasPi security cam packages is MotioneyeOS from Calin Crisan. I've written about it in a previous post. There's a great wiki for it here.
This week I needed to set it up again for a new RasPi Zero W. I noticed that Calin has written a script for Linux or Mac users that automatically installs the image on a RasPi SD card. He calls it writeimage.sh.
Quoting from his installation page:
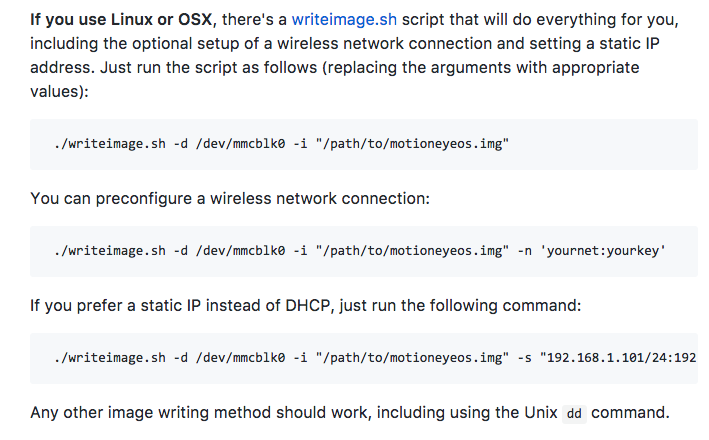
If you use Linux or OSX, there's a writeimage.sh script that will do everything for you, including the optional setup of a wireless network connection and setting a static IP address. Just run the script as follows (replacing the arguments with appropriate values.)
He then goes on to describe the variables you can set to automate the process, set wifi, and even create a static IP.
I use a Mac and reading his description I thought the process was going to be simple. As usual, it wasn't. Calin is clearly comfortable with scripts. Many of the RasPi community - especially those who bought the little computer just to create a security camera - are less so.
Here I'm going to explain in simple terms how to use the writeimage.sh file with a Mac.
Step 1: Go here and download the file writeimage.sh.
Step 2: I added the writeimage.sh file to my root directory. In simple English that means place the file in your Mac Home Directory using Finder. (The Home Directory is the one with the little house.)
Step 3: Place your blank SD card in your card reader.
Step 4: Now you need to find the path to your SD card. To do so, open Terminal on your Mac and type:
diskutil list
This will display something like this:
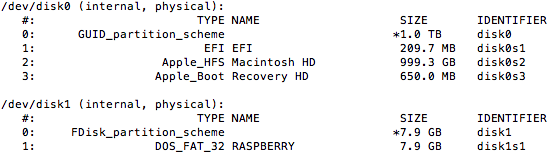
Step 5: Note the name of your SD card. In this case, it's
/dev/disk1
Note, if you type the wrong disk by mistake you will spend the next several days trying to resurrect your computer, and if you don't have a backup, you'll lose everything. So be very, very careful which disk you select. The difference between success and catastrophe is between typing "0" and typing "1". SO PAY ATTENTION!!!
Step 6: Download the image motioneyeos file for your RasPi. You can find the files here.
Step 7:
Now you need to find the precise path to your downloaded file. Personally, I always put my active files on my Desktop, but even finding the correct path to the Desktop can be challenging. To do it, open Finder > Go > Go to Folder, then drag the img file to the Go to Folder window that opens:
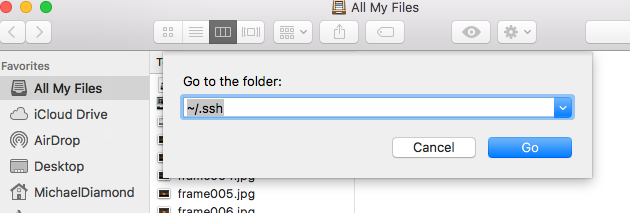
It will display the full path to the file.
Step 8: Now let's turn to Calin's page of instructions. This is where the path to your SD card and to your img file are used.
As you can see, he offers various options depending on whether you want to automatically set up your Pi's WiFi and/or Static IP.
In my case I wanted to set up both the WiFi and Static IP.
Step 9: Using the correct path and name for your SD card, and the correct path and name for your img file, type your command VERY CAREFULLY into Terminal. Precede it with sudo to give yourself permission. In my case I typed:
sudo ./writeimage.sh -d /dev/disk1 -i "/Users/MyName/Desktop/motioneyeos-raspberrypi-20170710.img" -n 'MySSID:MyPassword' -s "192.168.1.144/24:192"
This is supposed to set up my Wifi and give me the static IP address 192.168.1.144.
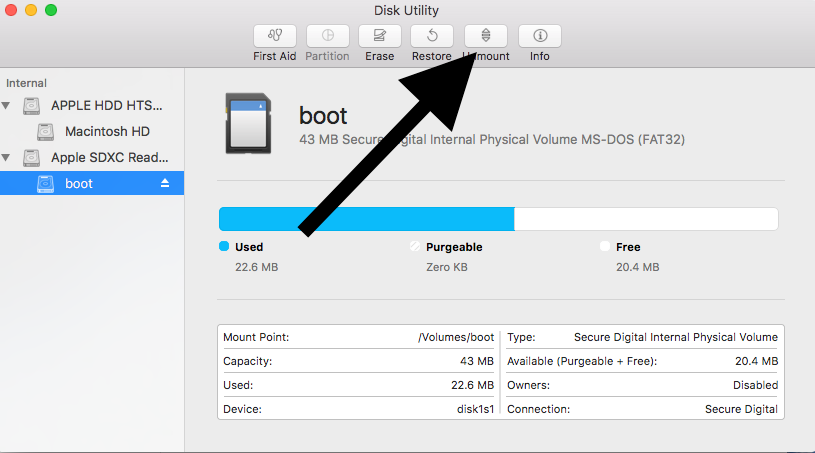
Step 10: It didn't work. The first error I got was:
:: writing disk image to sdcard
dd: /dev/disk1: Resource busy
A quick look around the web and I discovered that the Mac itself was actually using the SD card, and to make this script work, I needed to unmount it. You do this with Disk Utility:
Step 11:
Then I tried again. This time things seemed to go well. Terminal reported that the script had run successfully.
Elated, I took the SD and placed it in the Pi, ready for it to set itself up in first boot.
After five minutes, I tried to view 192.168.1.144:80 in my browser.
Nothing.
It took me half an hour more to solve this one, and I needed to look inside the writeimage.sh file to find the answer.
If you look at Calin's instructions above, you'll see the following:
192.168.1.XXX/24:192
However, looking inside the writeimage.sh file you'll see this has been truncated. In face, the full address at the end includes your gateway (router address) and DNS and should look something like this:
192.168.1.144/24:192.168.1.1:8.8.8.8
So my full working command was this:
sudo ./writeimage.sh -d /dev/disk1 -i "/Users/MyName/Desktop/motioneyeos-raspberrypi-20170710.img" -n 'MySSID:MyPassword' -s "192.168.1.144/24:192.168.1.1:8.8.8.8"
Make sure you're using the img file and not a compressed file. If you have a file name like this: motioneyeos-raspberrypi-dev20181210.img.xz you must decompress it first to create your img file - otherwise it won't work.
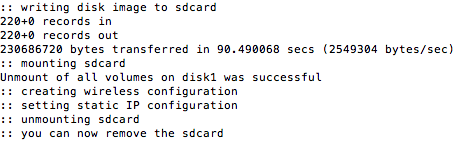
When the script has run successfully, you should get something like this:
Step 12: Finally, I like to tie up loose ends so I removed the writeimage.sh file I'd placed in the root directory as I described in Step 1 above.