Several acquaintances have asked for instructions to build a switch that can be operated from a phone app, and/or virtual assistant (Google Home, Alexa, etc). This is a detailed description - but you'll need a wee bit of technical skill to get through it.
THIS PROJECT DESCRIPTION IS SOLELY FOR EDUCATIONAL PURPOSES. ONLY CERTIFIED ELECTRICIANS ARE QUALIFIED TO WORK WITH MAINS VOLTAGE. IF YOU ARE NOT A CERTIFIED ELECTRICIAN, DO NOT ATTEMP THIS PROJECT.
Why you shouldn't try this...
- This is a DIY project for creating a "smart switch." The device won't fit in the wall to replace an existing socket - but it can be mounted neatly next to a device you want to control. (See video at foot of this article.)
- I'd not recommend attempting this if you don't know what the Arduino IDE is.
- This switch won't communicate directly with a smart assistant. It works through two apps - Blynk and IFTTT. If you don't want to install them on your phone/tablet, this isn't for you.
- I know this works with Google Home because I've been using it for months. I see no reason for it not working with the others, but you may need to fiddle a bit.
Why you should do this...
Once you've installed Blynk and IFTTT, know how to flash your ESP and wire things up, it's easy and inexpensive to replicate - so you can have lots of smart devices around the house and they're cheap and simple to make.
What you need
- Blynk
- IFTTT
- Arduino IDE
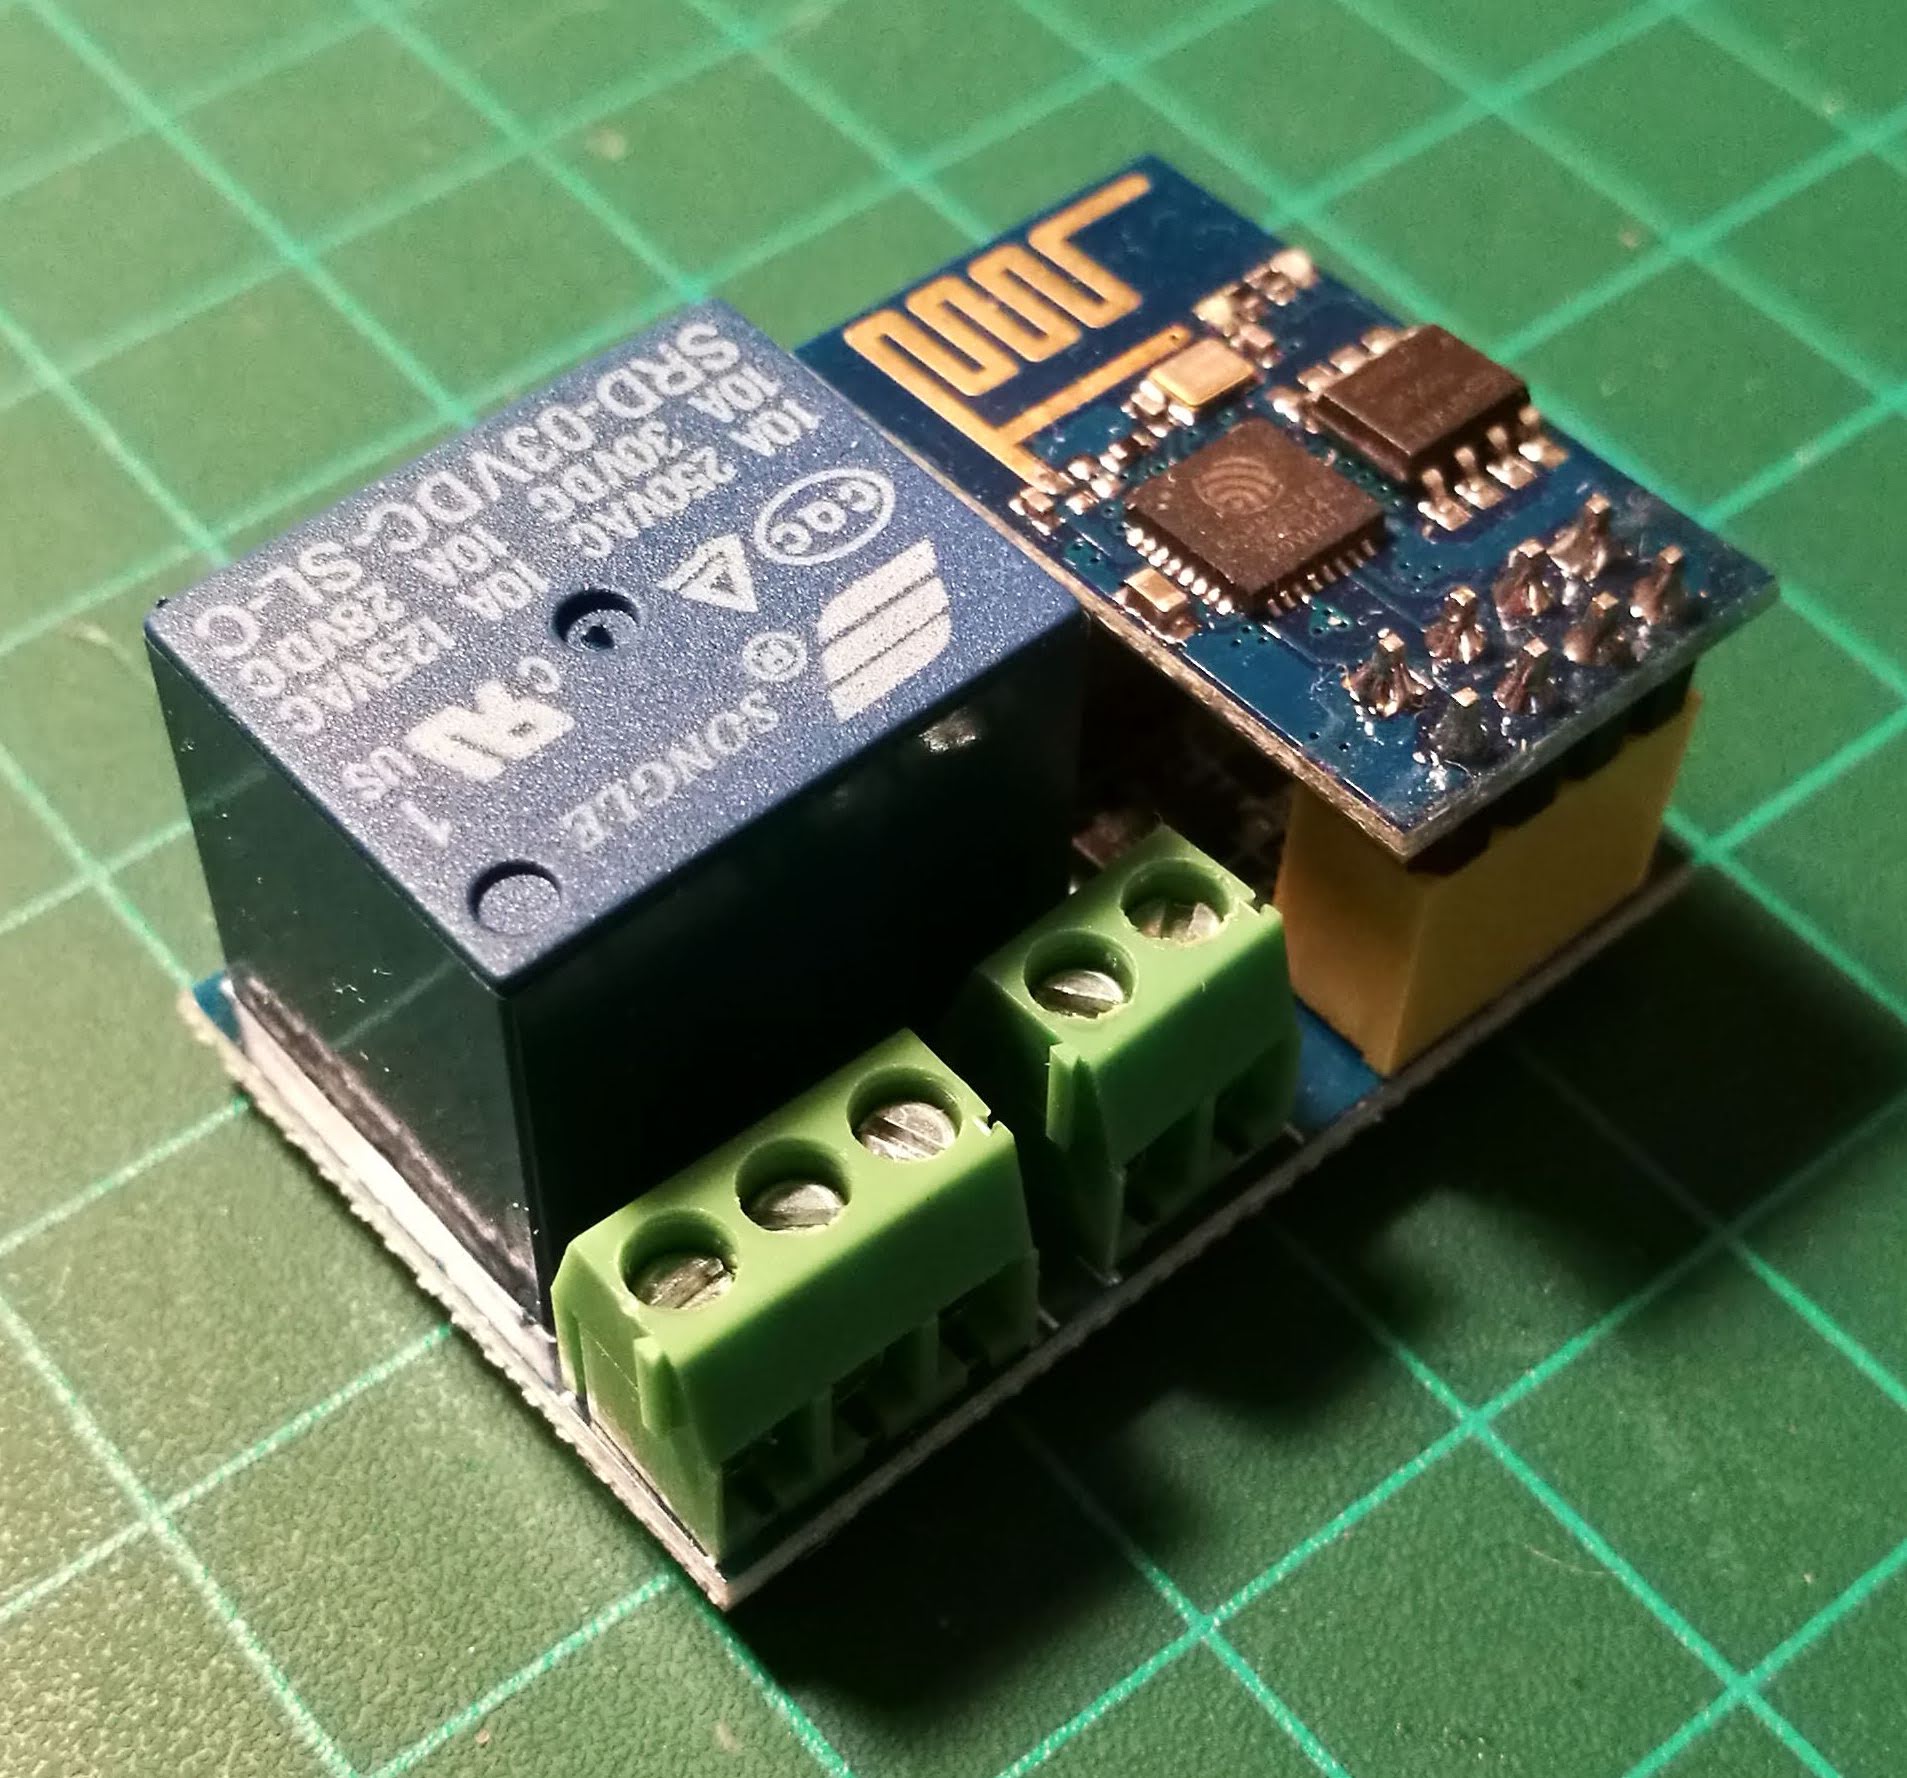
- ESP8266 01
- ESP8266 Board with Relay. (This is the cheapest board I found but probably not the best quality.)
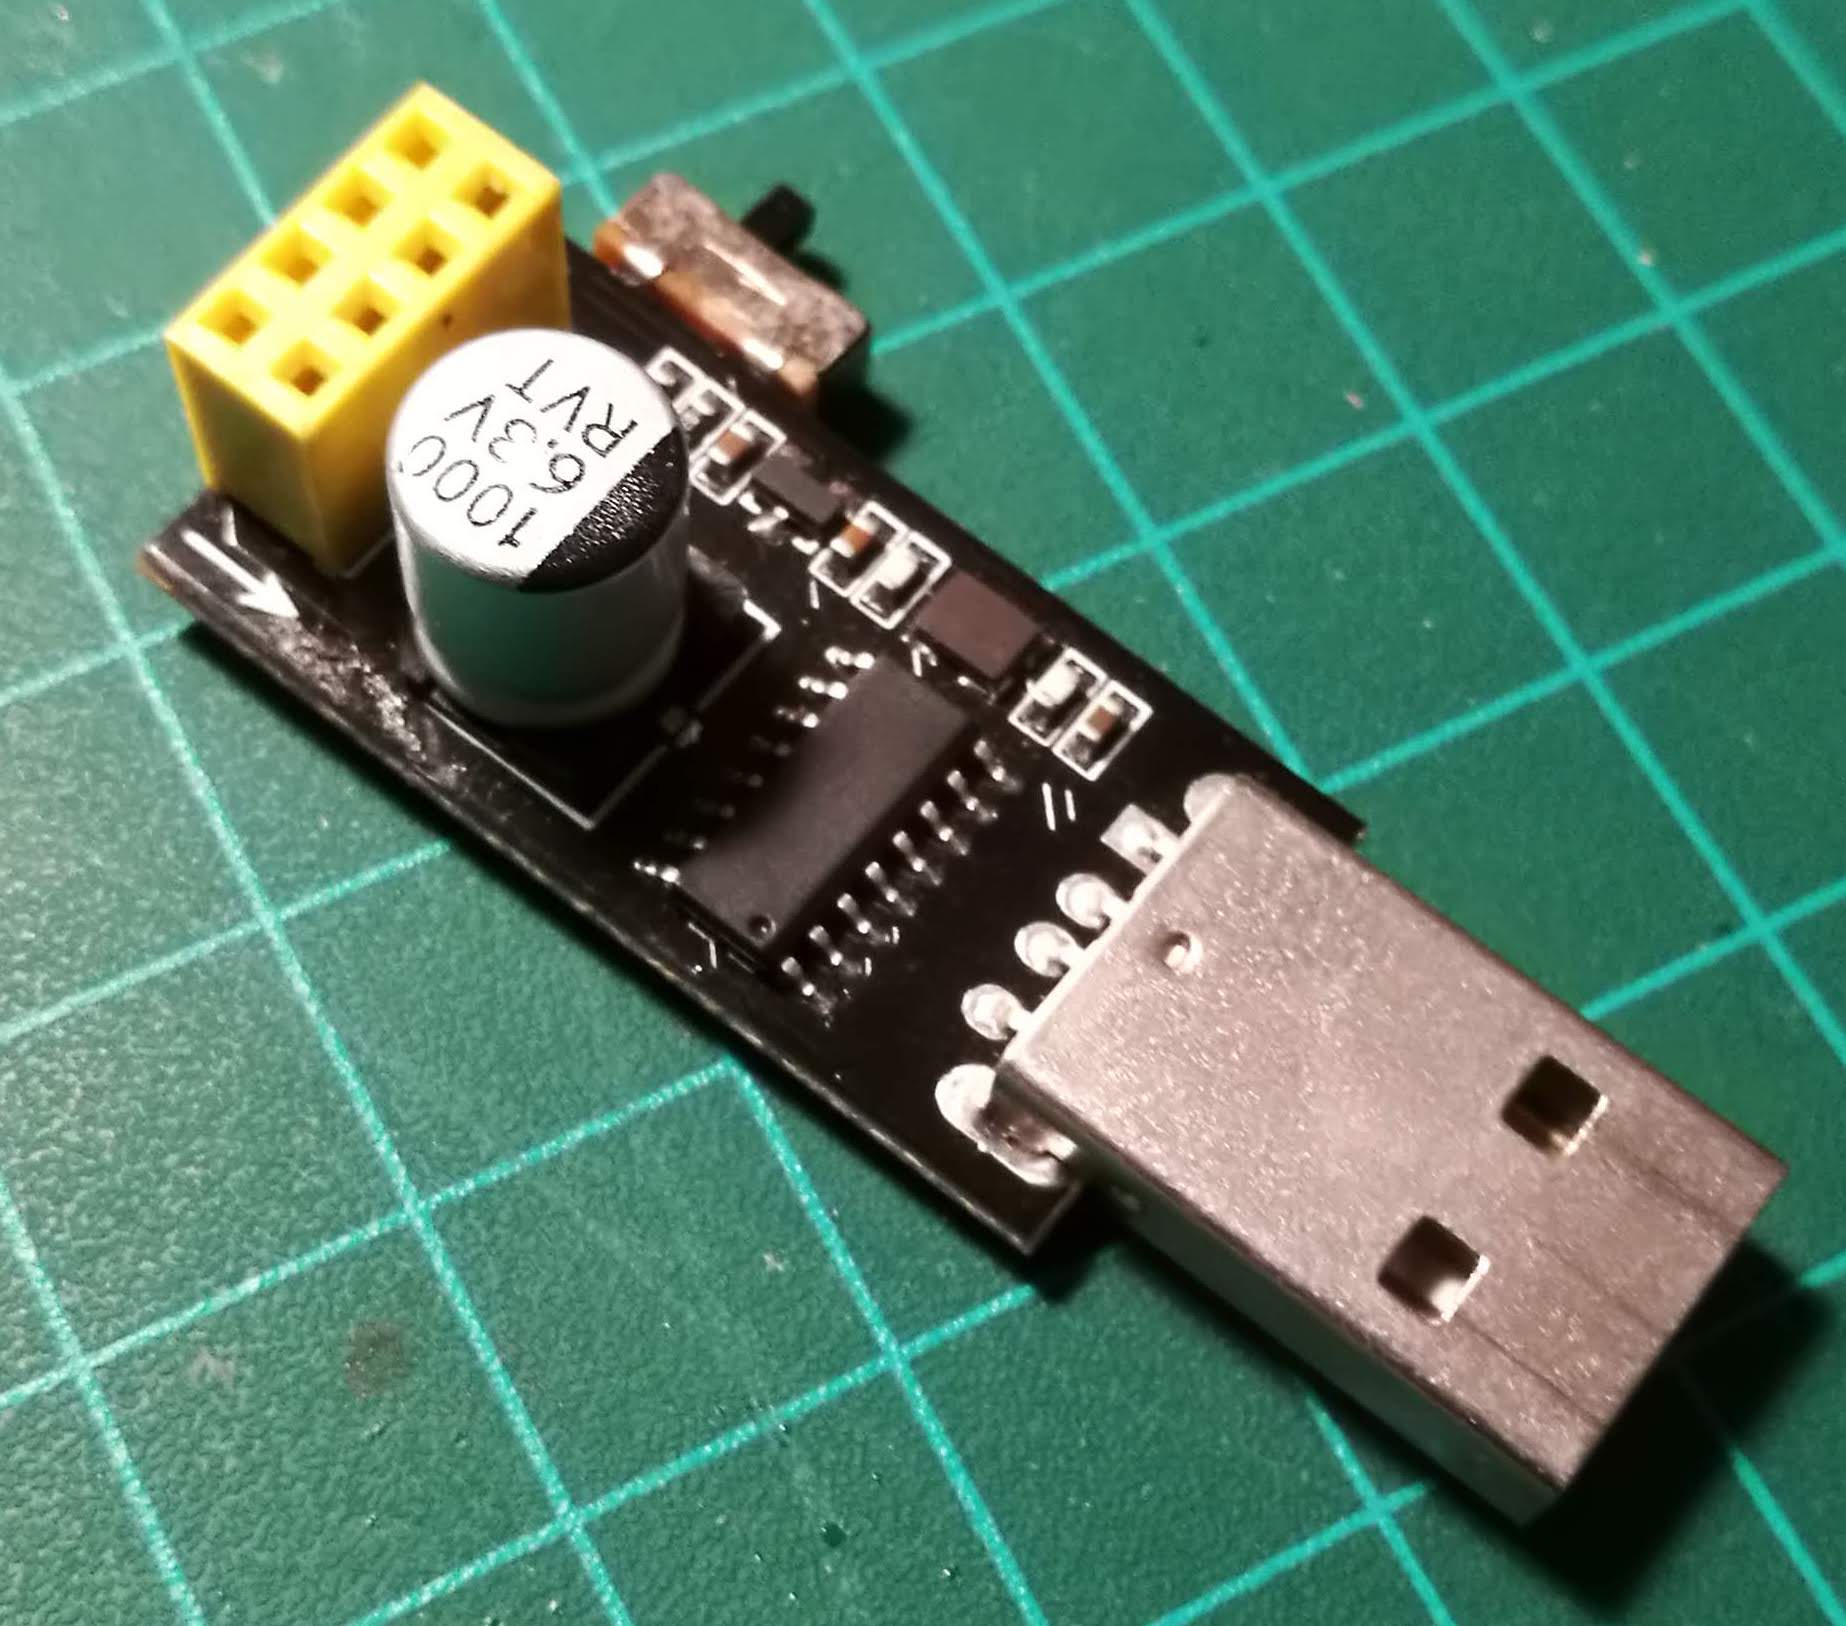
- ESP8266 01 programming board.
- 5v phone charger. (I dismantled mine to put it in my project box.)
- A small electrical box to put things in.
- If you're going to make a power cable, you'll need a short extension cord suitable for your country.
- Cable terminal connectors similar to this.
Steps
- Open a Blynk account - free for limited use.
- Open an IFTTT account - free.
- Make sure you have ESP8266 in your Arduino IDE. (See below for a link to instructions.)
Setting up Blynk
Blynk is a terrific application to make it easy to control IoT devices. I've been using it for a couple of years and I was drawn to it because I could use it without struggling with code. Highly recommended for beginners.
You need to get a key from Blynk - that you'll flash onto the ESP8266. Once you've done it, you'll be able to activate your ESP/Relay from anywhere in the world.
You'll start with this page:
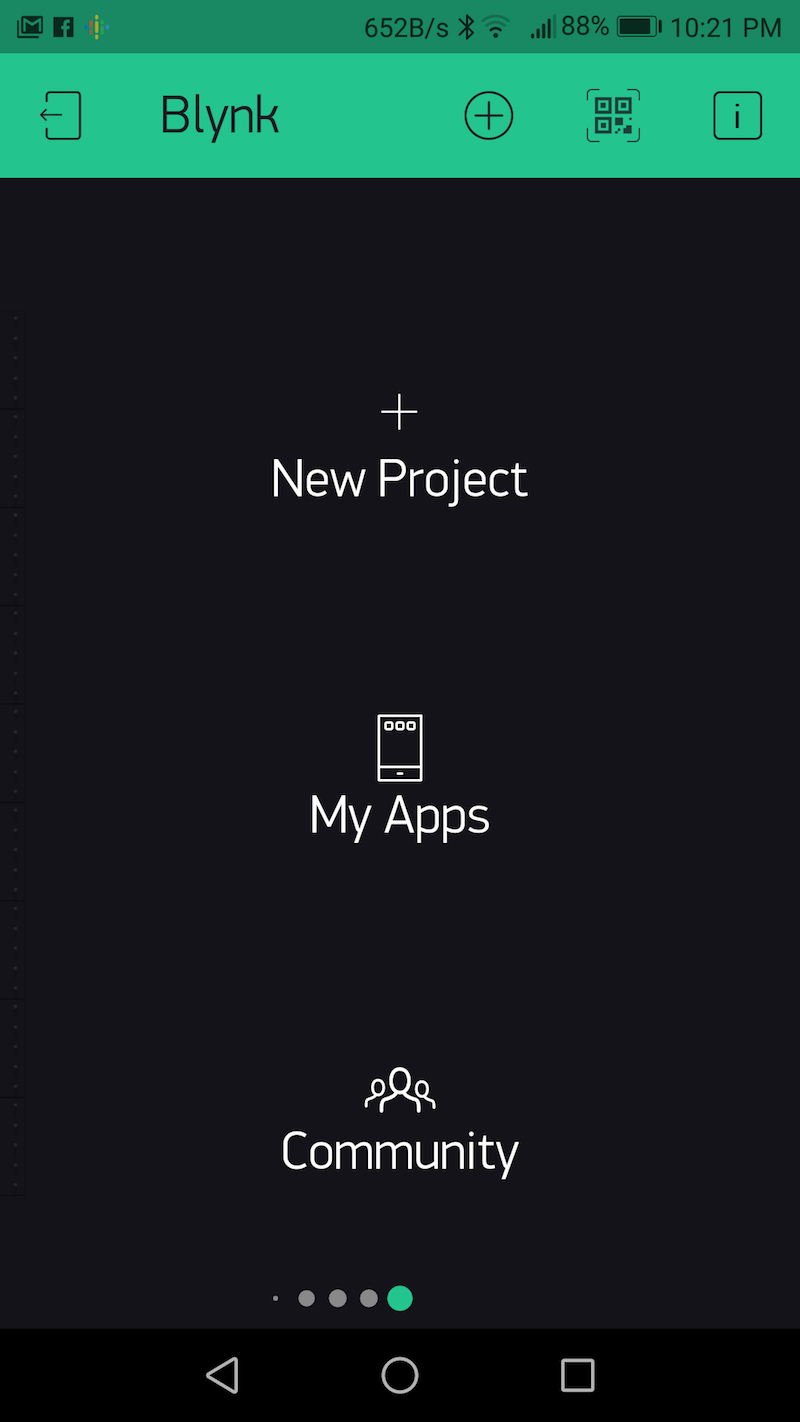
Click New Project
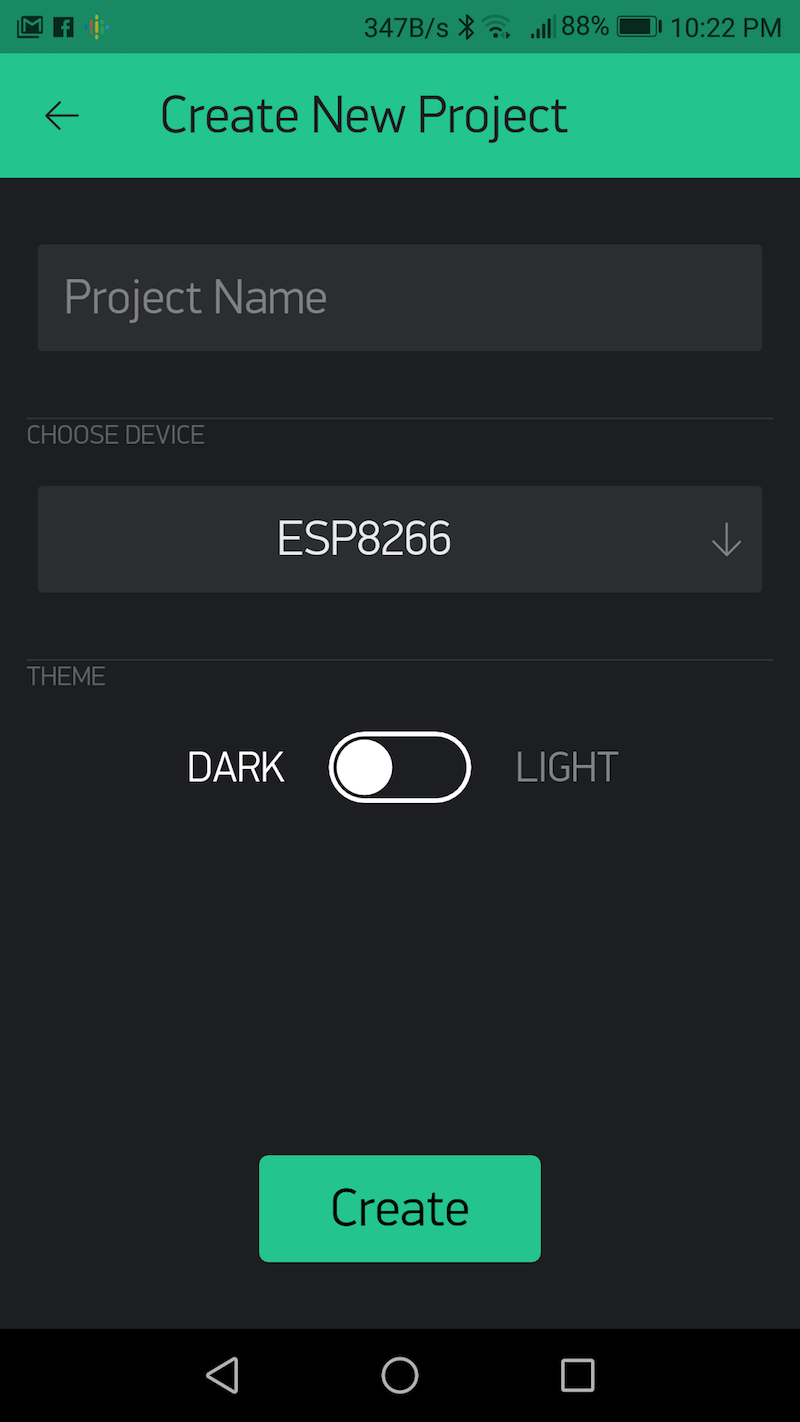
Make sure to select ESP8266 and tap, Create
At this point Blynk will send your code to your email address and you'll get this screen:
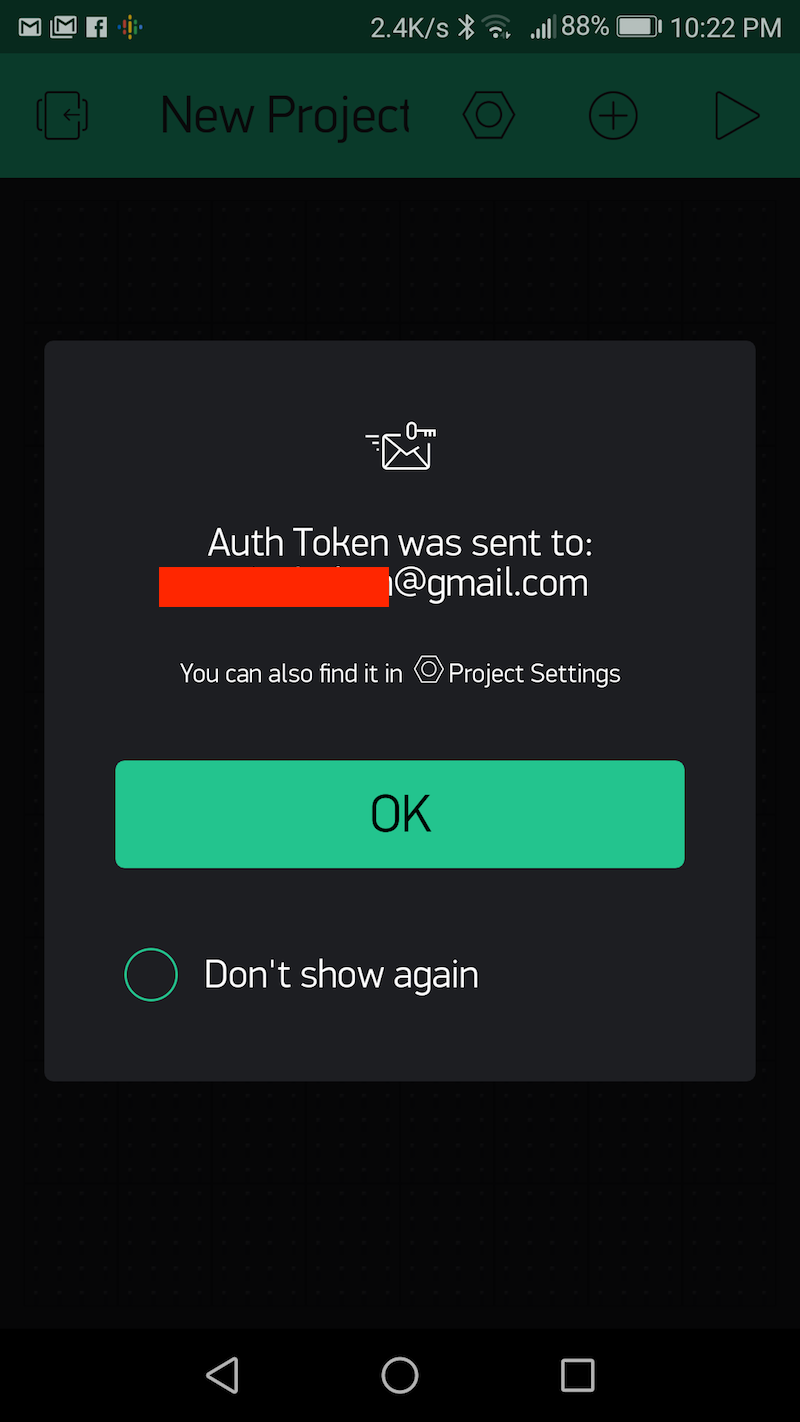
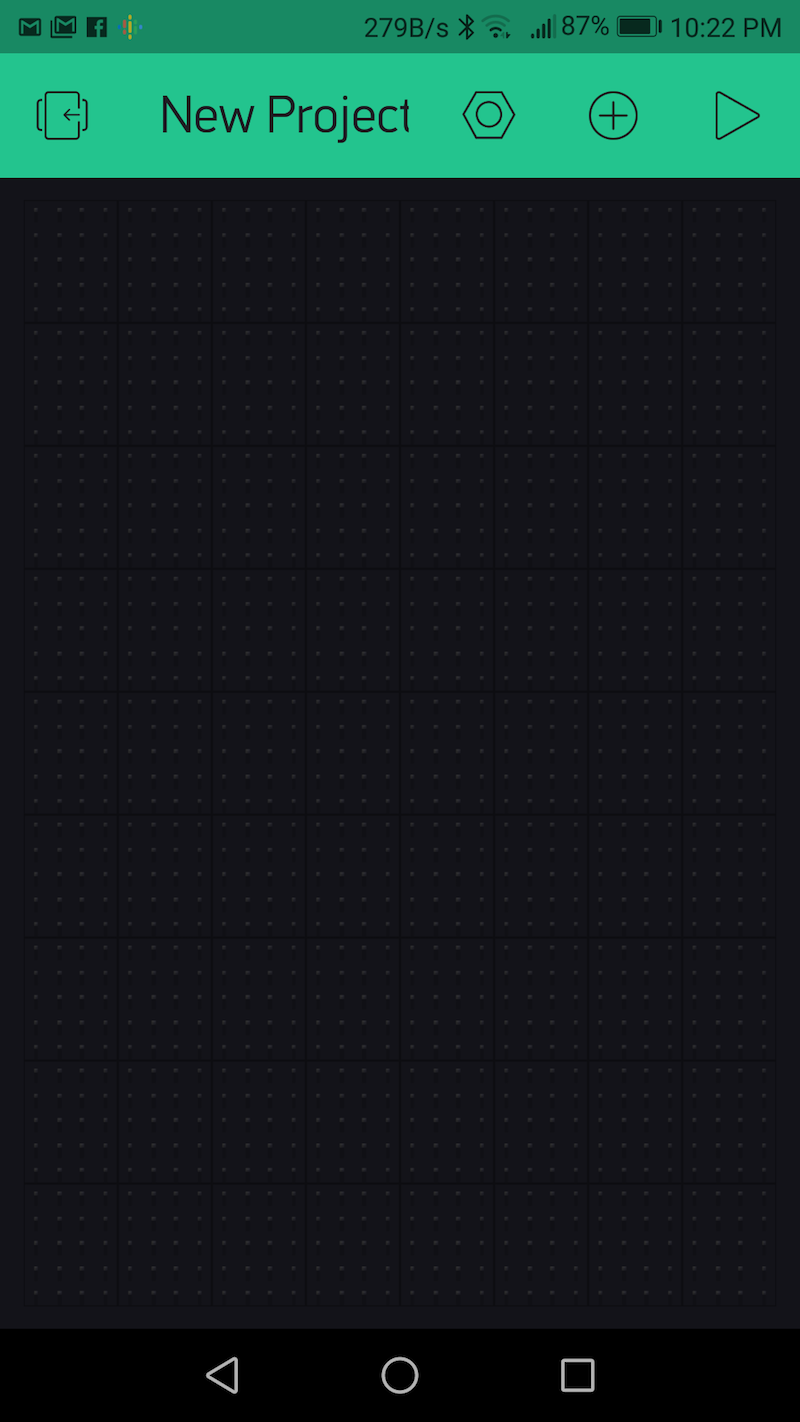
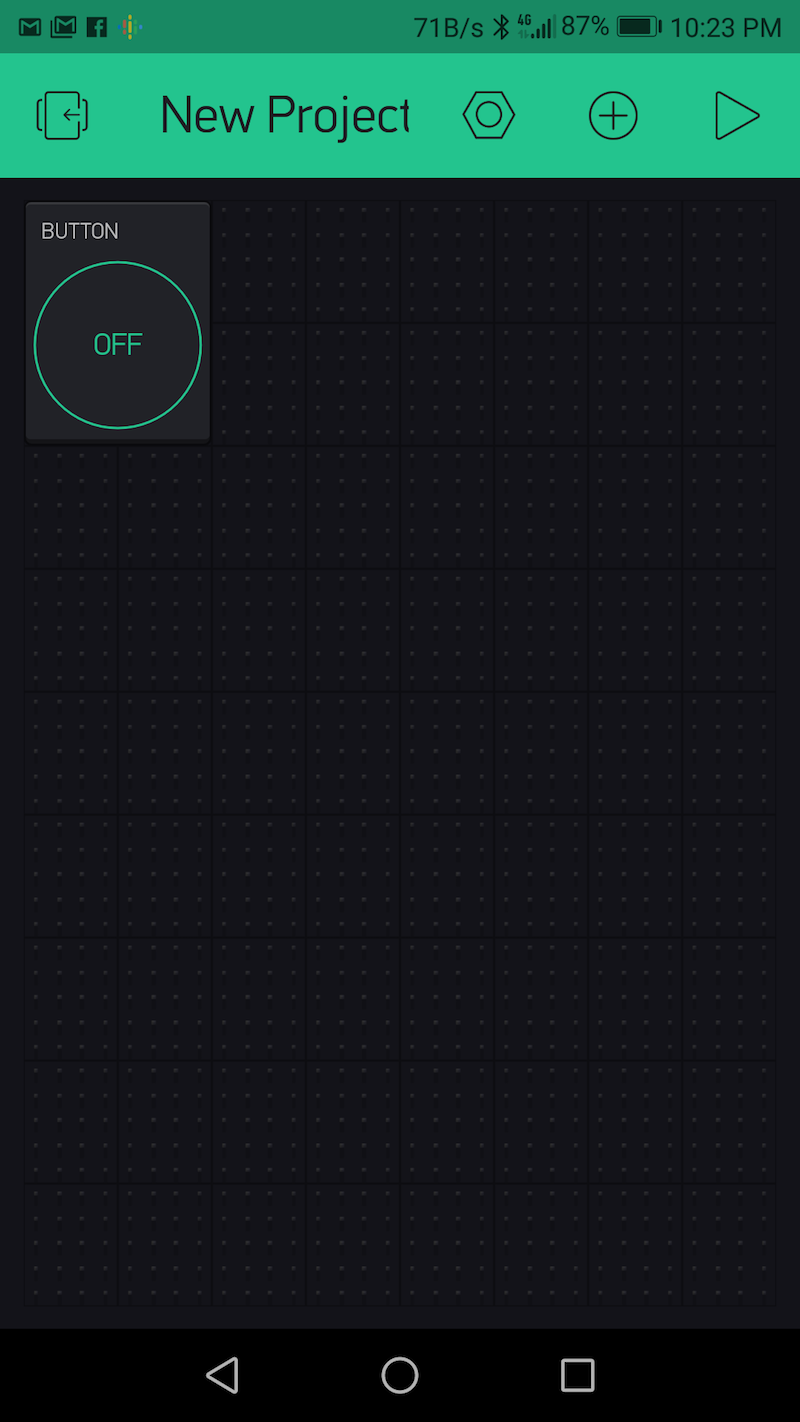
Tap OK and you arrive at this:
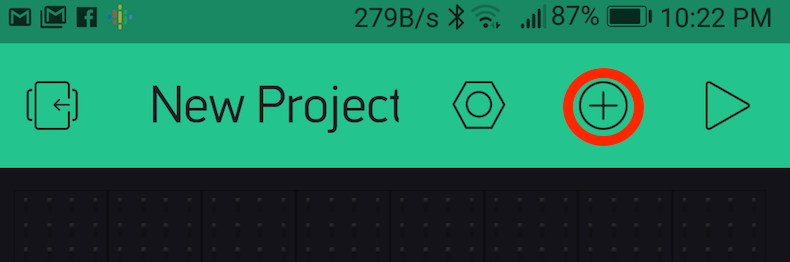
Tap here:
Select Button
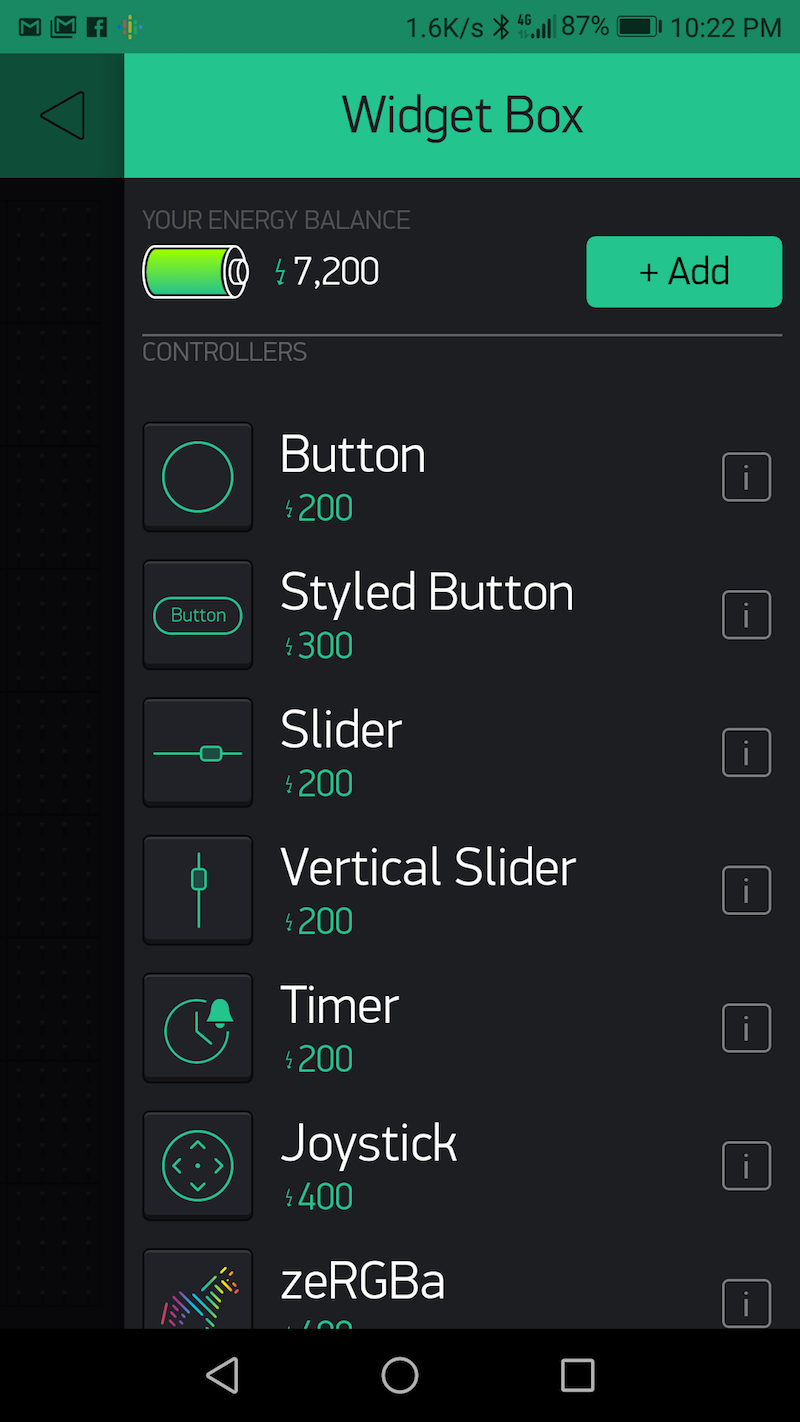
And you get this:
Now tap on the button you've just added:
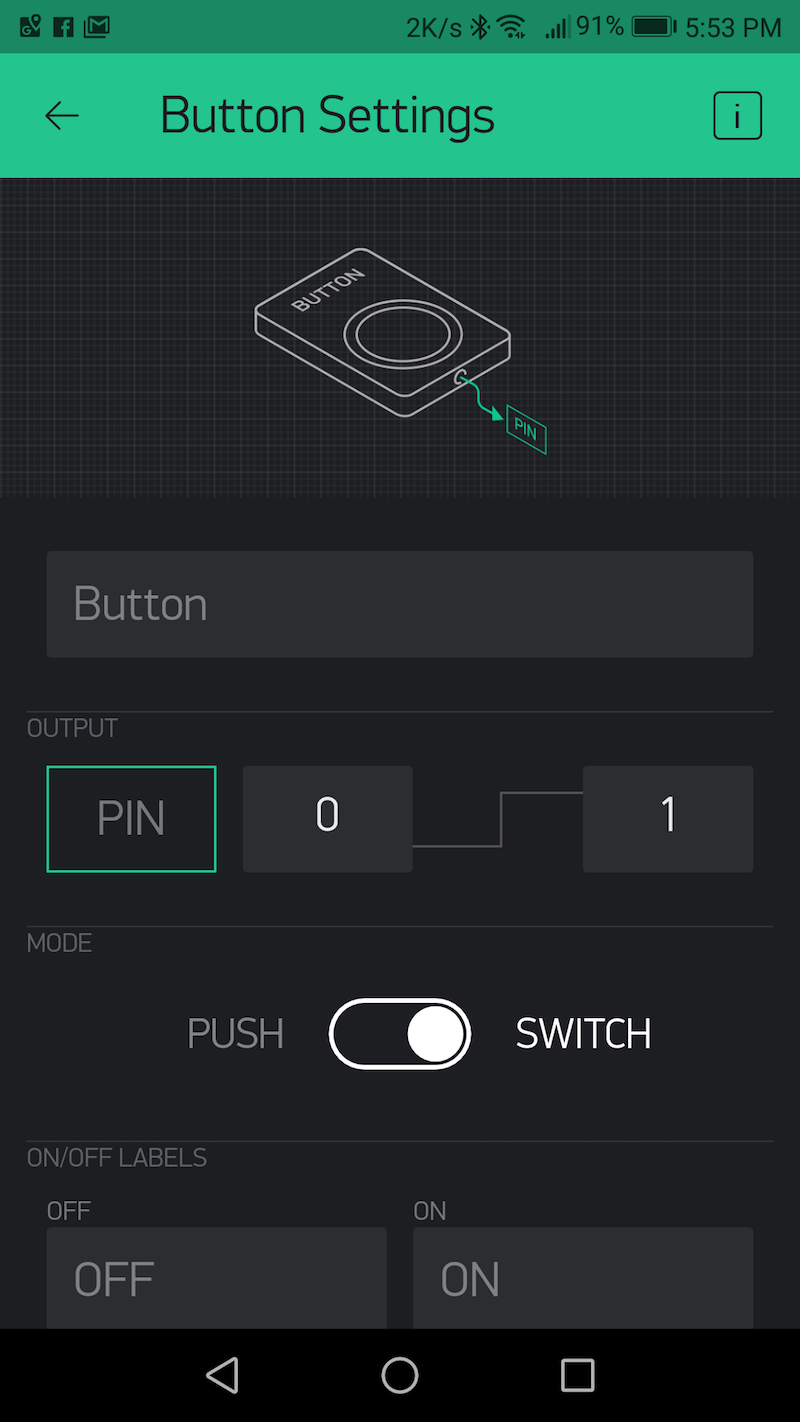
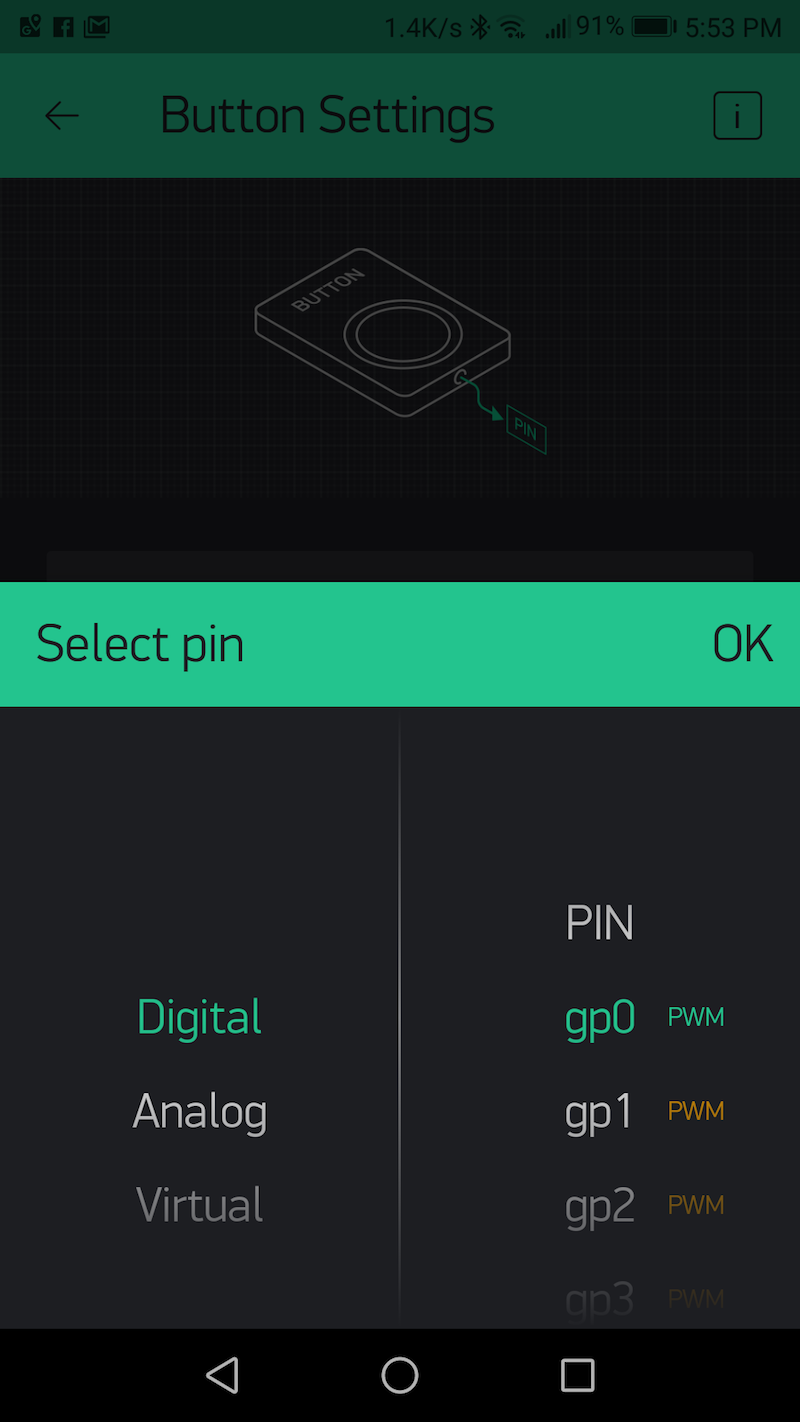
Tap Pin and make sure you select Digital gp0 and tap OK. Then make sure you select Switch instead of Push.
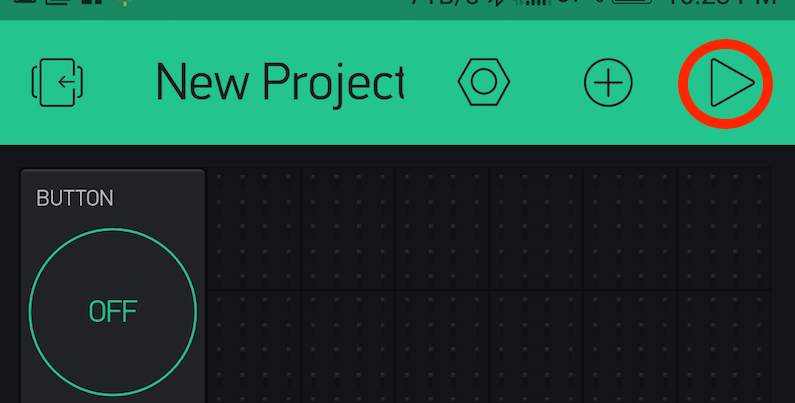
You've completed setting up the Blynk interface. Naturally, it won't run until your ESP8266 has been flashed and connected to the internet. You also need to tap here to run the app.
That's us done with Blynk.
Flashing the code to the ESP8266
If you've got this far, you probably have the Arduino IDE in your computer and have it set up for the ESP8266. If you need guidance, follow these instructions from my co-blogger, Amir.
Once you have Arduino set up with support for the ESP8226, go over to your email account and copy the key you received from Blynk.
Then, insert the key into this sketch:
/**************************************************************
 * Blynk is a platform with iOS and Android apps to control
 * Arduino, Raspberry Pi and the likes over the Internet.
 * You can easily build graphic interfaces for all your
 * projects by simply dragging and dropping widgets.
 *
 *   Downloads, docs, tutorials: http://www.blynk.cc
 *   Blynk community:            http://community.blynk.cc
 *   Social networks:            http://www.fb.com/blynkapp
 *                               http://twitter.com/blynk_app
 *
 * Blynk library is licensed under MIT license
 * This example code is in public domain.
 *
 **************************************************************
 * This example runs directly on ESP8266 chip.
 *
 * You need to install this for ESP8266 development:
 *   https://github.com/esp8266/Arduino
 *
 * Change WiFi ssid, pass, and Blynk auth token to run :)
 *
 **************************************************************/

#define BLYNK_PRINT Serial    // Comment this out to disable prints and save space
#include <ESP8266WiFi.h>
#include <BlynkSimpleEsp8266.h>

// You should get Auth Token in the Blynk App.
// Go to the Project Settings (nut icon).
char auth[] = "PASTE YOUR BLYNK AUTHORIZATION CODE HERE";

void setup()
{
  Serial.begin(9600);
  Blynk.begin(auth, "INSERT WIFI SSID HERE", "INSERT WIFI PASSWORD HERE", IPAddress(188,166,206,43));
}

void loop()
{
  Blynk.run();
}
After you've saved the above sketch into Arduino, flash it to the ESP8266 using the programming board. (Make sure the switch on the programming board is set to PROG.)
Testing Blynk
Insert your flashed ESP8266 into the relay board, connect your 5 volt power supply to the board, and fire up the Blynk app. When you tap the Button on Blynk, the relay should toggle off and on.
The Circuit
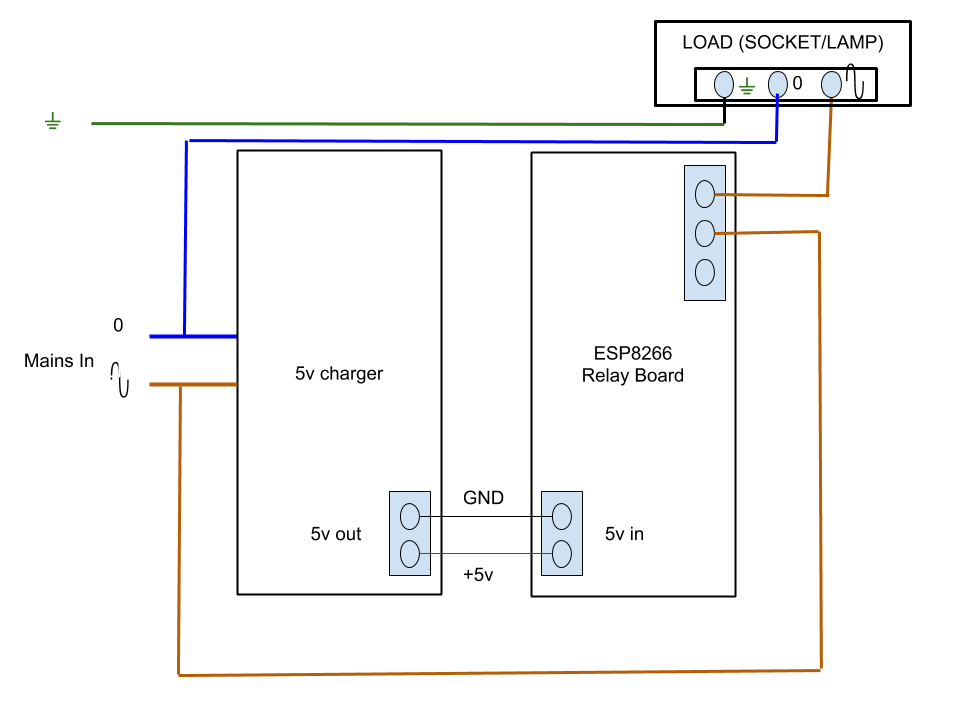
Warning - this is live mains electricity. If you don't know exactly what you're doing, don't attempt it.
Another warning - if you're going to use this as a power socket, make sure you incorporate a ground wire.
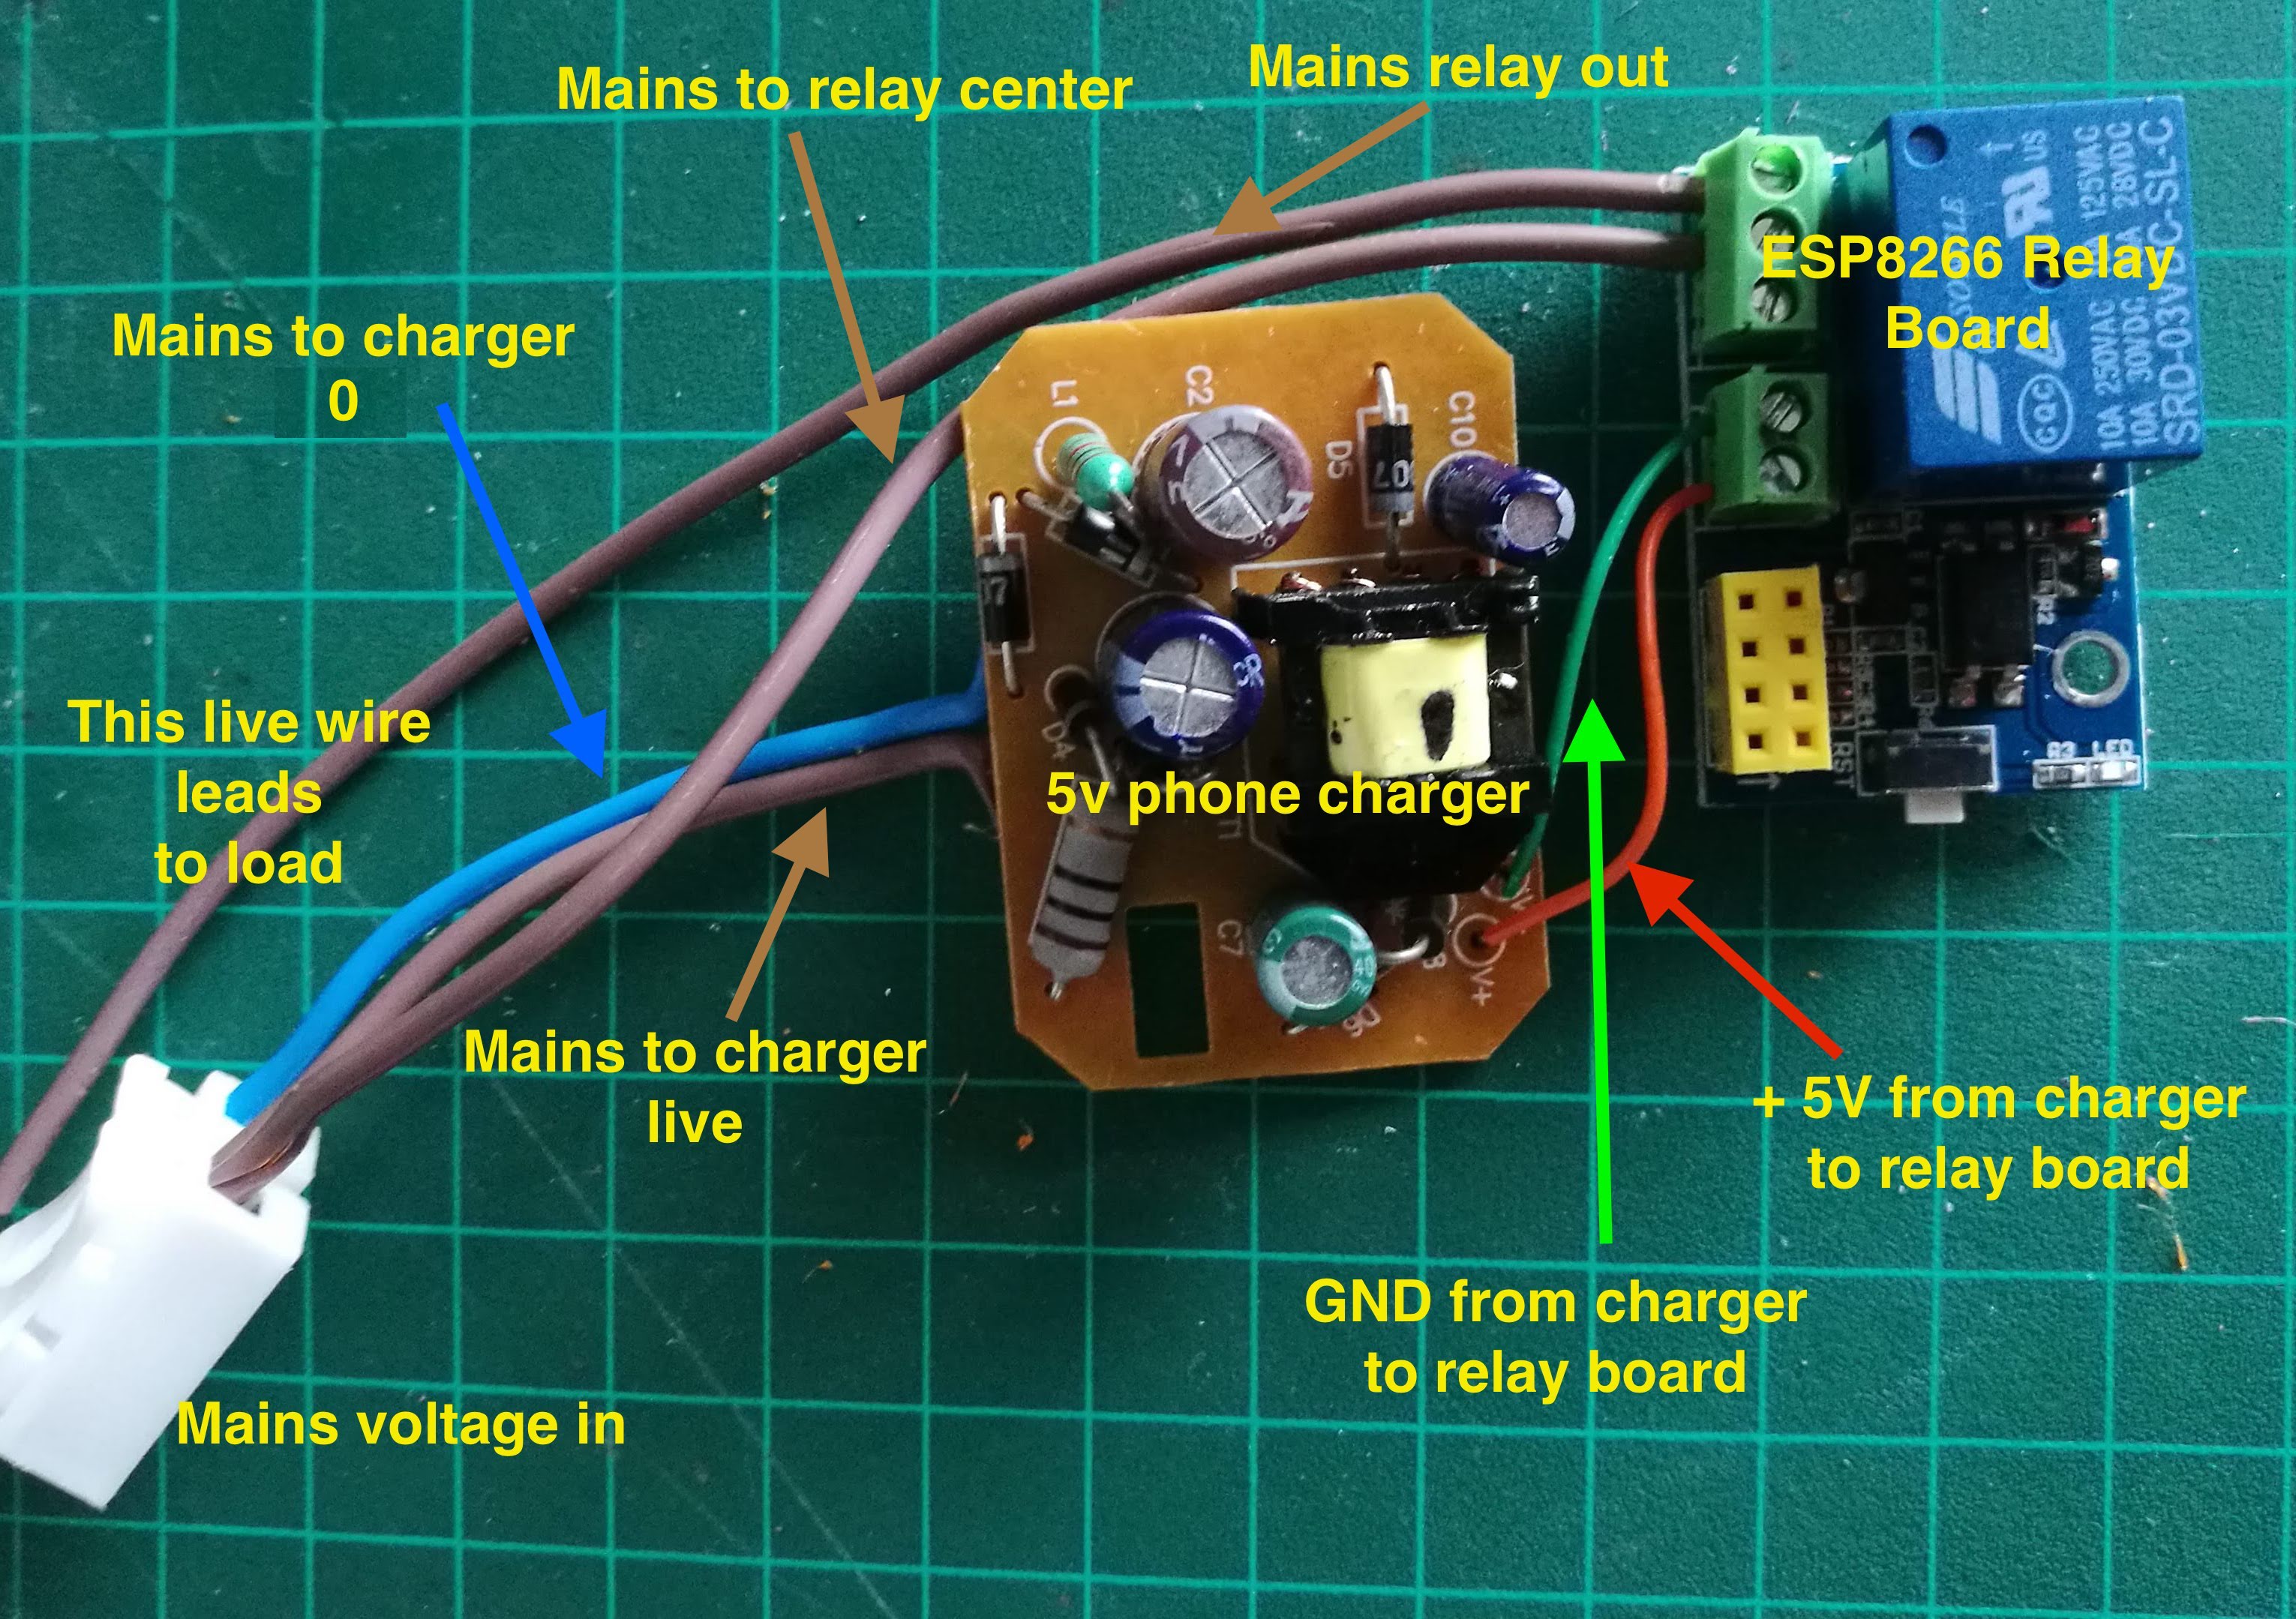
Note, the photo above does not include a ground wire because I used it to control a two-wire lamp. If you intend to use this in a power cable, or your lamp has a metal case, you must have an earth wire.
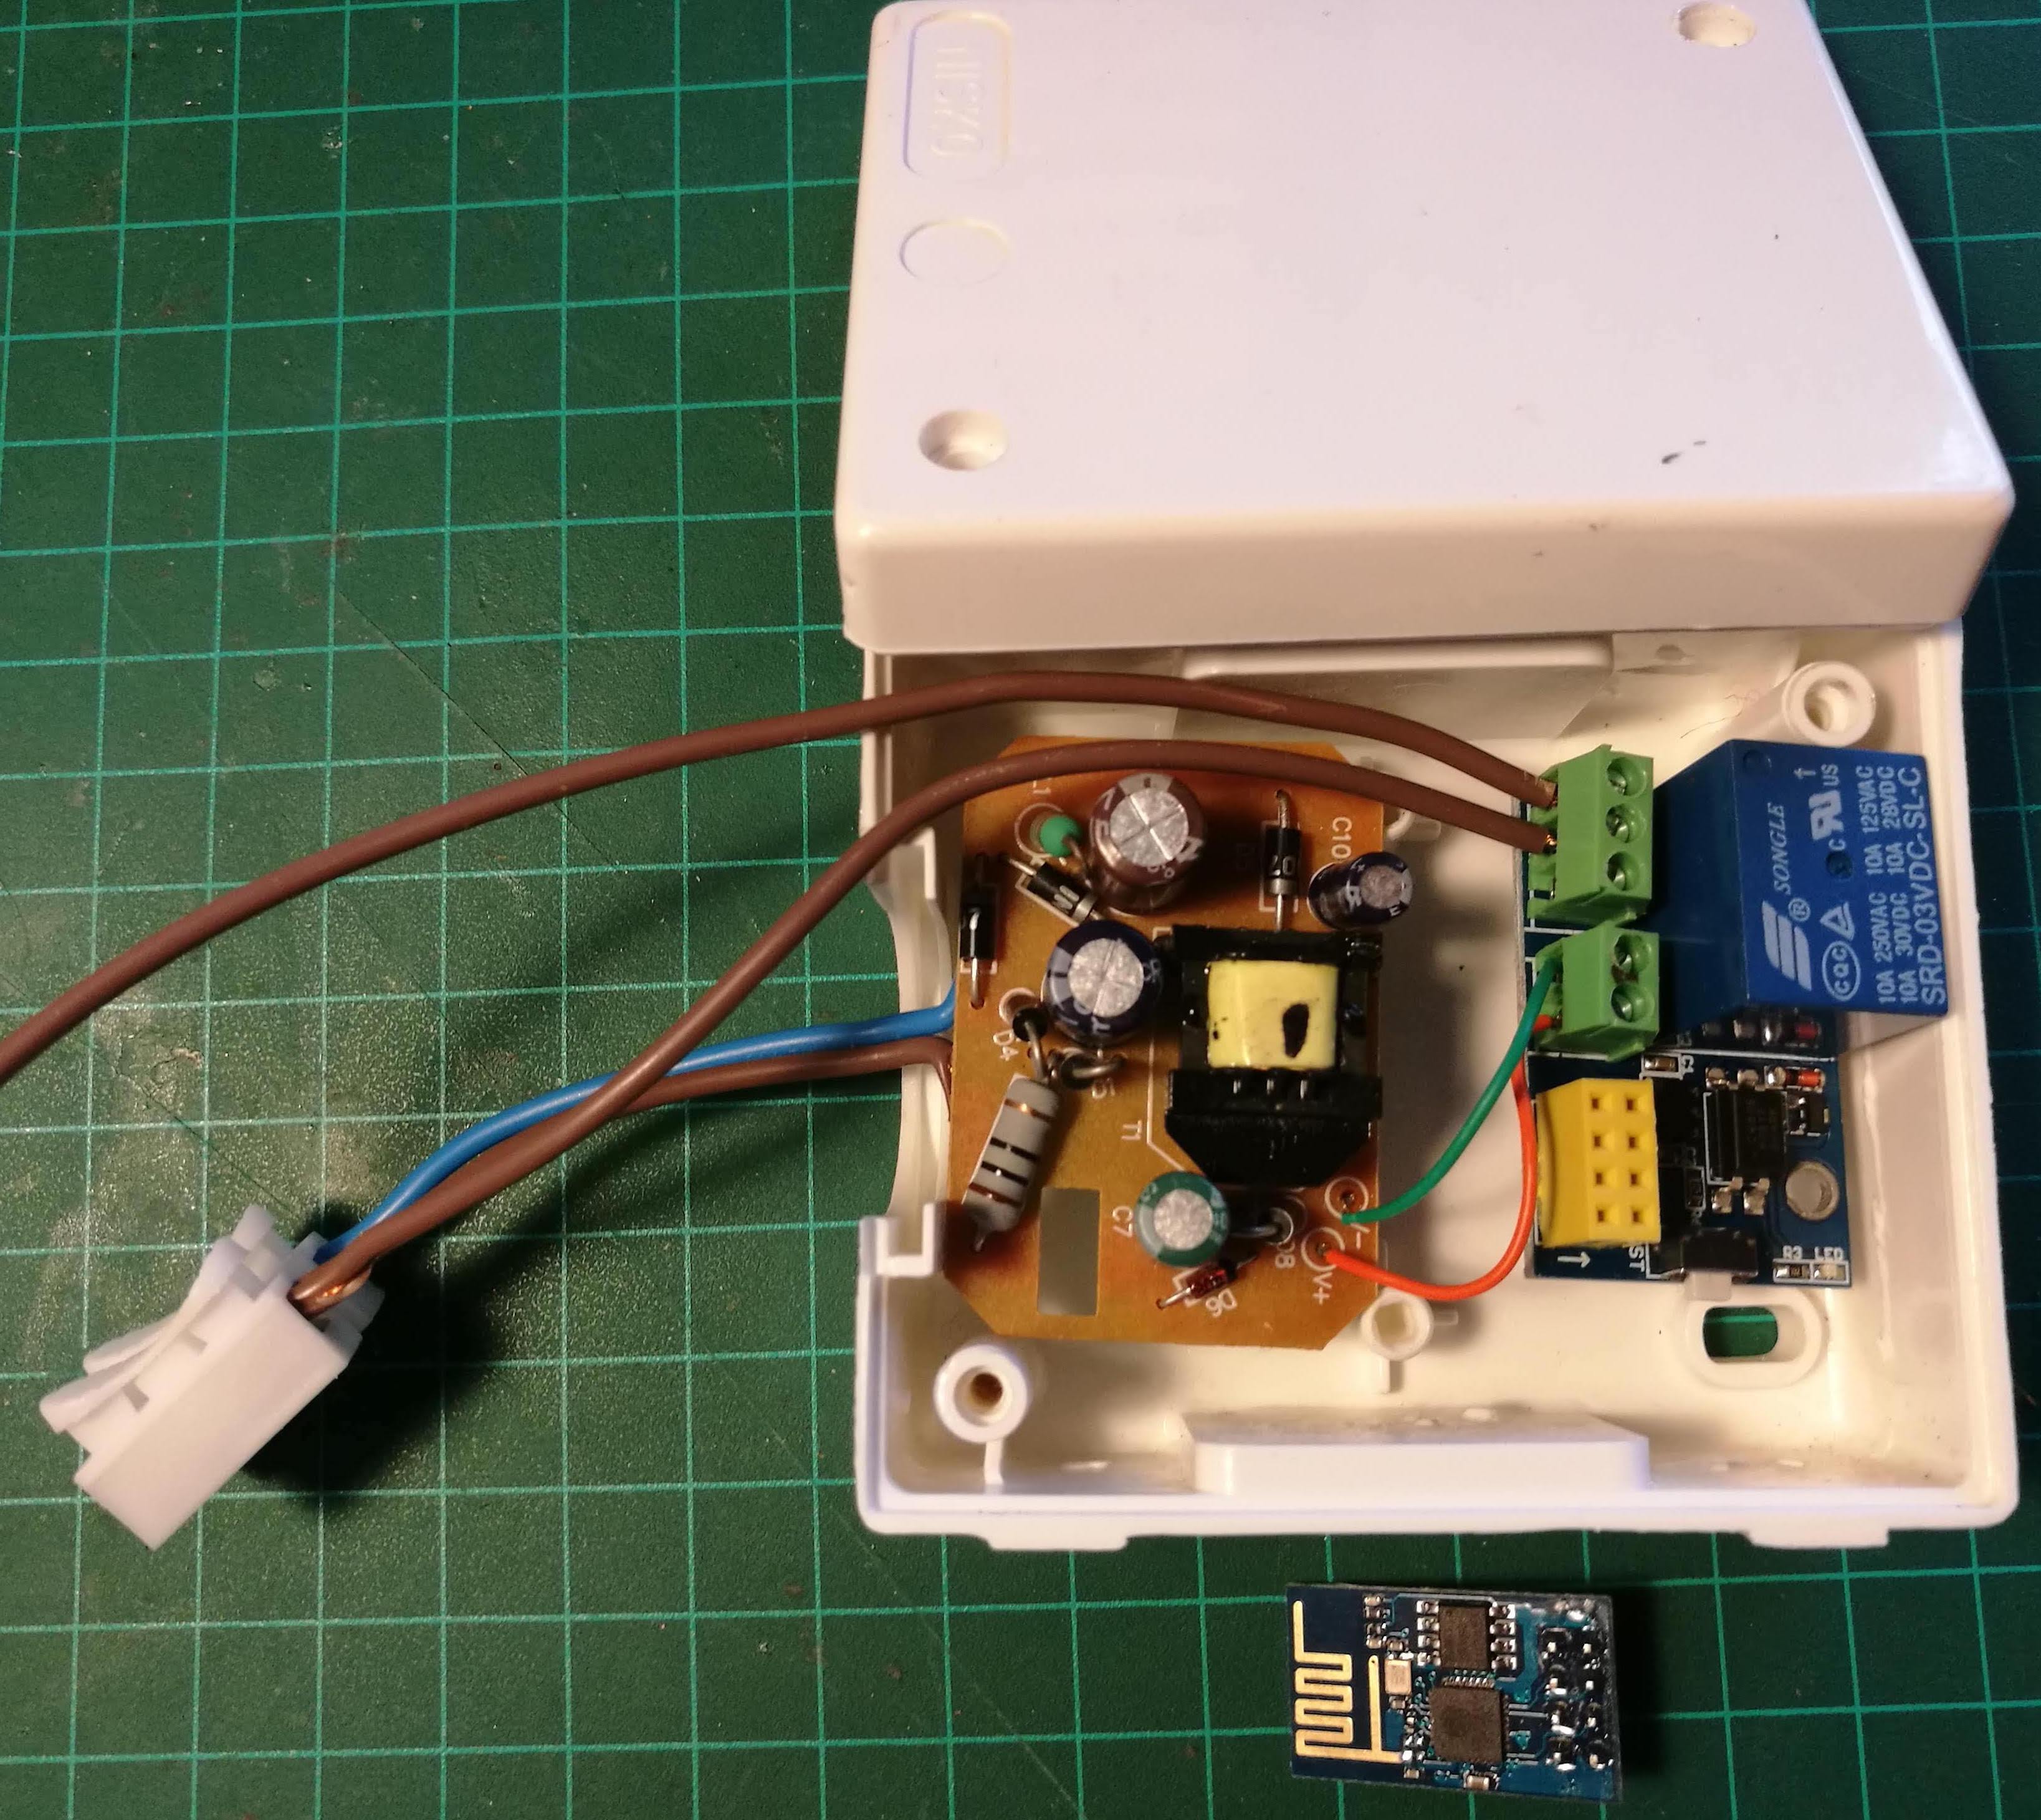
Once you've securely wired/soldered everything up, fit it in a suitable box. (Note the ESP8266 next to the box, ready to be inserted into the relay board.)
Setting up IFTTT
This is taken from a previous post. It covers Google Home but I'm sure it can't be much different for other Digital Assistants.
Here I describe the web interface of IFTTT but it's just as easily to do on your phone.
In your IFTTT Applets, create a New Applet.
When presented with the IF trigger, search for Google Assistant.
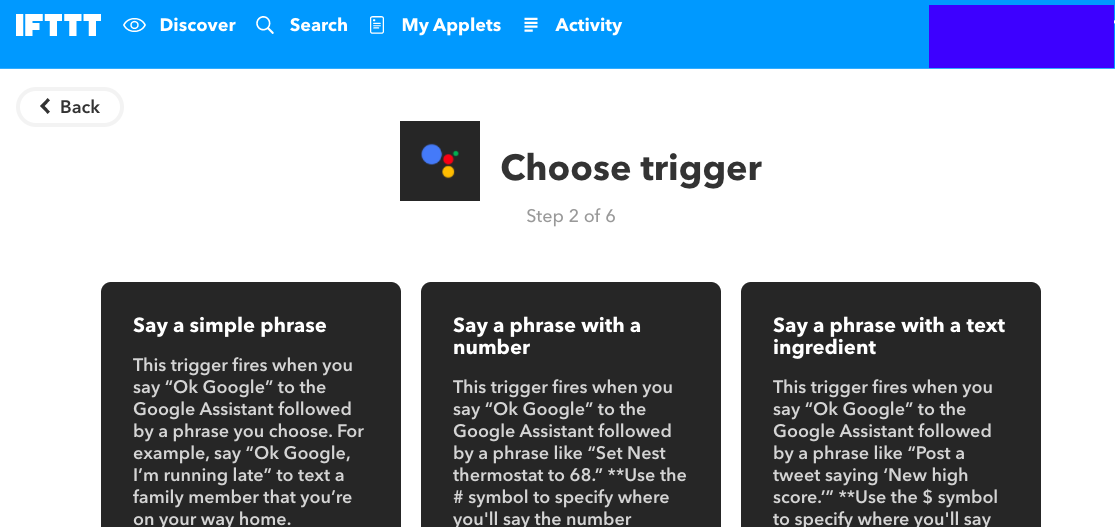
Choose your phrase. (In my case I chose the Simple Phrase).
The next stage is to create the Then part. Here, search for Webhooks.
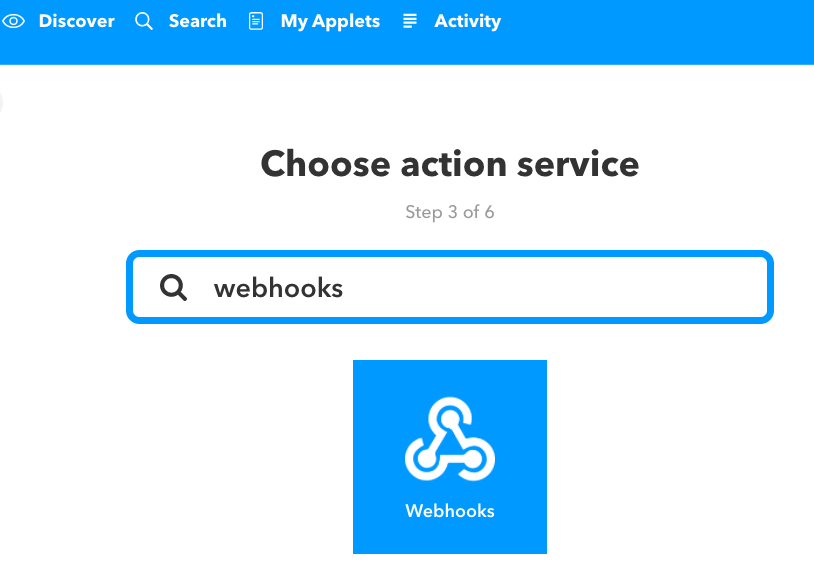
Select: Make a web request
You're now presented with a form requiring a URL and other information. Complete it as follows:
URL: http://188.166.206.43/blynk_auth_key/update/digital_pin_used_in_blynk
(Some people have trouble with this because Blynk uses different servers for different countries. I suggest you ping blynk-cloud.com to find your server IP address and replace mine above if it's different.)
It's also important to specify "D" for "digital" prior to the pin number. So, digital pin 1 will be D1, pin 2 will be D2, etc.
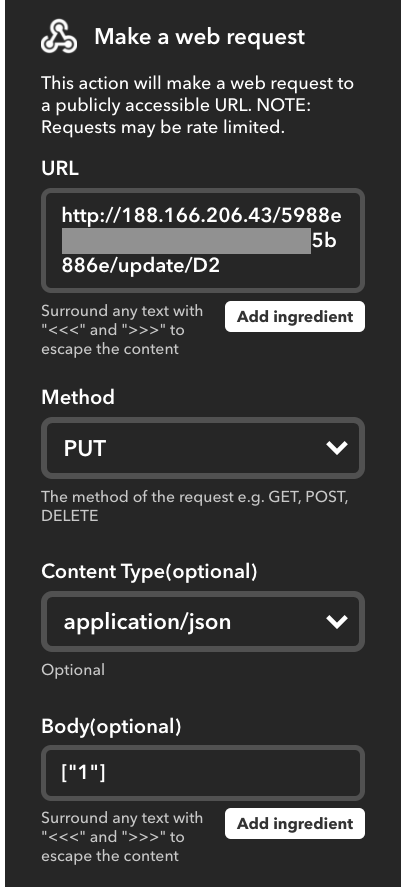
Under Method, select PUT.
Under Type, select applications/json
Under Body, select 0 or 1, depending on whether you want to switch on or switch off. Make sure you use square brackets and quotations: ["0"].
Save your new Applet and that's it.
Say your phrase to Google Assistant, and it should command your ESP accordingly.
Naturally, you'll need to create another Applet to command the ESP to perform the opposite logic.
Conclusion
For those with a keen eye, you may have noticed that the relay board I've used is isolated - meaning that with a minor alteration, it can be used for low voltage projects. This is one major advantage it has over Sonoff devices. (Don't use the wiring diagram above if you want to work with low voltage.)
Of course, there are more efficient ways of connecting a smart switch to Google Home but they may require a bit more knowledge and equipment. MQTT is an excellent protocol and Home Assistant running on a Raspberry Pi can do everything I've described above. However, using MQTT and HA is a little more complicated requiring considerable understanding of the underlying protocols. My simple description above uses off-the-shelf apps that make it very easy to for the beginner to work with.