The jewish holiday of Hanukkah will be next week, and one of the most ancient traditions is lighting the hanukkiah (Or Hanukkah Menora). The Hanukkiah has a place for nine candles, one candle is always lit and another eight being lit gradually every passing day of the holiday.

When I was a kid we used to build a hanukkiah in kindergarten and later in school. It was very simple - You take 9 items which are the same, put them next to each other, paint a little, put candles on top and you got yourself a Hanukkiah!

Not surprising, this holiday is all about lights, pretty much like every other holiday celebrated on December by every other country/religion. The christians used to put candles on the christmas tree but at some point replace it with lights. If I had to take an educated guess I would say some people got their houses burned by putting candles next to a tree inside a wooden house. In jewish culture the tradition of lighting candles hasn't passed, and usually during this holiday you will hear about several people got their house burnt by not watching the candles after lighting them. So, after writing this short prolog I can say that Hanukkah is coming soon and I felt a bit nostalgic, wanted to build a Hanukkiah, but this time a futuristic one! No candles! Also, up until now I never really worked so much with wood and wanted to make some project involving wooden items.
Let's start from the end, it all come to this - An electronic hanukkiah, which has 3 modes: Simulated fire, changing colors and music notes. You can check it out on the next video:
First Steps
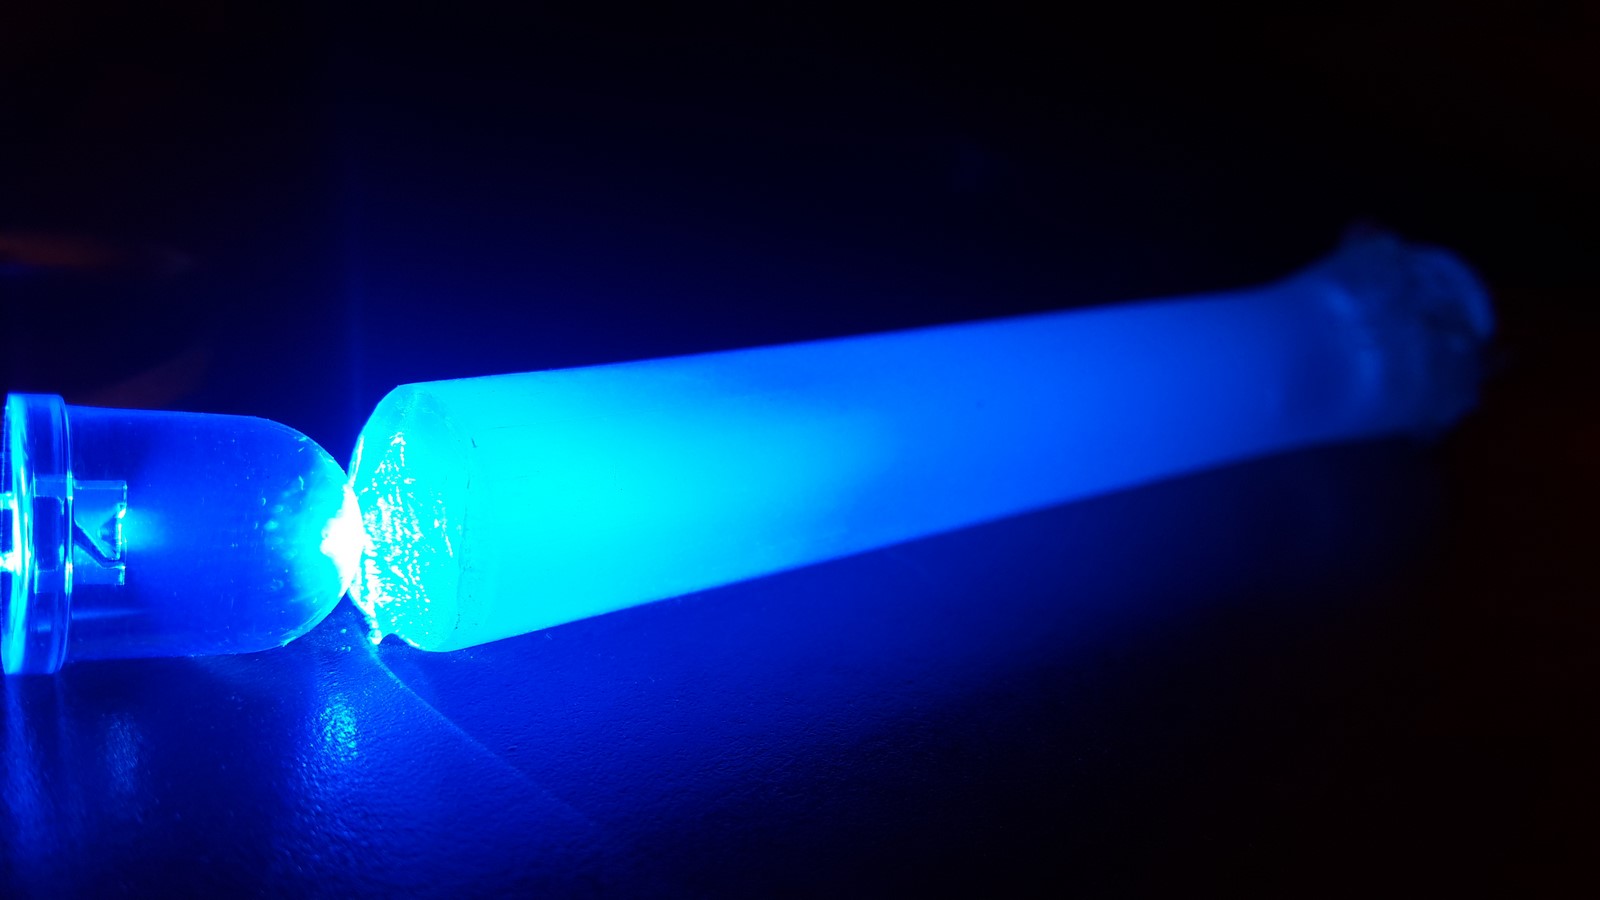
How has it all started? While working on the Scorbot project I played with some leds and hot glue and figure out merging them together create some nice visualization:
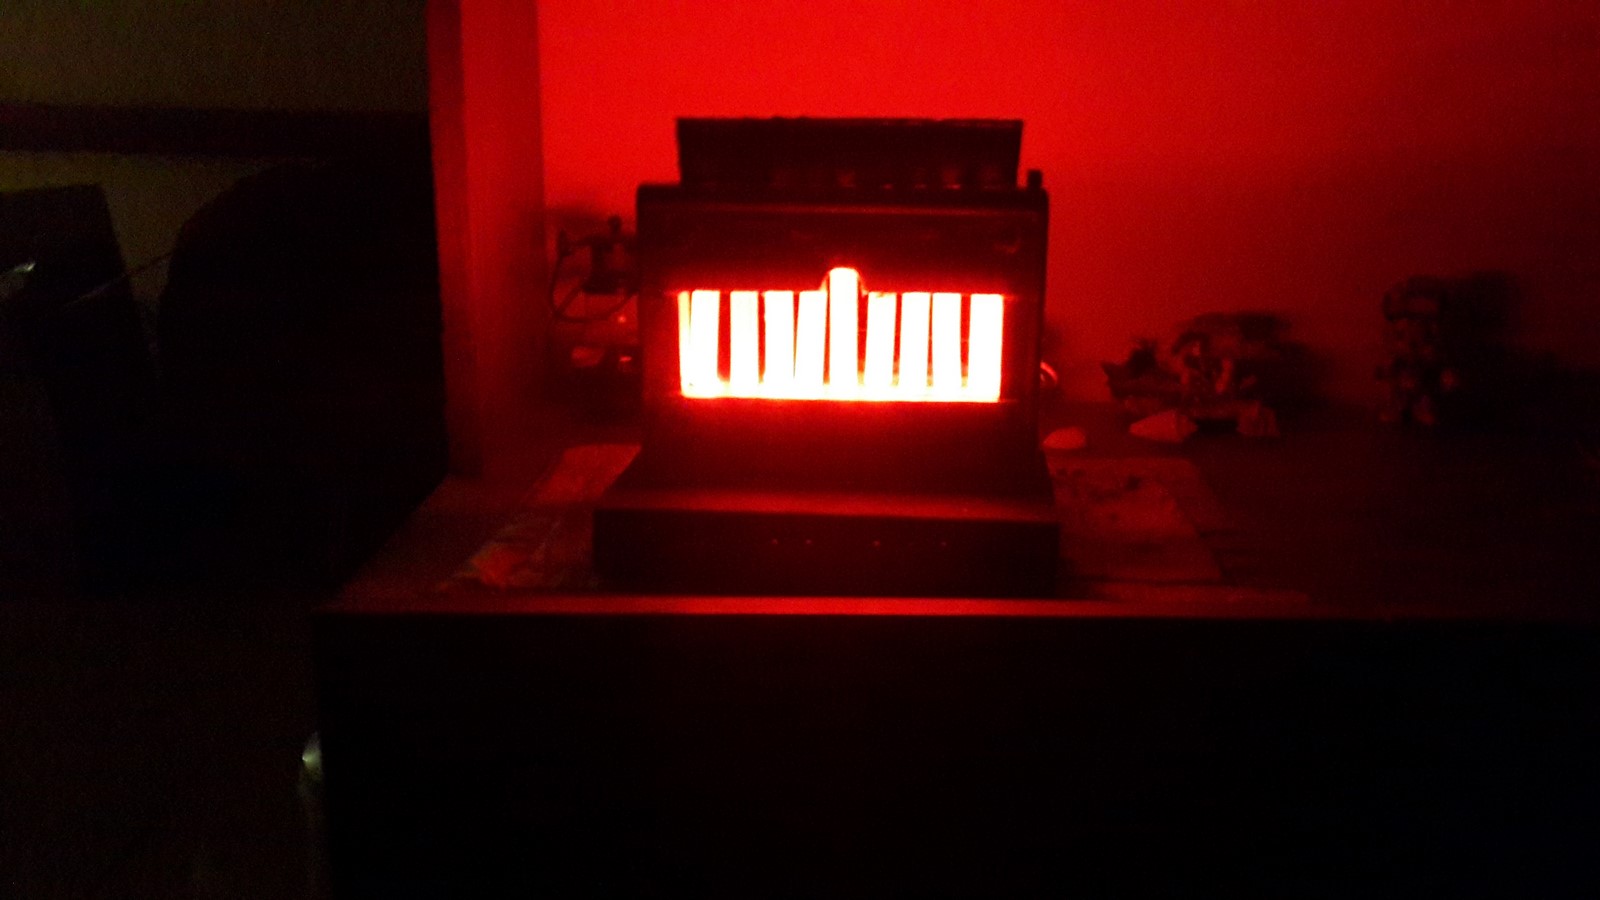
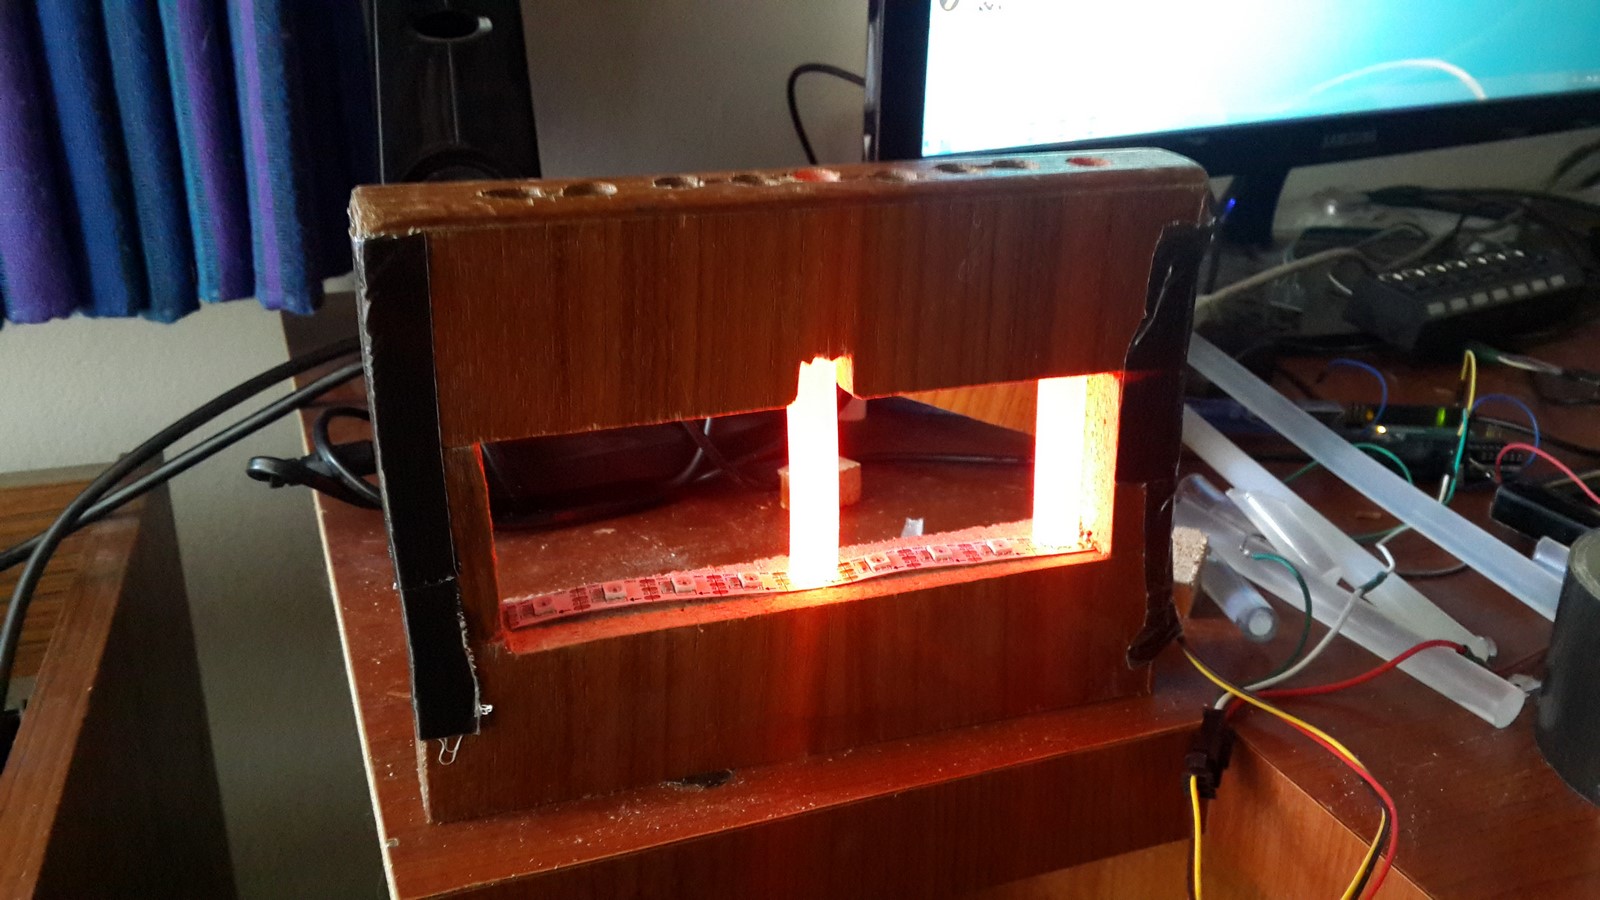
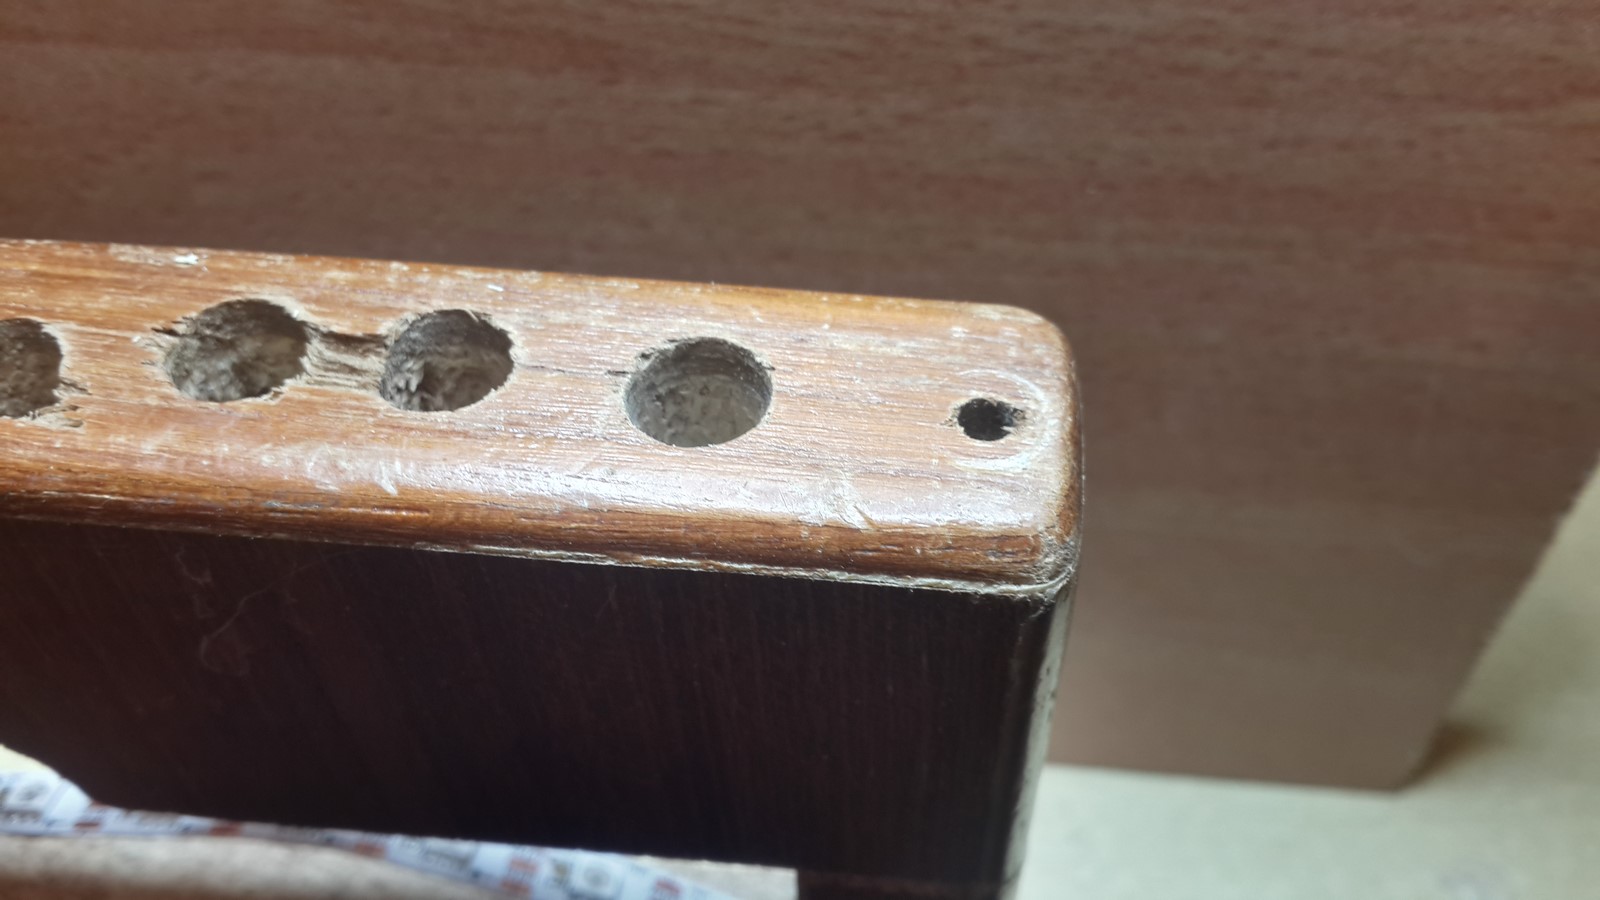
 So I decided these are the candles I want. The first step was to take a piece of wood, cutting the upper part of it, drill nine holes, connect addressable led strip (WS2812) with 9 leds and examine the results. Note that the holes had to be very accurate to fit precisely to the led strip.
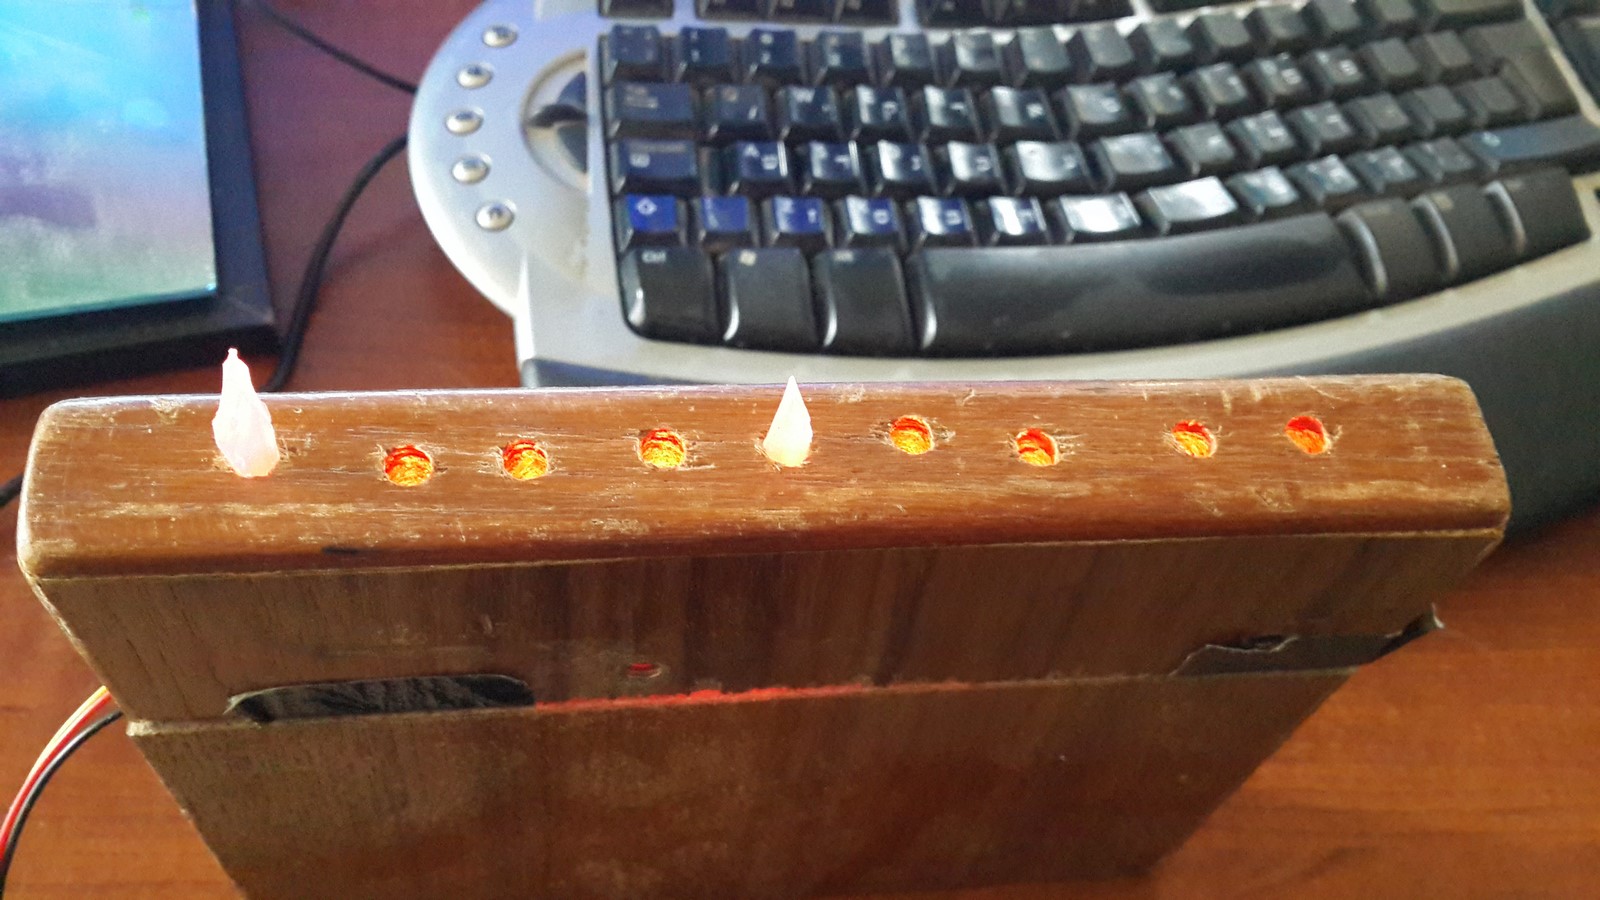
OK that looked nice! I wrote a simple program to simulate the light of a burning candle. The idea is to use as much randomness as possible with the right colors so here's the code for fire on a single led (Using Adafruit_NeoPixel library):
int c=random(50);
if (random(100) < 99 )  strip.setPixelColor(i, strip.Color(random(120)+135, 0, 0));
else  strip.setPixelColor(i, strip.Color(c+135, c+135,0));
delay(random(100));
What we get is a reddish color which changes its brightness to random values in random times, and once in a while it jumps to a yellow color. I found over the net several ways to do so and this one is a combination of a few suggestions which eventually I liked the most.
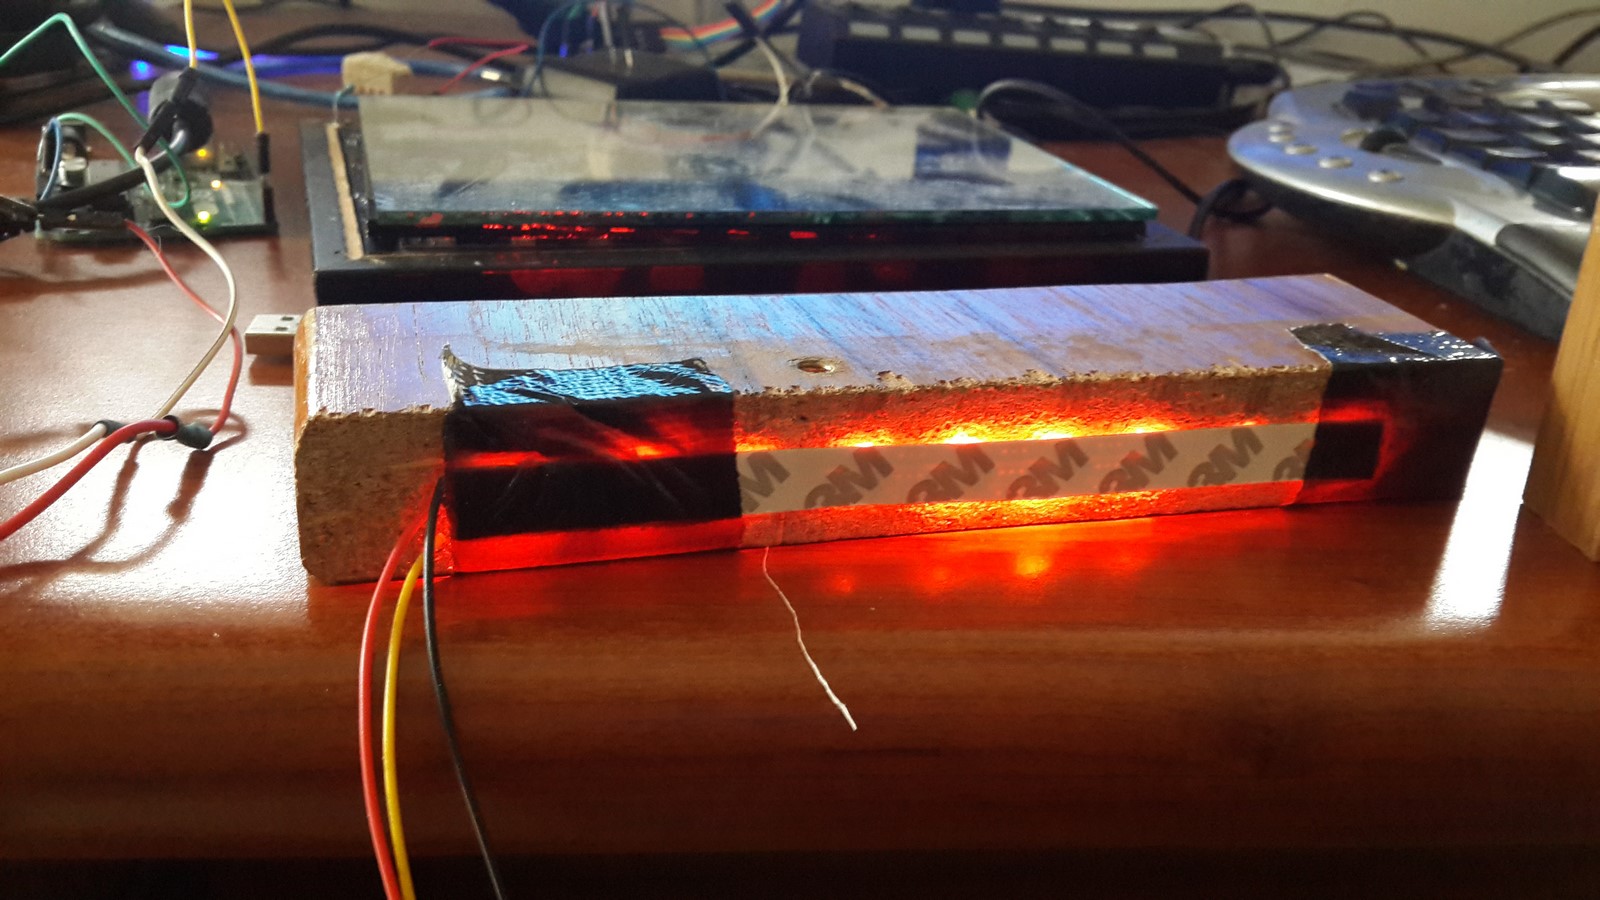
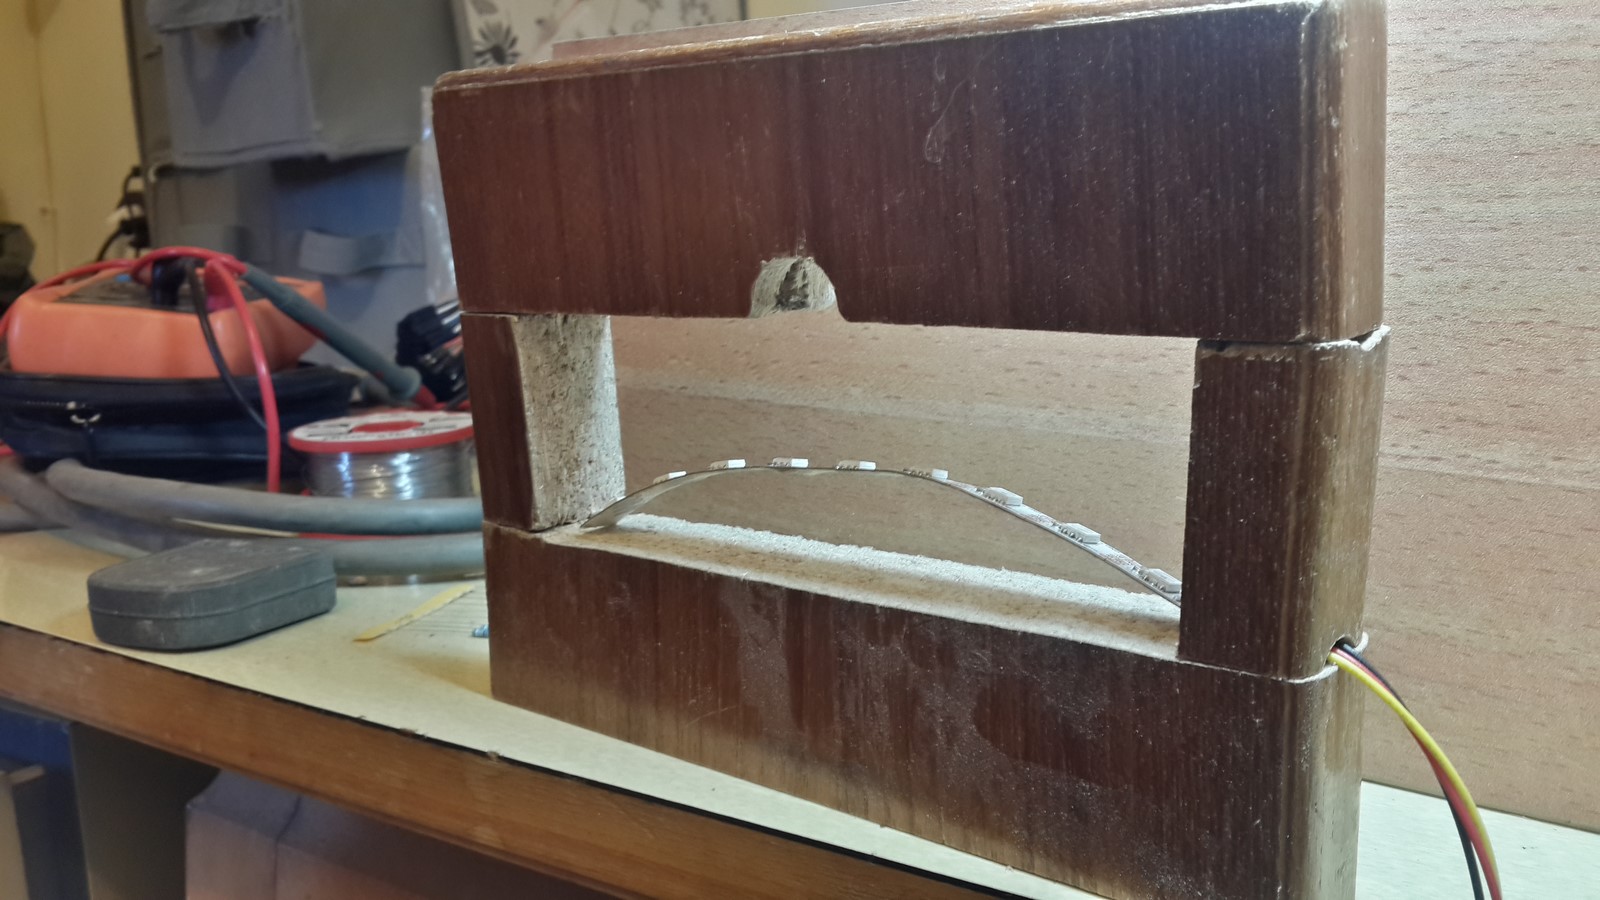
This hanukkiah structure was nice but didn't satisfy me yet, the lights weren't strong enough and I decided to cut the bottom part of the wood as well.
Cutting the wood:
Putting back the two sides of the cut wood:
Cut the top part in the middle for the middle candle, and put the leds and hot glue sticks:
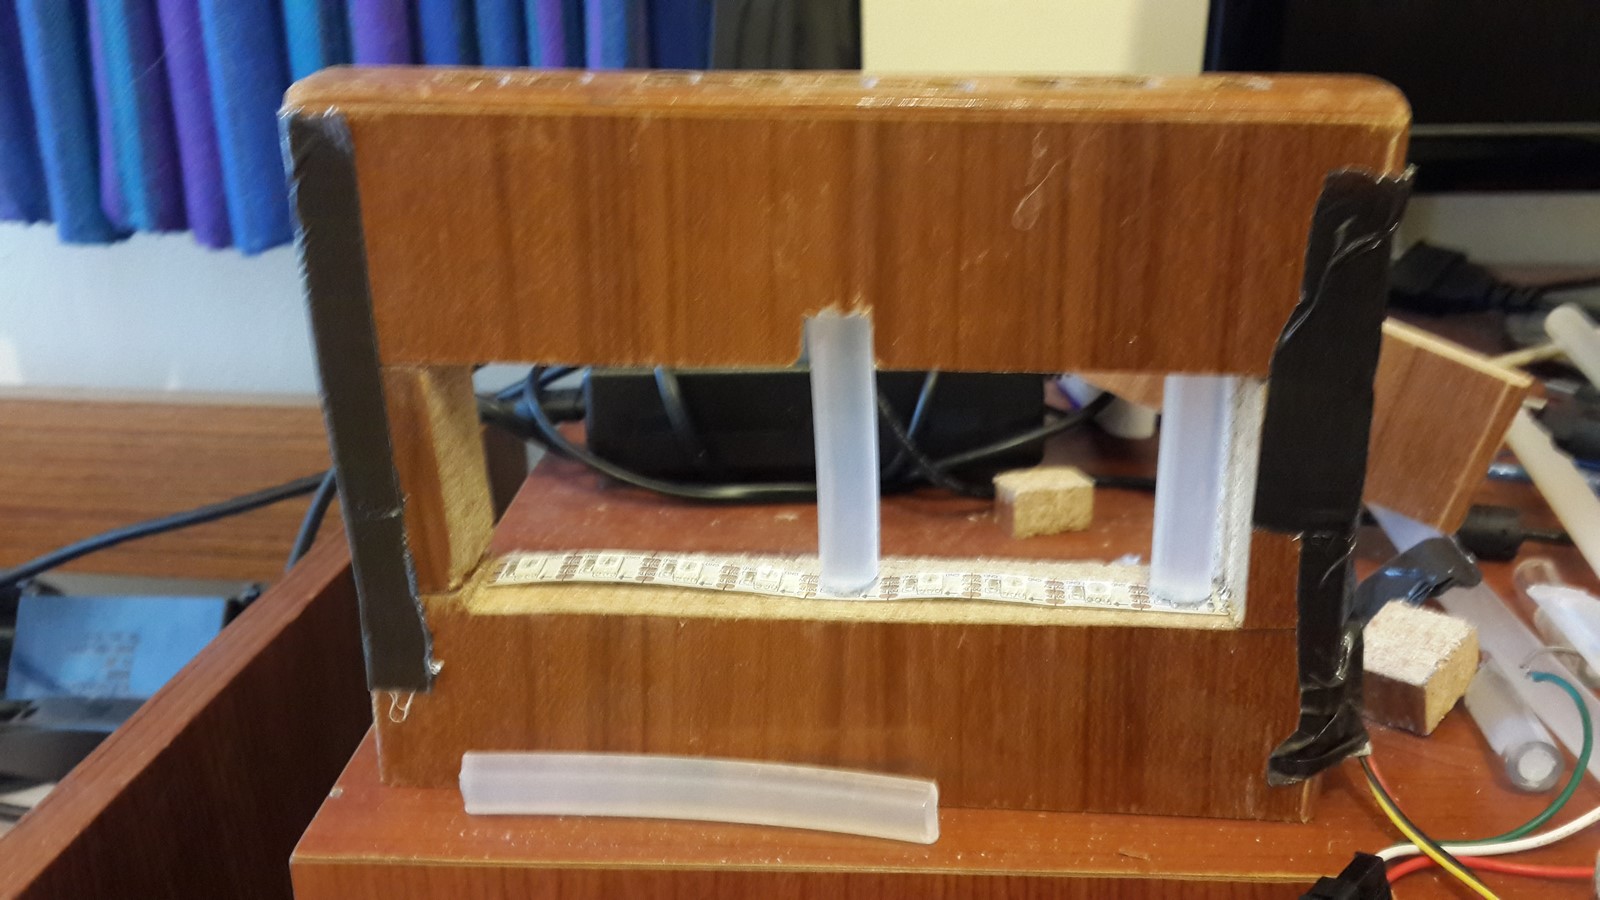
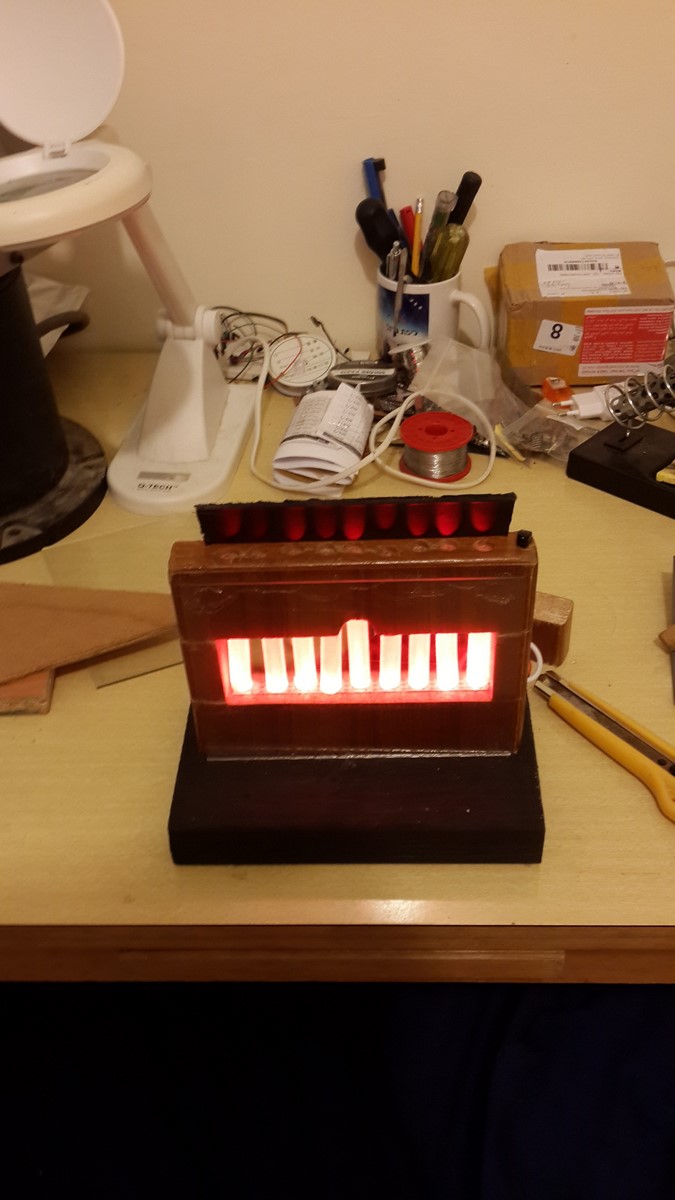
Lighting it - Yes! Looking good! That's the hanukkiah I want! Now we can continue full power on making one great hanukkiah.
Advance steps
When I understood the concept of the hanukkiah I want, all is left is the decision on which features the project will have and the construction itself. The features' list was develop during the construction, everyday I thought about another thing I want my hanukkiah to have. The final feature list includes:
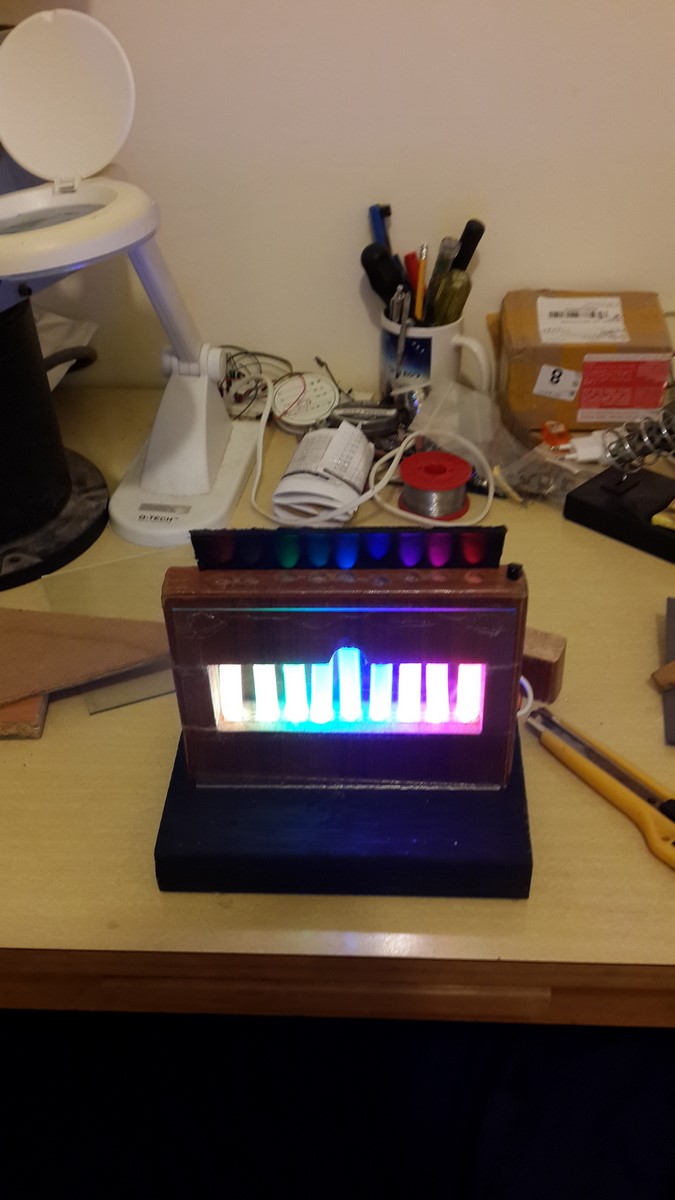
- Wooden Hanukkiah, covered with glass. Nine leds lights hot glue sticks from bottom to top. The top is covered a bit to see the lights coming out from the bottom.
- Different modes of lights are controlled by an IR remote control.
- A button for manual control.
- Controlling how many and which lights to turn on, and switch between 3 states:
a. Fire simulation.
b. Changing colors.
c. Playing music and lighting the leds according to the notes.
On this paragraph I'll attemp to separate the assembly process into several steps, some were carried out in parallel.
Carpentry #1
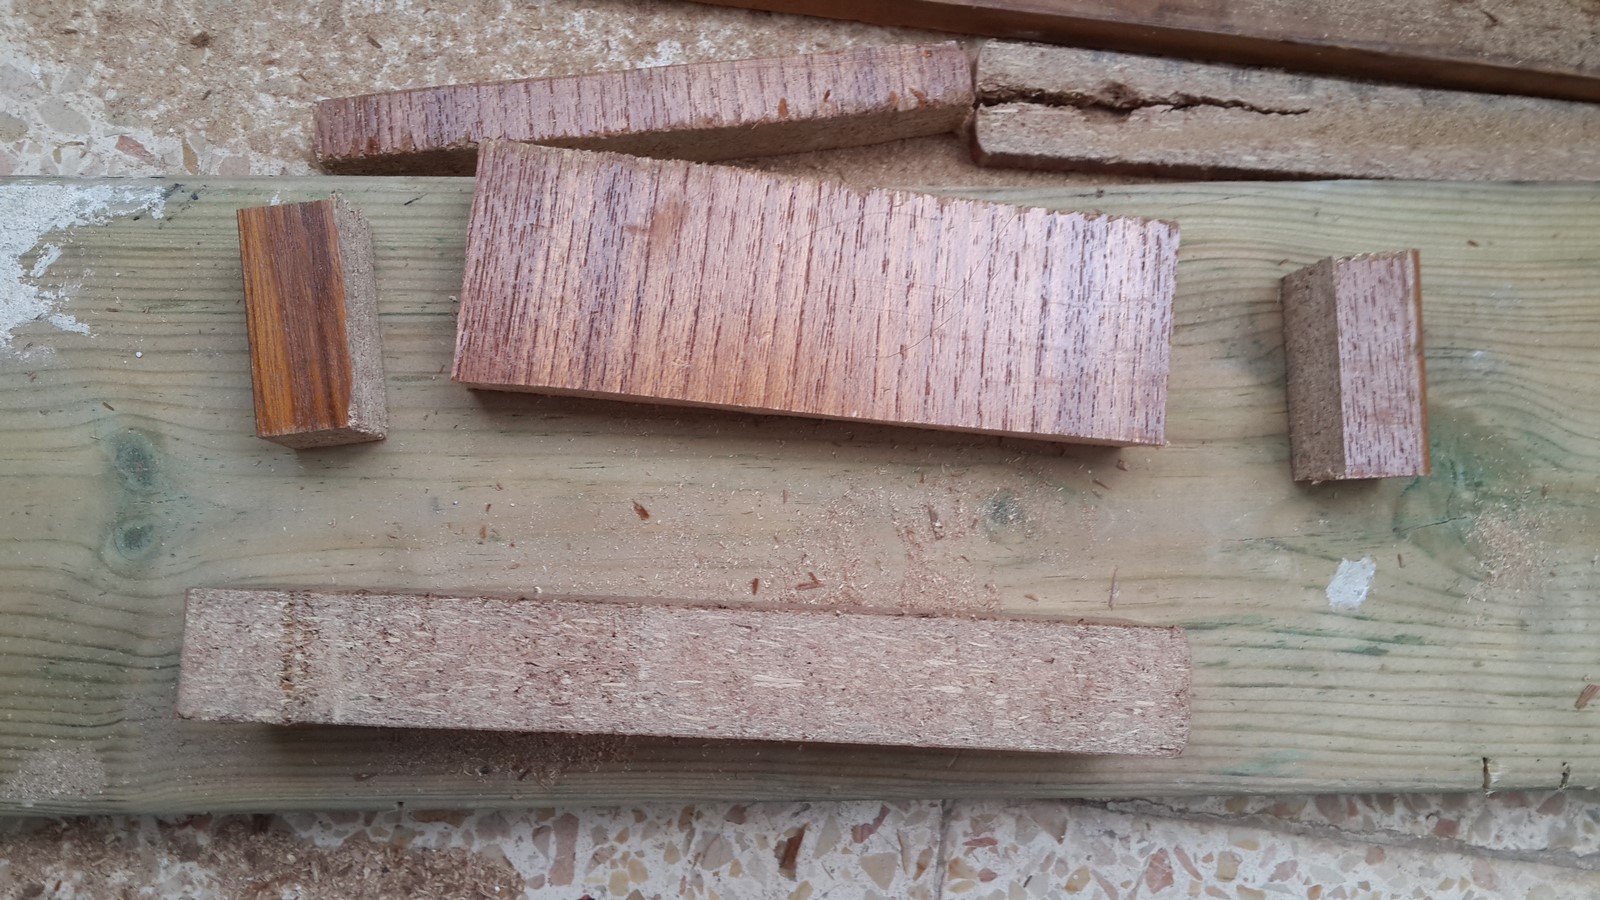
Performing actions on my particleboard was a bit tough because I didn't had too much experience with that. The particleboard is resistant but can be broken easily if not handle correctly.
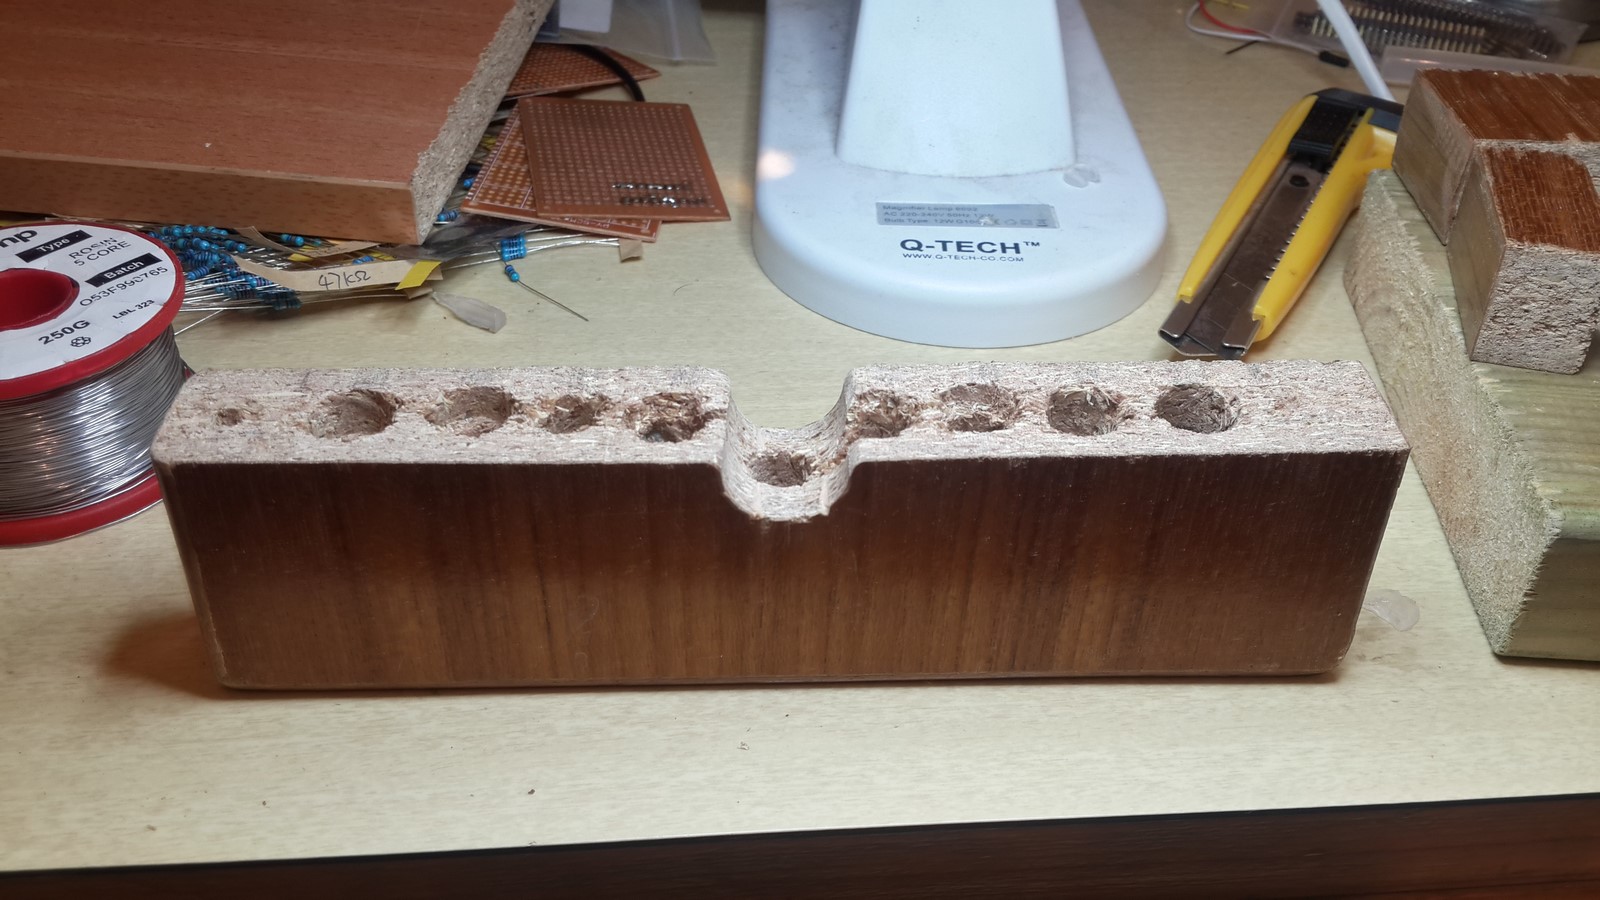
I've started with the top part of the hannukia. The goal was to make the middle part higher, where the highest "candle" will be, and the holes should be big enough to suit the hot glue sticks. For this part I've used the first time with an awesome tool - The Dremel. Using a dremel, a gentle work of smoothing can be perform on the wood and you'll get a nice work like this:
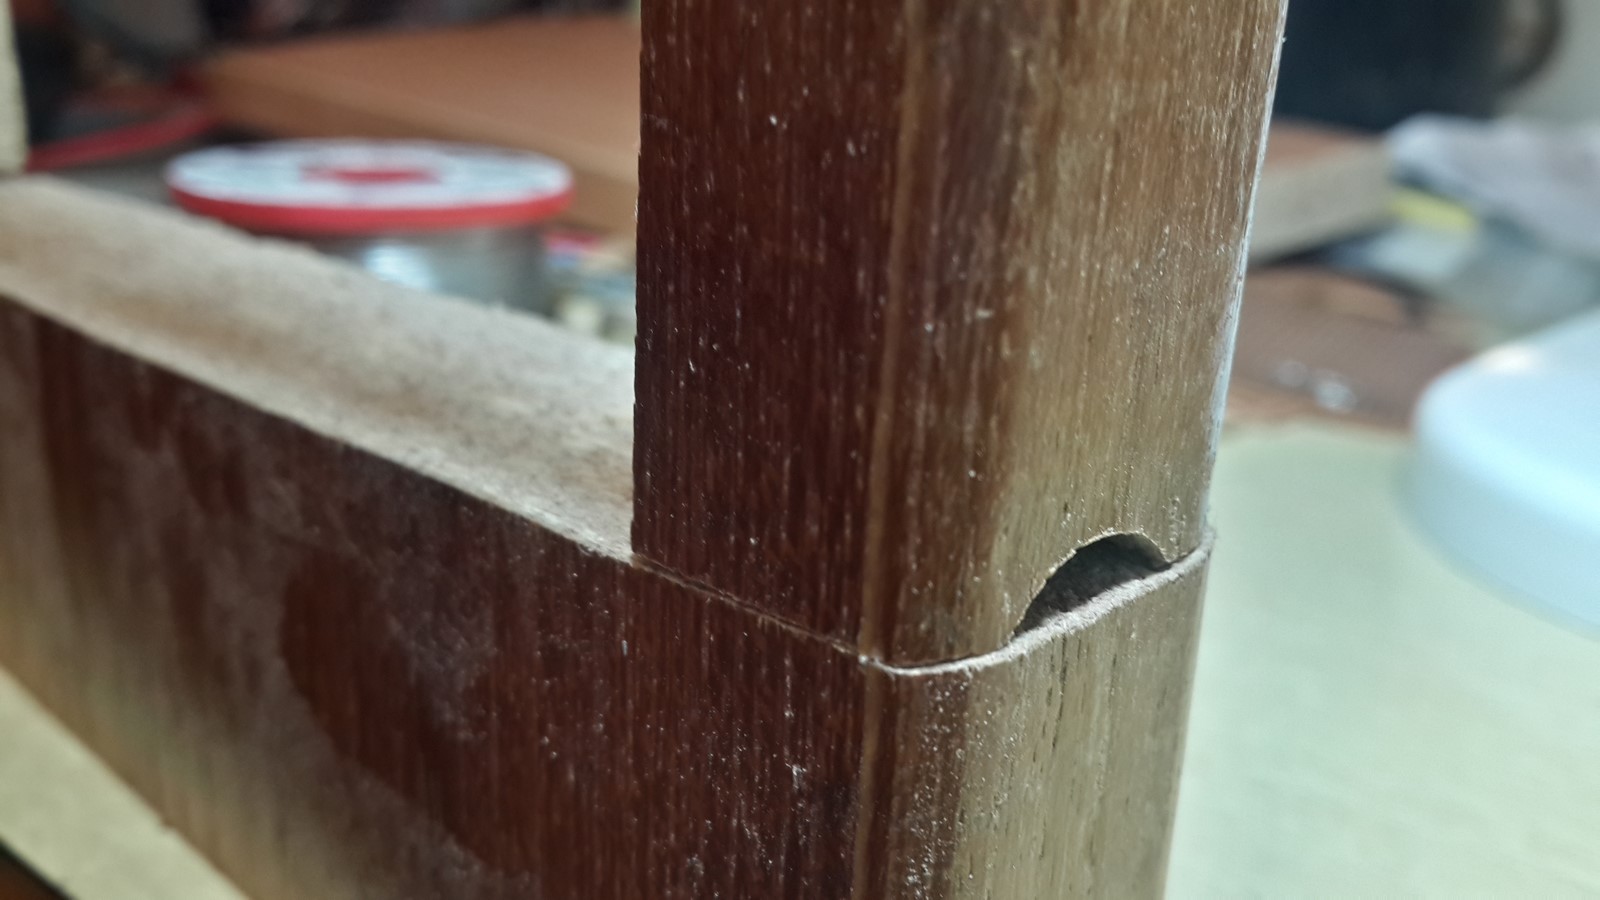
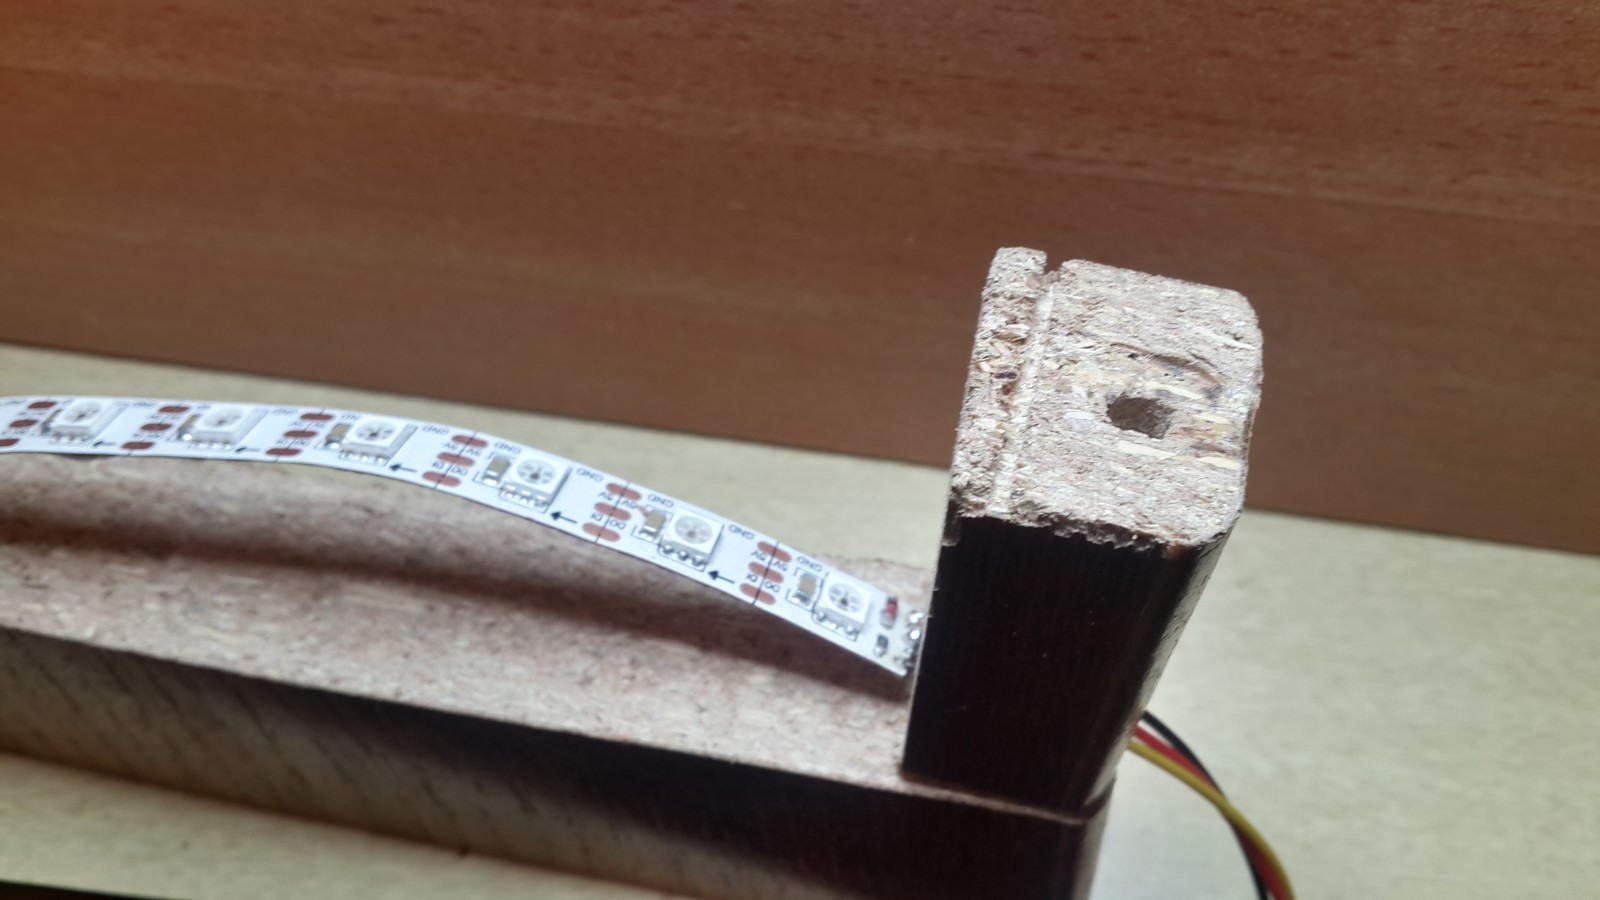
 The right part was also smoothed so the led strip and its wires could be inserted gently:
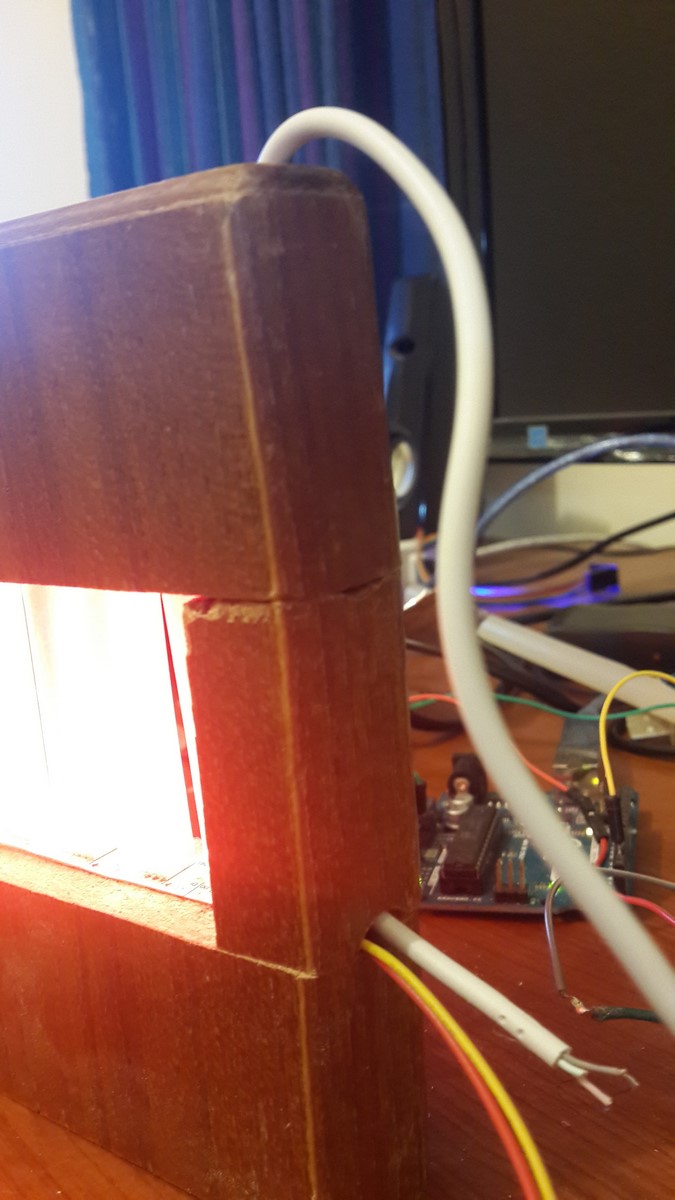
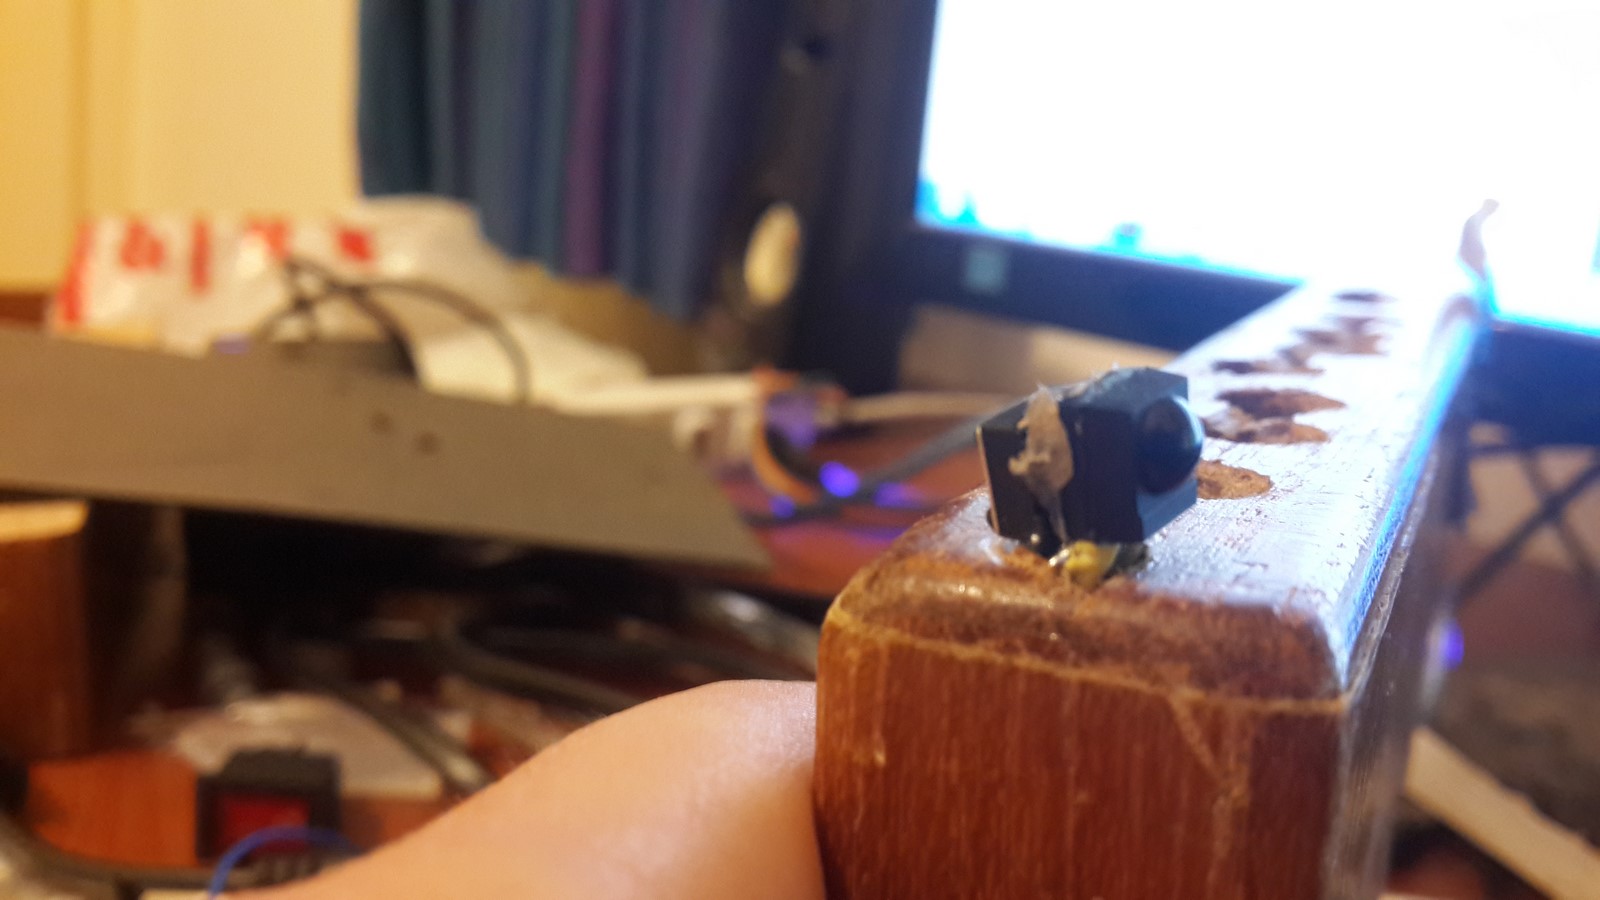
Then, I drilled a hole from the top right part of the hanukkiah all the way to the bottom, where the wires of the light control will be. Eventually I chose IR but didn't know at the time which one will I use and just drilled this hole so future wires will not be loose.
At this point I still did not glue the wooden parts since I wasn't yet sure what I want to do next. The next parts of handling the woods was after the electronics part was already done.
Hot Glue Sticks
The hot glue sticks, as mentioned before, are great for light refraction and nice visualizations. Two things I should mention here are:
There are many kinds of hot glue sticks, I've tested two kinds of sticks and realized the more transparent the better.
When cutting the sticks, to use them as candles, it is best to cut a bit more then you really need, about 0.3-0.4cm more. Then, when you want to put a stick into the wooden hole, warm one of the edges with a solder iron or a lighter and stick it into the hole. Doing so will make it hold tight since, well, it is hot glue after all... However, while warming the stick you will loose a bit of its length and therefore it is best to cut it a bit longer then what you really need.
Electronics
The leds were working already and I had to choose how will I control them. I've started by cutting a spare USB cable and inserting it through the hole I drilled. It went in and out perfectly!
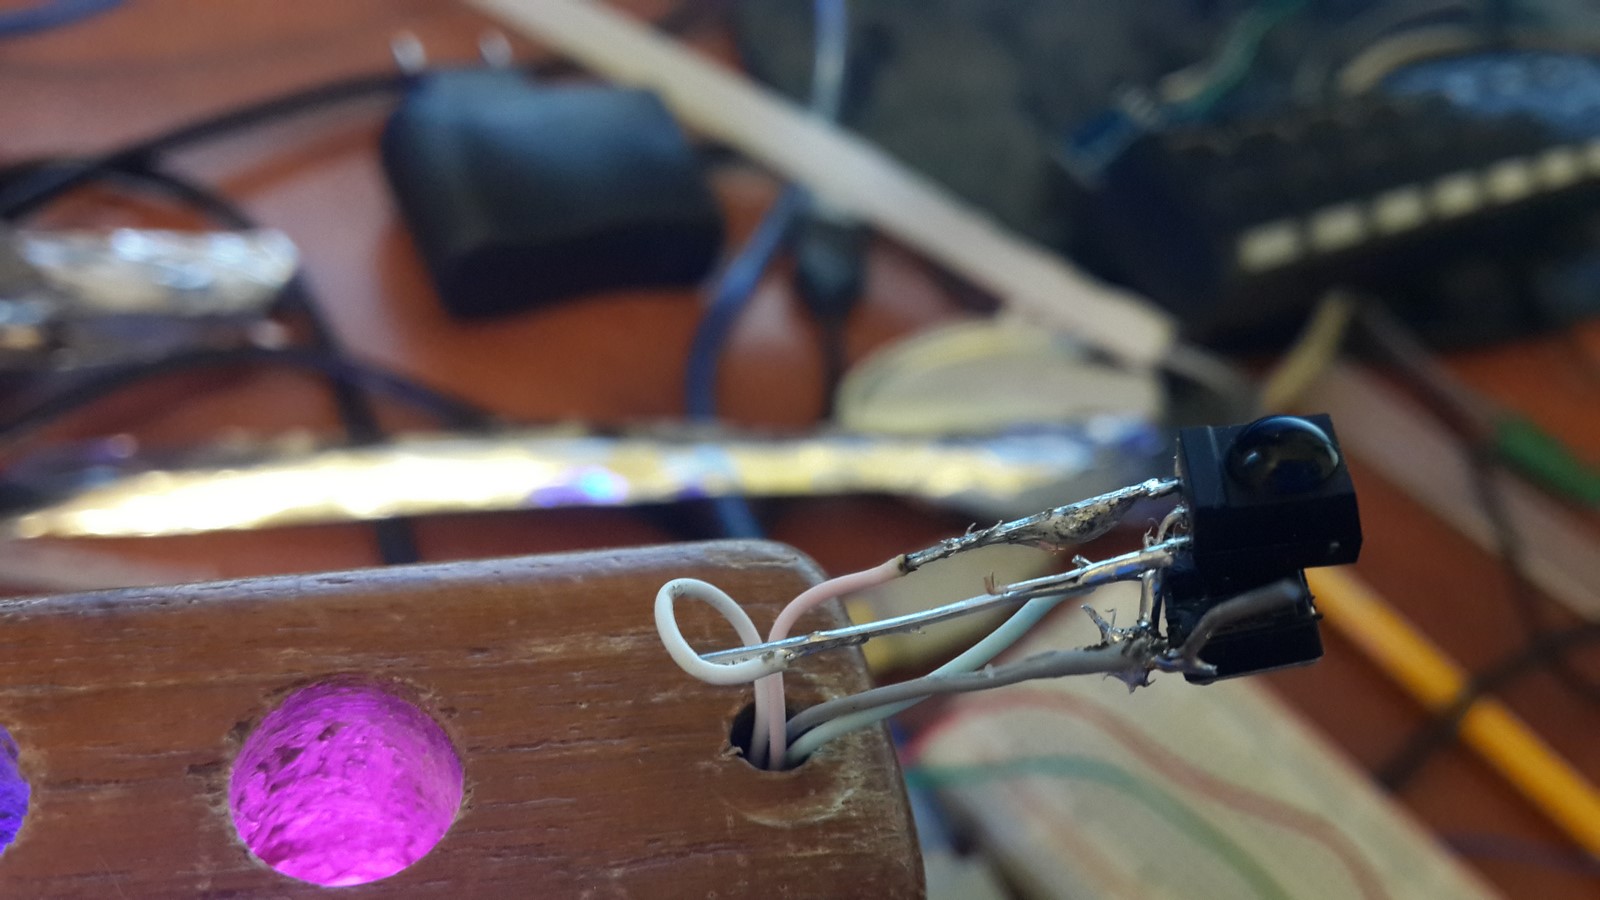
 So I had four wires to use, and the decision was to put IR receiver and a button on the right top of the hanukkiah. Using some hot glue I glued the button and the receiver back to back, connected their ground leg and connects them to the four wires. Later, I realized I have to put shrink tubes on each leg since they were touching one another after inserting them to the hole.
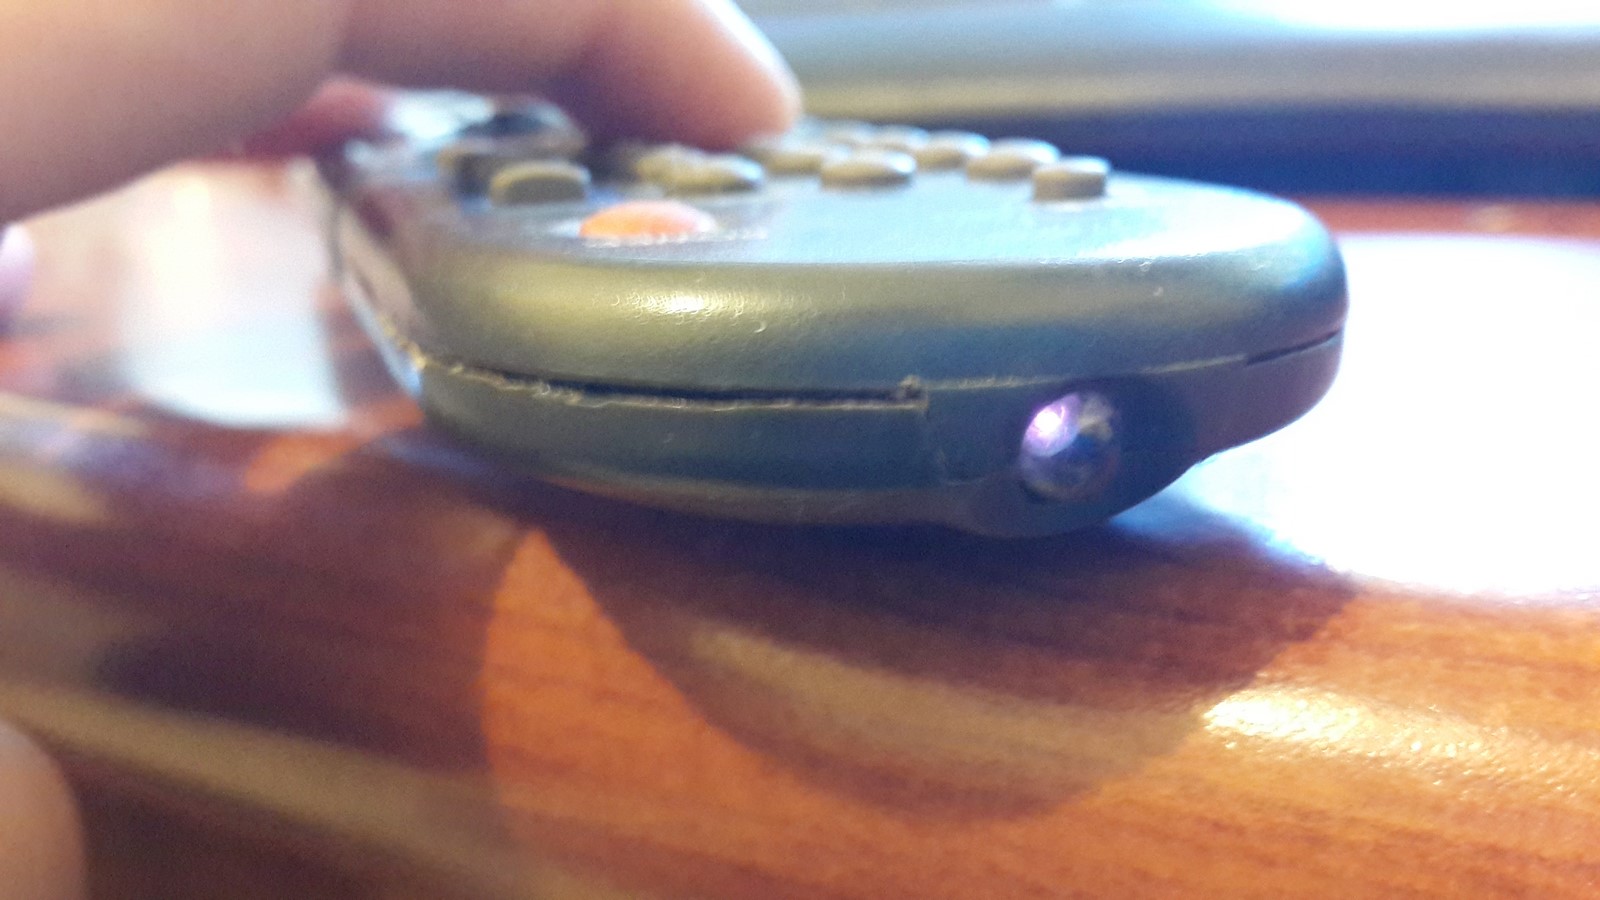
I found an old remote in my house, left here by the previous tenant and was thrown into my "One-day-I-will-use-it box". I didn't even know if it's working. Here's a tip how to check if a remote is working: The IR led light cannot be seen by the human eye but can be seen by a digital camera. So all need to be done is to look at the remote through your phone camera, pressing buttons and checking if there's a purple light coming out from the led.
In order to get the readings from the remote I've used the example on the IRremote arduino library. The pins of the receiver should be connected to VCC, GND and the OUT pin to one of the arduino pins, then upload the program and open the terminal. Each time you press on a button you'll get a 32-bit word, can be represent also by 8-hex word, and this will be the special code for the selected button.
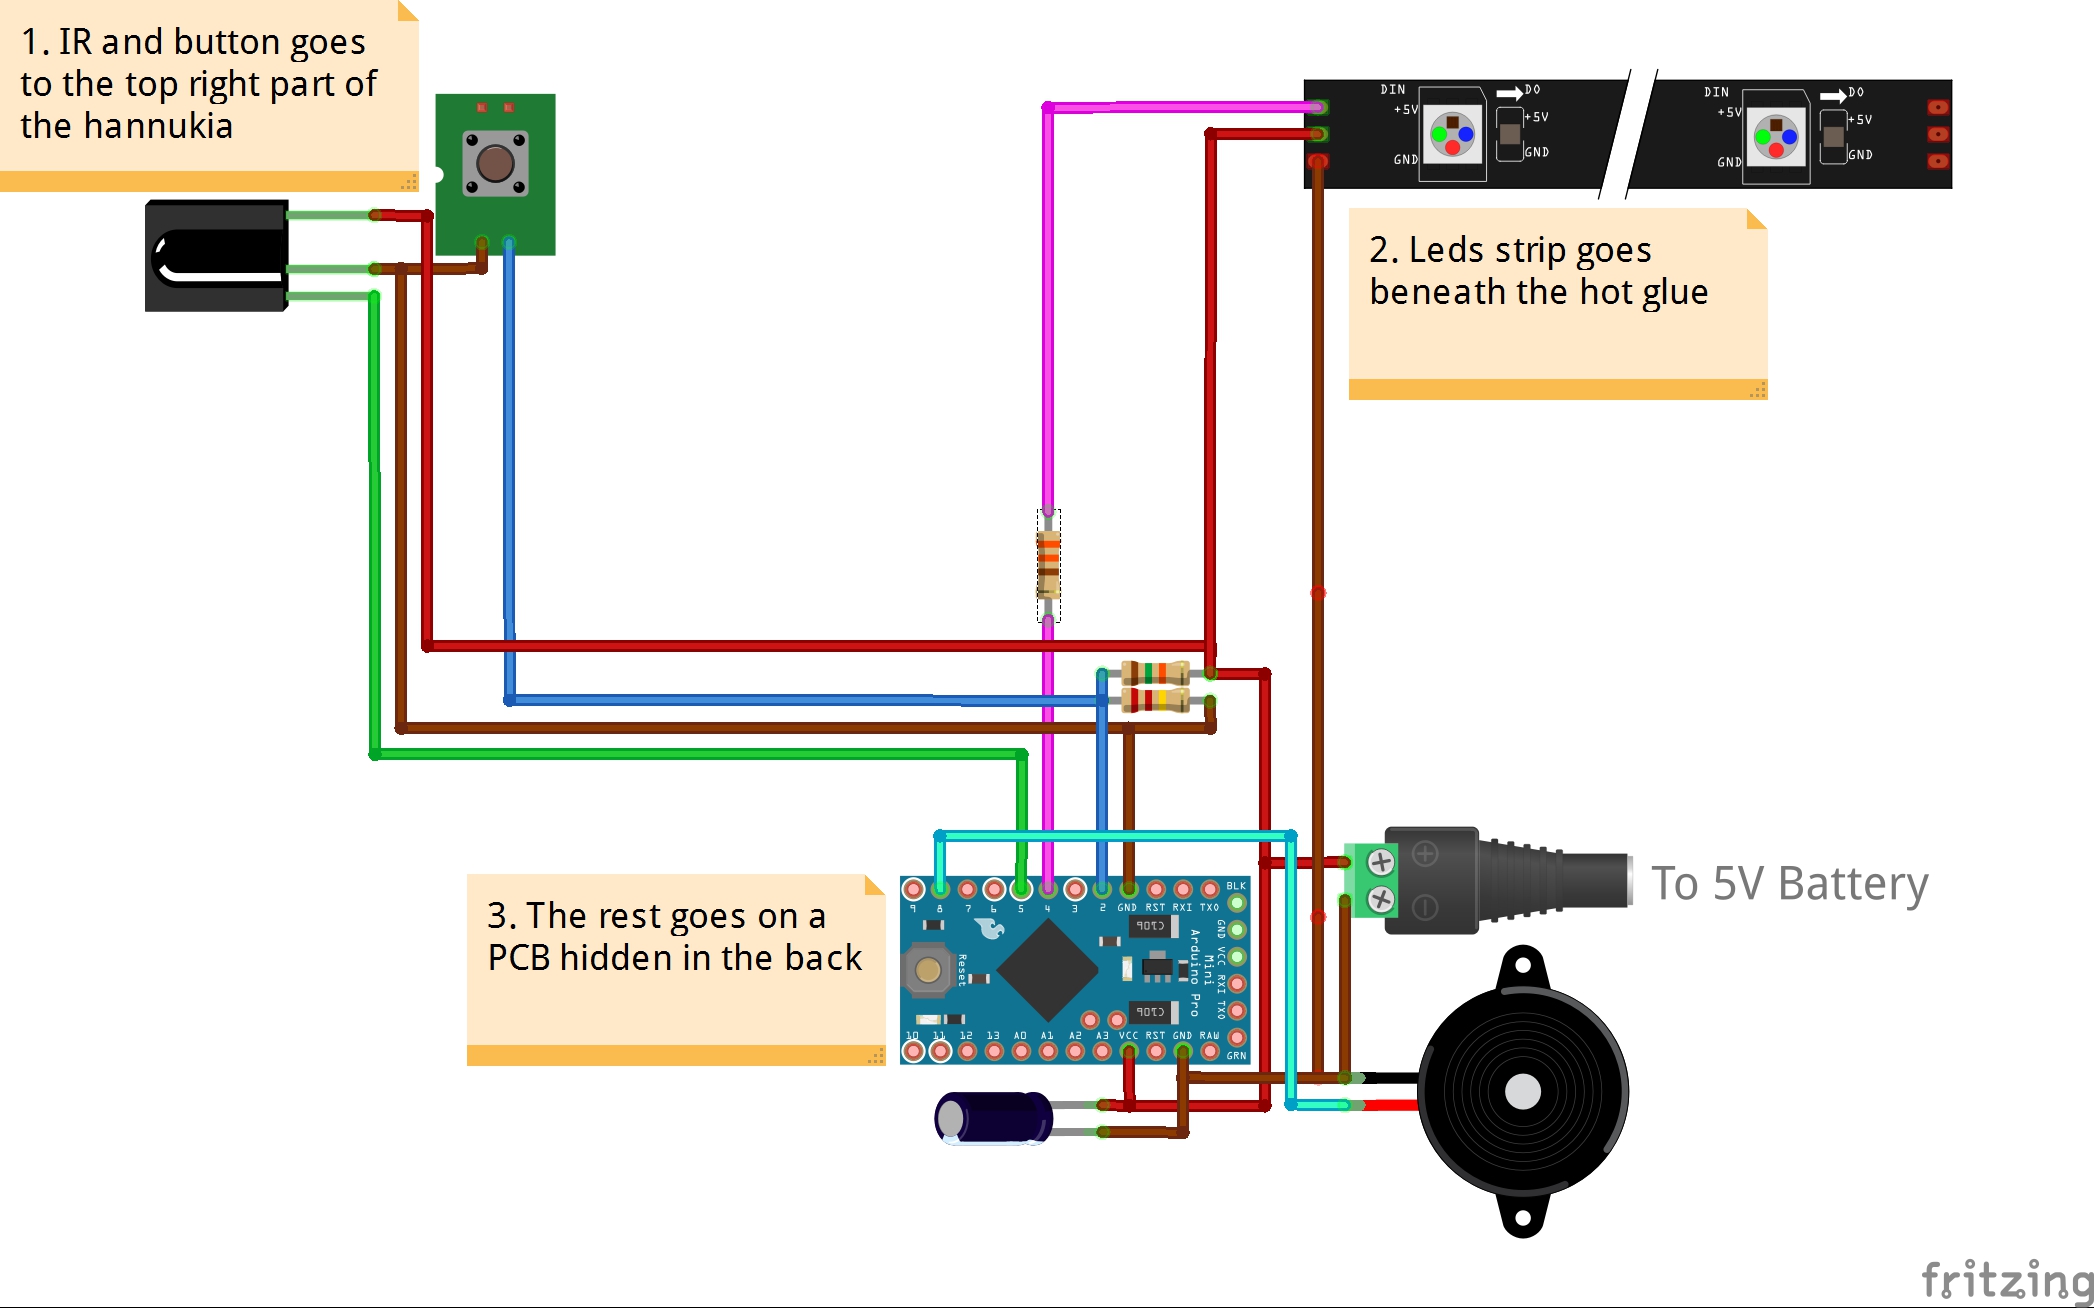
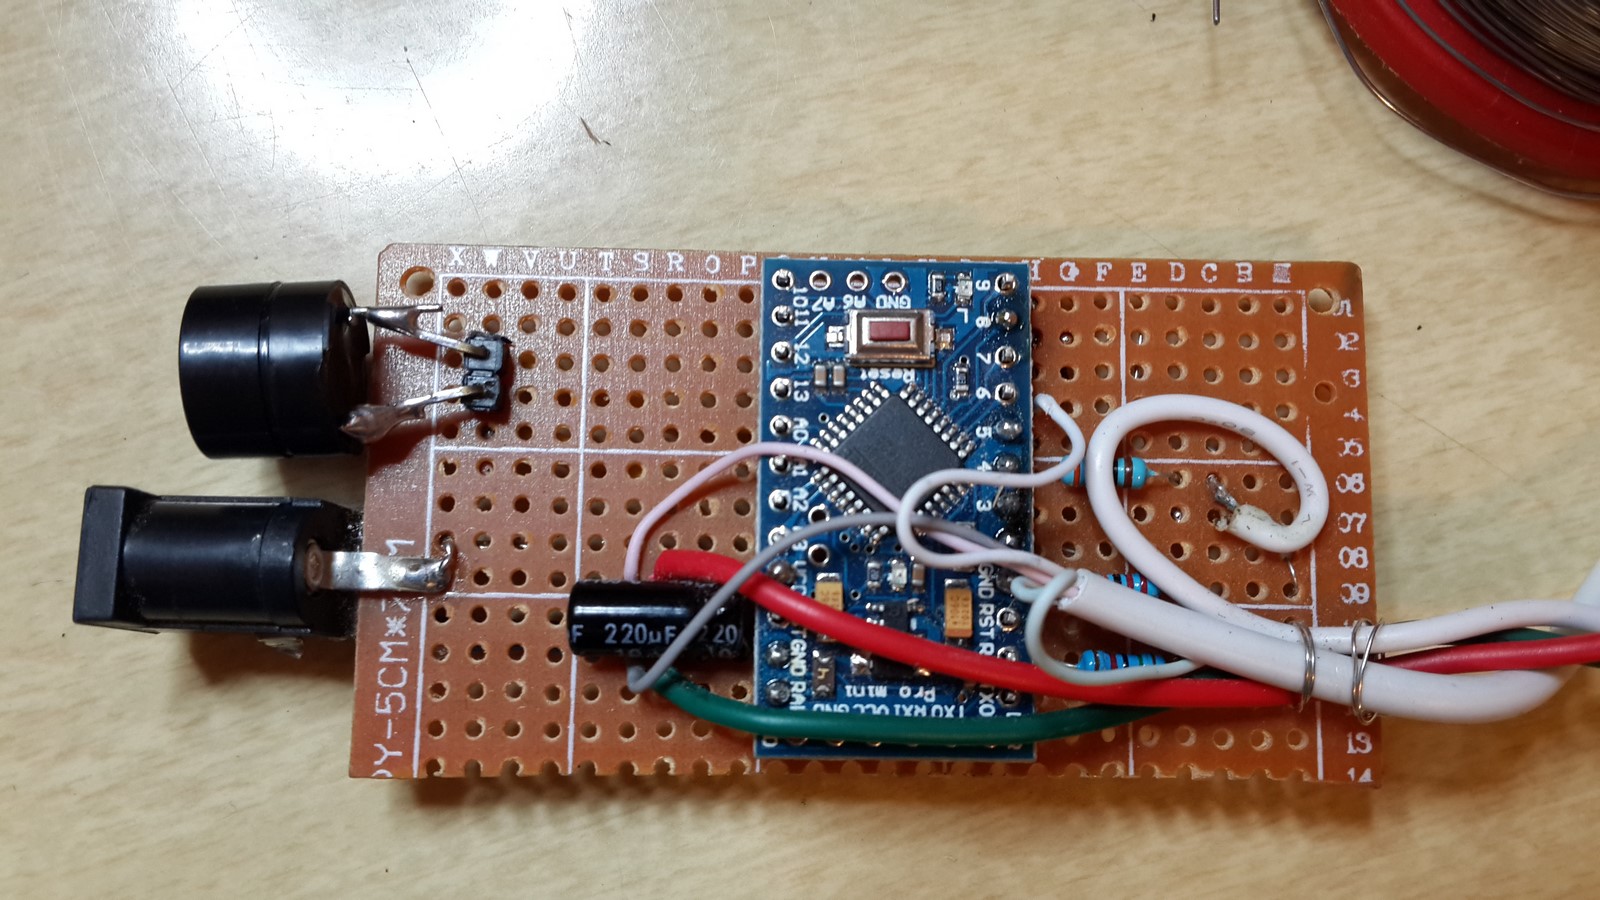
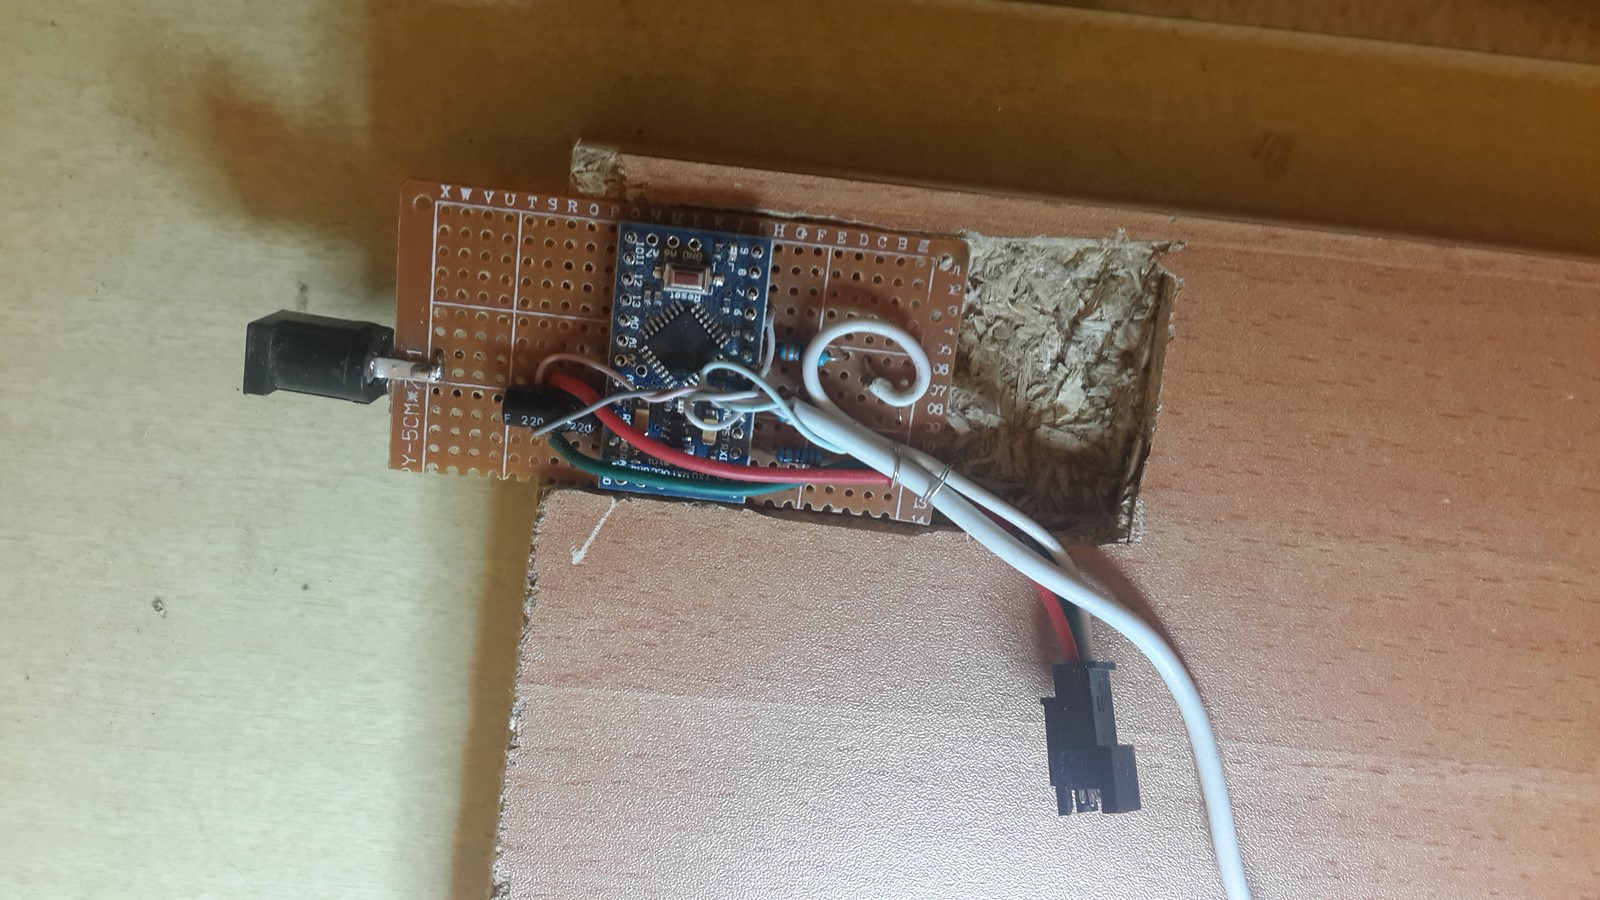
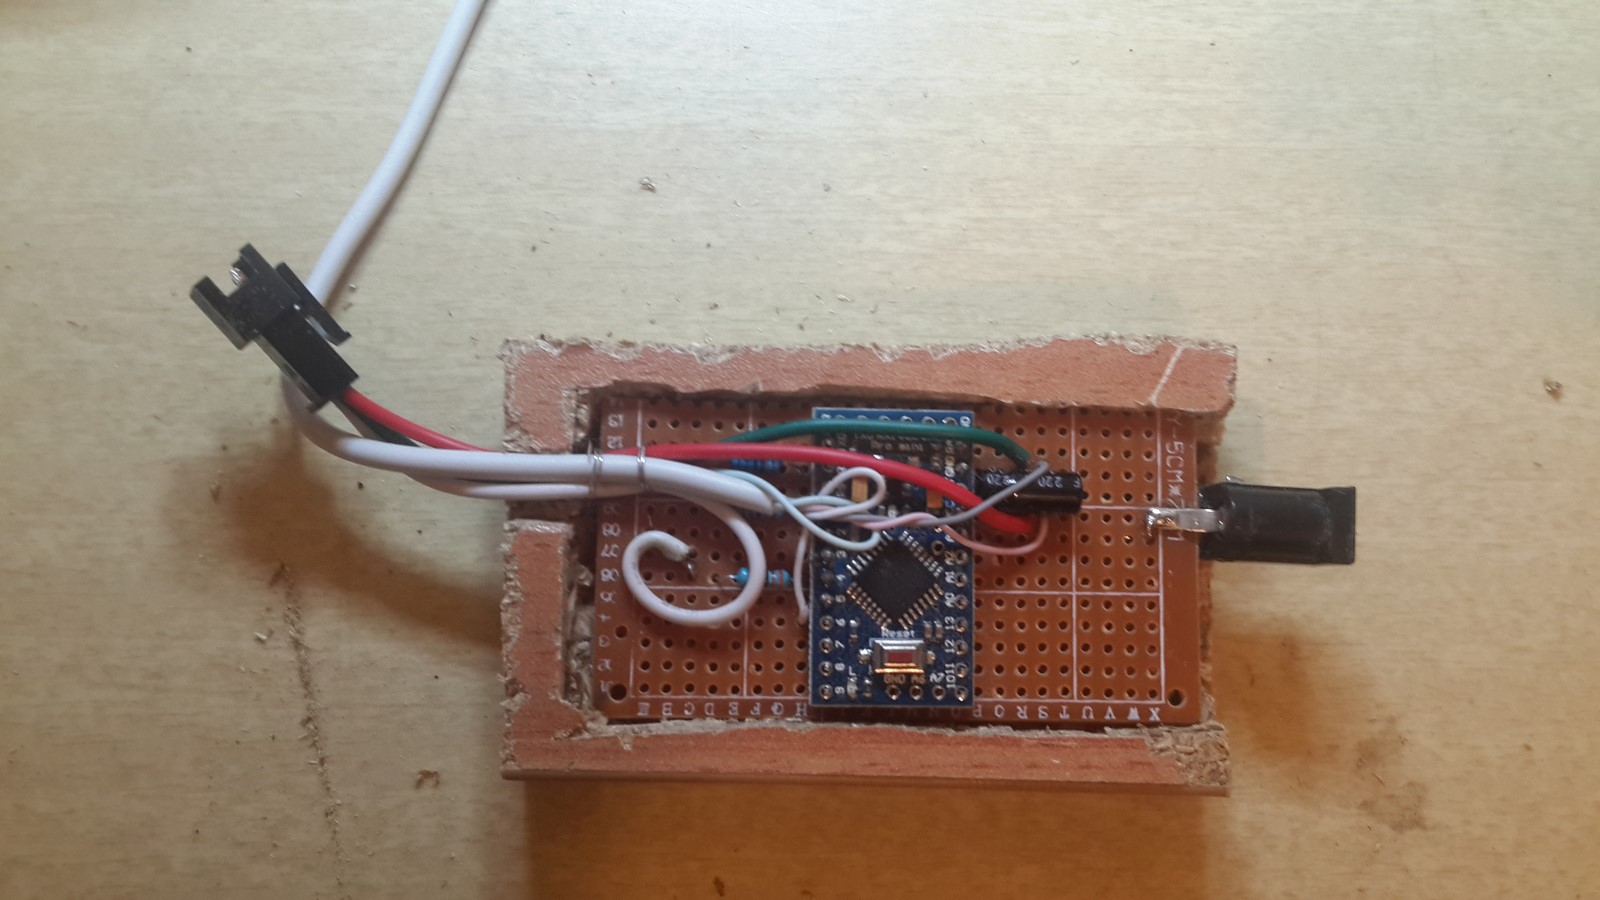
Following the IR receiver, button and led strip I also wanted to connect a piezo-speaker for the creation of sounds - and finally, the overall electronic circuit look like this:
A few notes:
- The IR receiver connect to 5V, GND and pin 5. Different receivers need different voltage, so check your item before connecting.
- The button is connected to pin 2 and is aimed to perform as an interrupt. Therefore two resistors are connected as a pull-up circuit. 15KOhm to VCC and 220KOhm to the GND.
- The WS2812 led strip is connected to 5V, GND and pin 4. In order to protect the leds and the WS2811 chip, a 330Ohm resistor is connected before pin 4 and a 220uF capacitor is connected between the VCC and the GND.
- The piezo-speaker is connected between pin 8 and GND. Some may say a resistor should be connected on the way to protect the speaker. I haven't had a problem with that so far.
Here's the PCB after soldering everything:
The Code
The arduino code can be downloaded from github. Notice the code uses IRremote library and Adafruit NeoPixel library. The idea of the code is very simple - The loop() function first try to decode data from the IR pin, then executes the command which can be one of the three modes of the program. The button function is activated using an interrupt on pin 2, changing the number of turned on leds. I added another interrupt (pin 3) to change the program mode (fire / colors) but disabled it at the moment, it can be easily enabled by adding a command to the setup() function attachInterrupt(1, button2, FALLING);.
The musical notes can be changed on the songsInfo.h file. The playSong() function plays the selected notes and treat the leds as a single octave, turning on different leds for different notes.
Important note: When compiling the code for the first time you will most likely get an error like this:
core.a(Tone.cpp.o): In function `__vector_7':
D:\Arduino\hardware\arduino\cores\arduino/Tone.cpp:535: multiple definition of `__vector_7'
IRremote\IRremote.cpp.o:D:\ArduinoMyWork\libraries\IRremote/IRremote.cpp:311: first defined here
This error occurs because both IR library and the tone() function define an interrupt involving TIMER2. In order to solve this error on arduino UNO or pro mini just go to the IRremote library directory, open IRremoteInt.h and change lines 69-70 from:
  //#define IR_USE_TIMER1   // tx = pin 9
  #define IR_USE_TIMER2     // tx = pin 3
To:
  #define IR_USE_TIMER1   // tx = pin 9
  //#define IR_USE_TIMER2     // tx = pin 3
If you use MEGA or Teensy just change a few lines before that (Assuming you will get the same error).
Carpentry #2
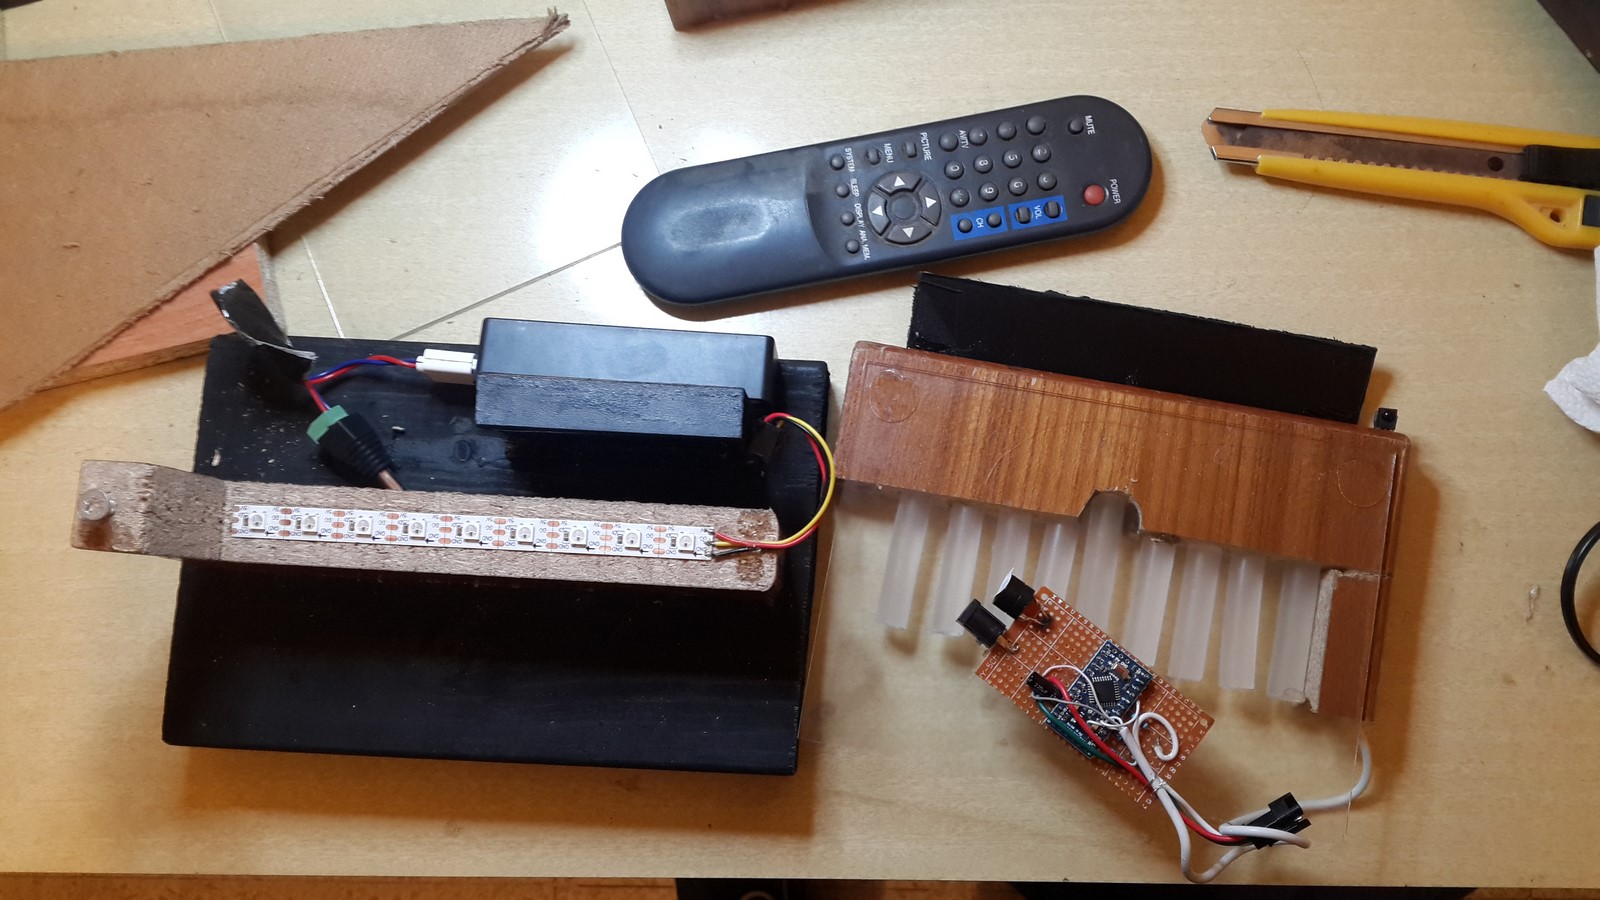
This is the final step where we put everything together. Usually When I build projects I like to build them to be robust, but not too robust so I'll be able to disassemble and fix them if a wire will be torn or if I want to upgrade it later. I've began by glueing with wood glue two parts of the hanukkiah as seen in the next photo marked by black circles:
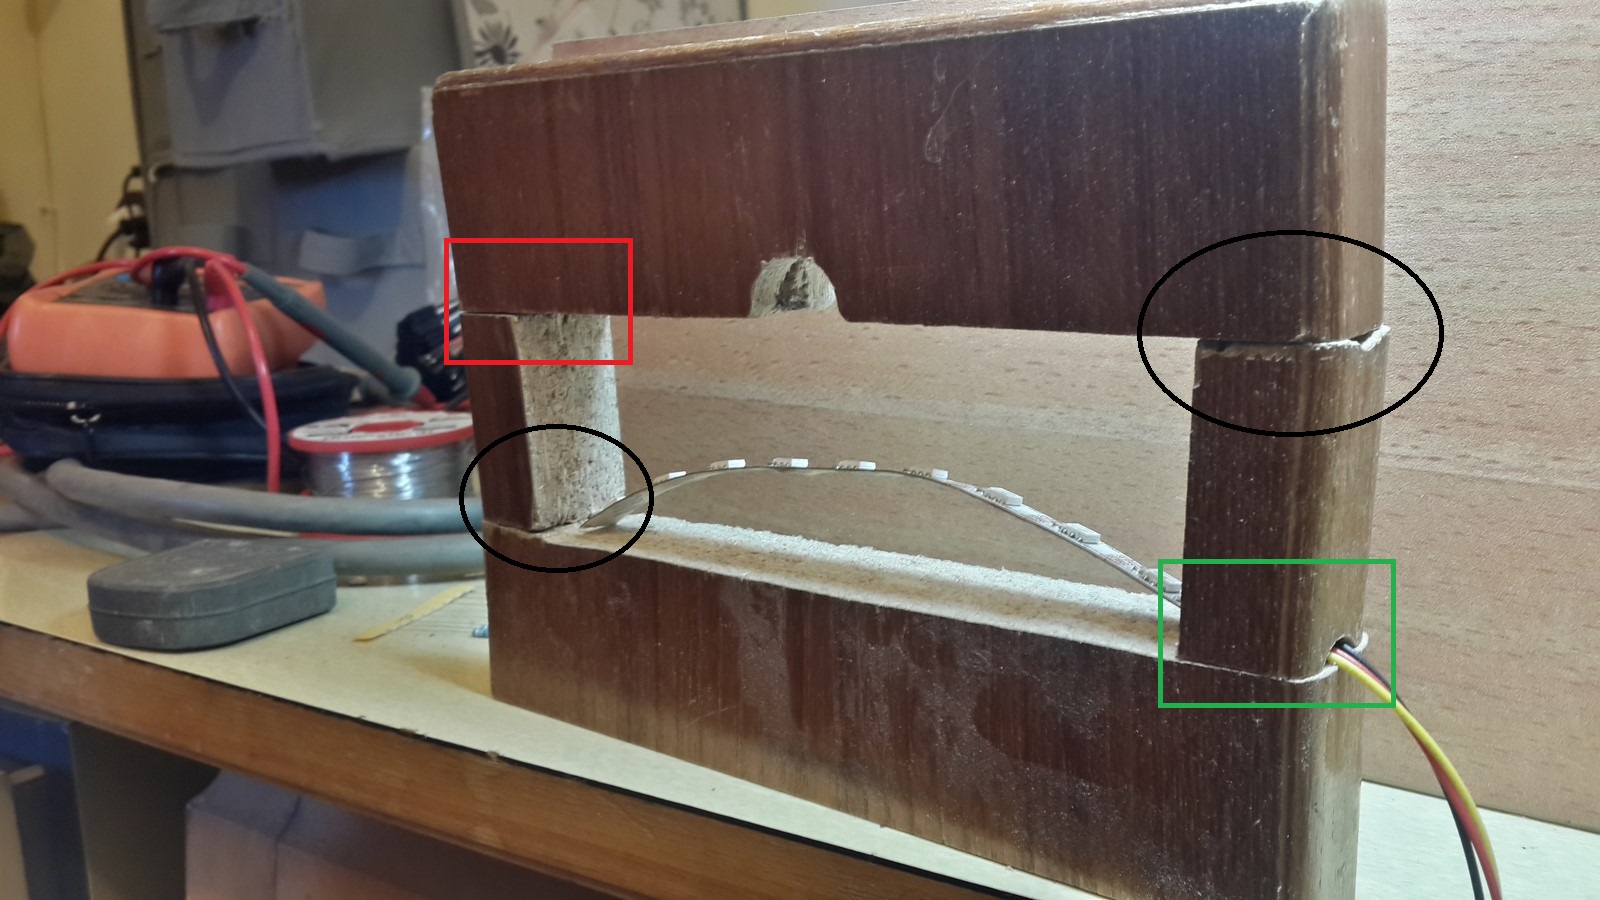 That gave me two "L" shaped parts which I could connect one to another. I left the "green rectangle" part free, so I can play with the wires if needed.
Finally, I drilled two holes in the part which marked in red rectangle. At the top part I drilled a wide hole and at the bottom part a narrow one. Then I screwed a screw to the bottom part as seen in the next photo:
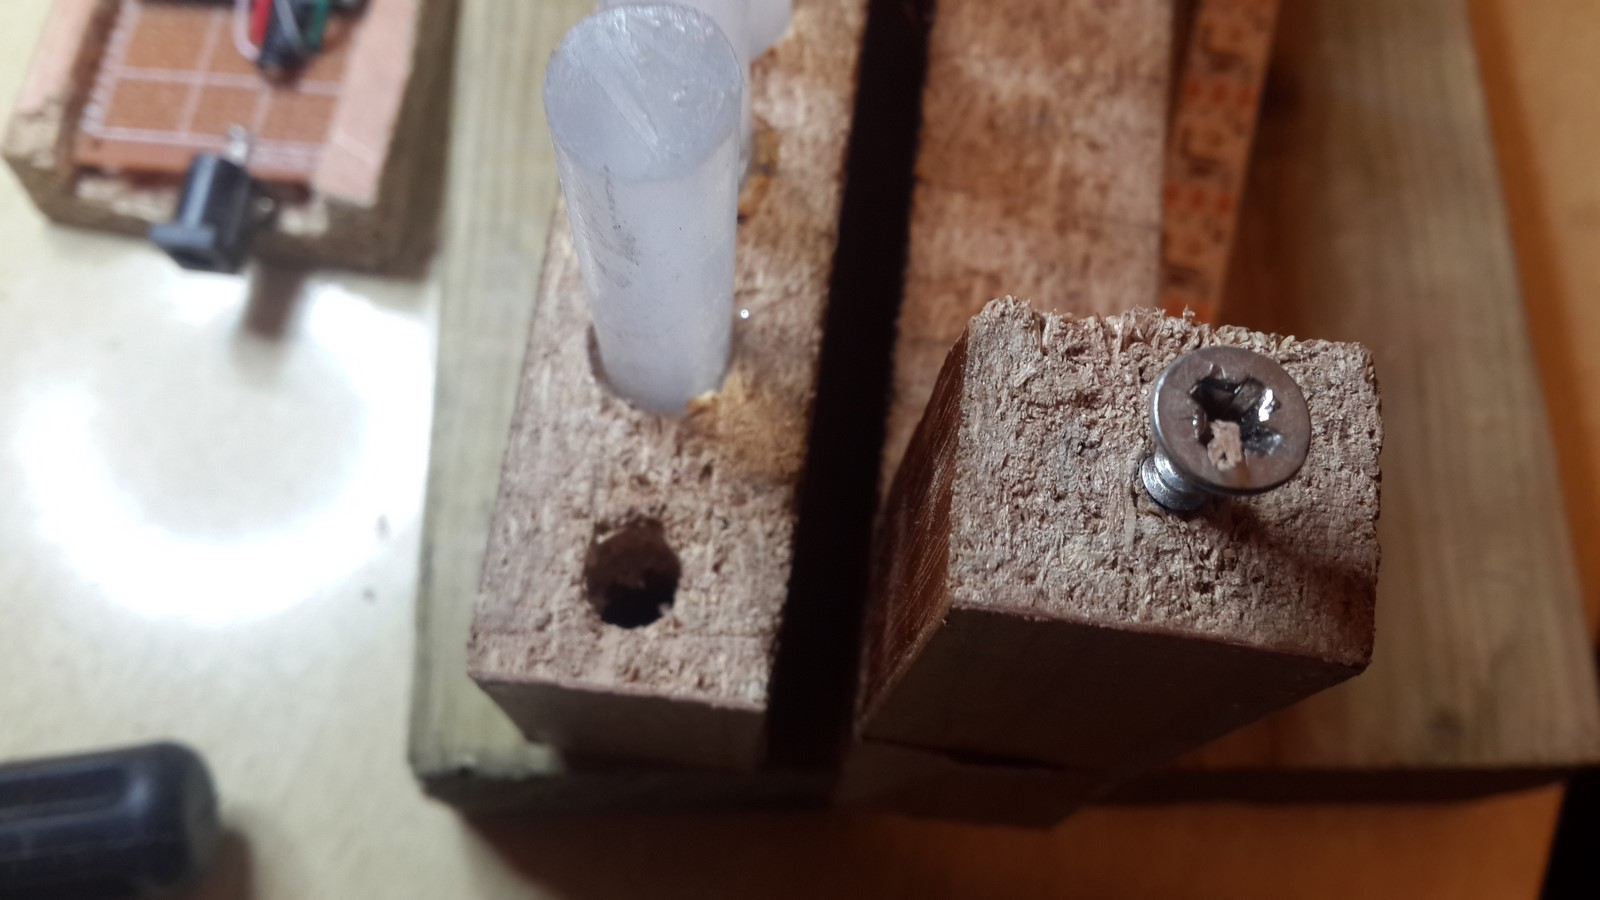 and we can now easily put the top part on the bottom part, rotate it until it gets to the right place.
 Note that it is important to drill a hole before screwing the screw on this certain particleboard since it can be broken by the power we put on the screw when rotating it.
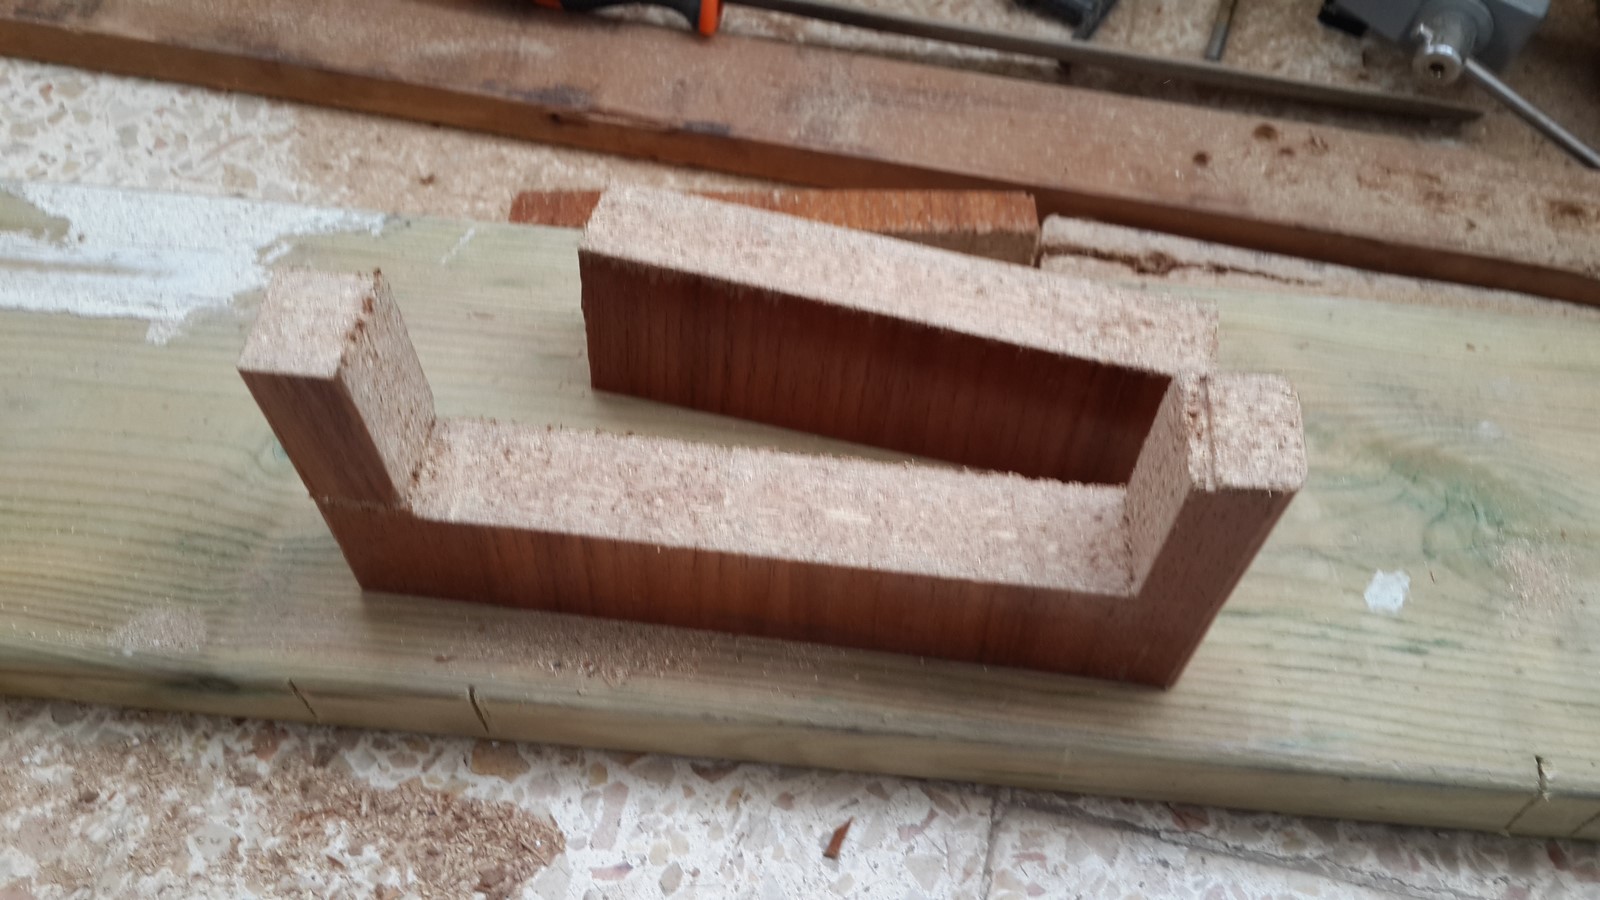
The next part is to build a "house" for the PCB since we don't want it to be loose, and it is also not very pretty to leave the PCB hanging in the back. For that I used another board, curved it with a Chisel and a hammer, and smoothed it with a dremel. After the inside was at the right size I saw it to get the wanted size from the outside and smoothed it as well:
 Turning it around and it look much nicer:
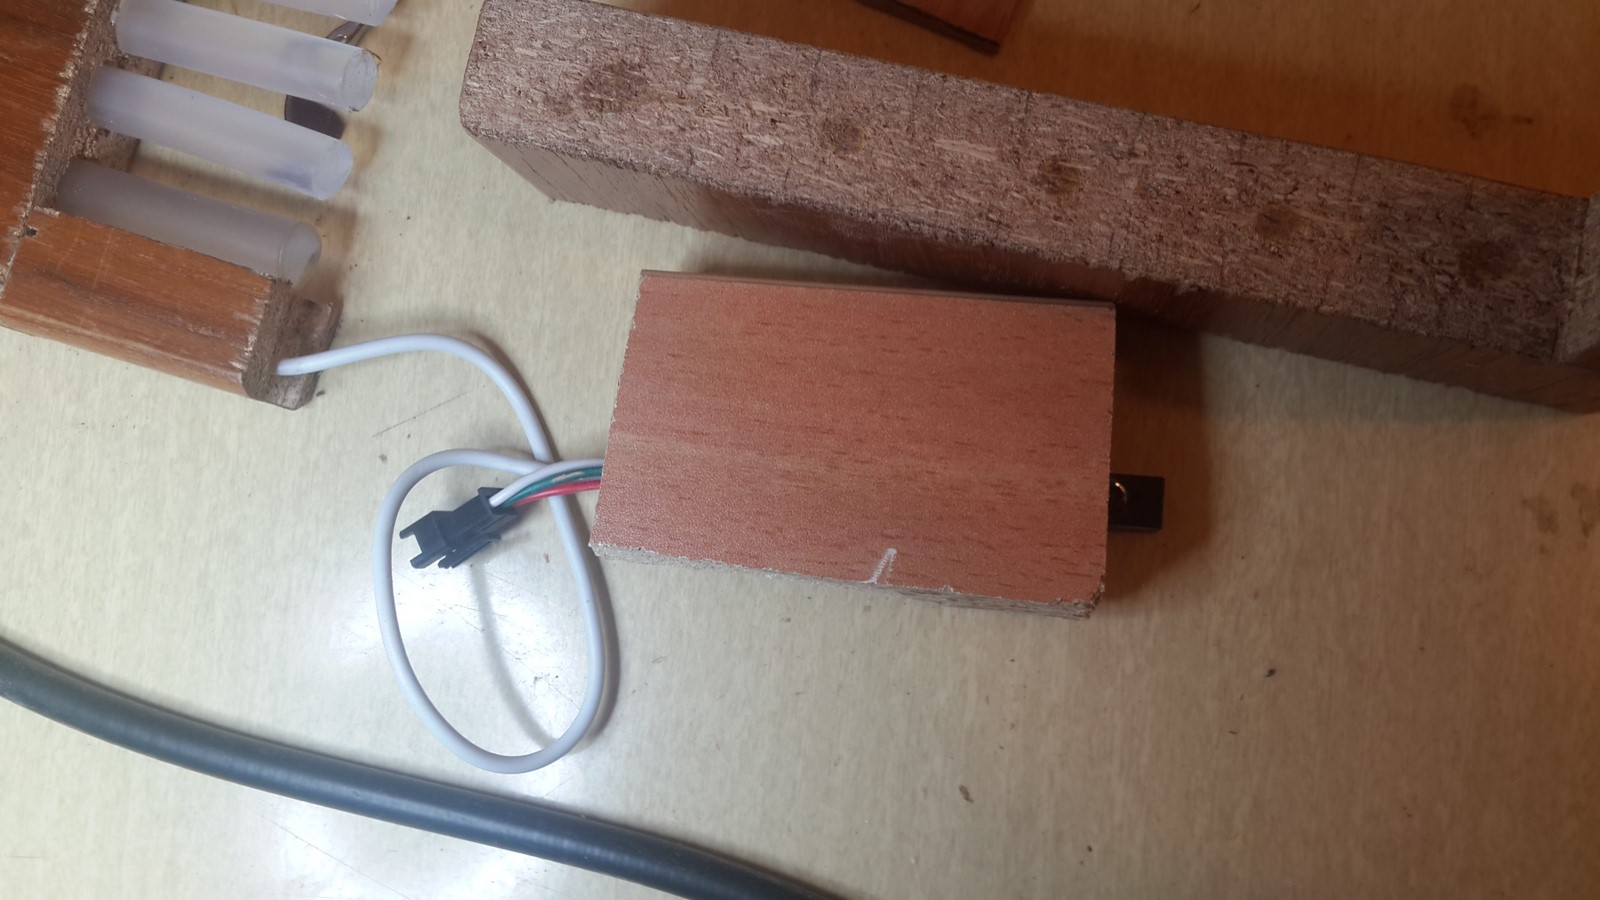 The next step was to get another board, paint it black, paint also the PCB "house" in black and glueing everything together nicely. At this point, this is how it looks from behind:
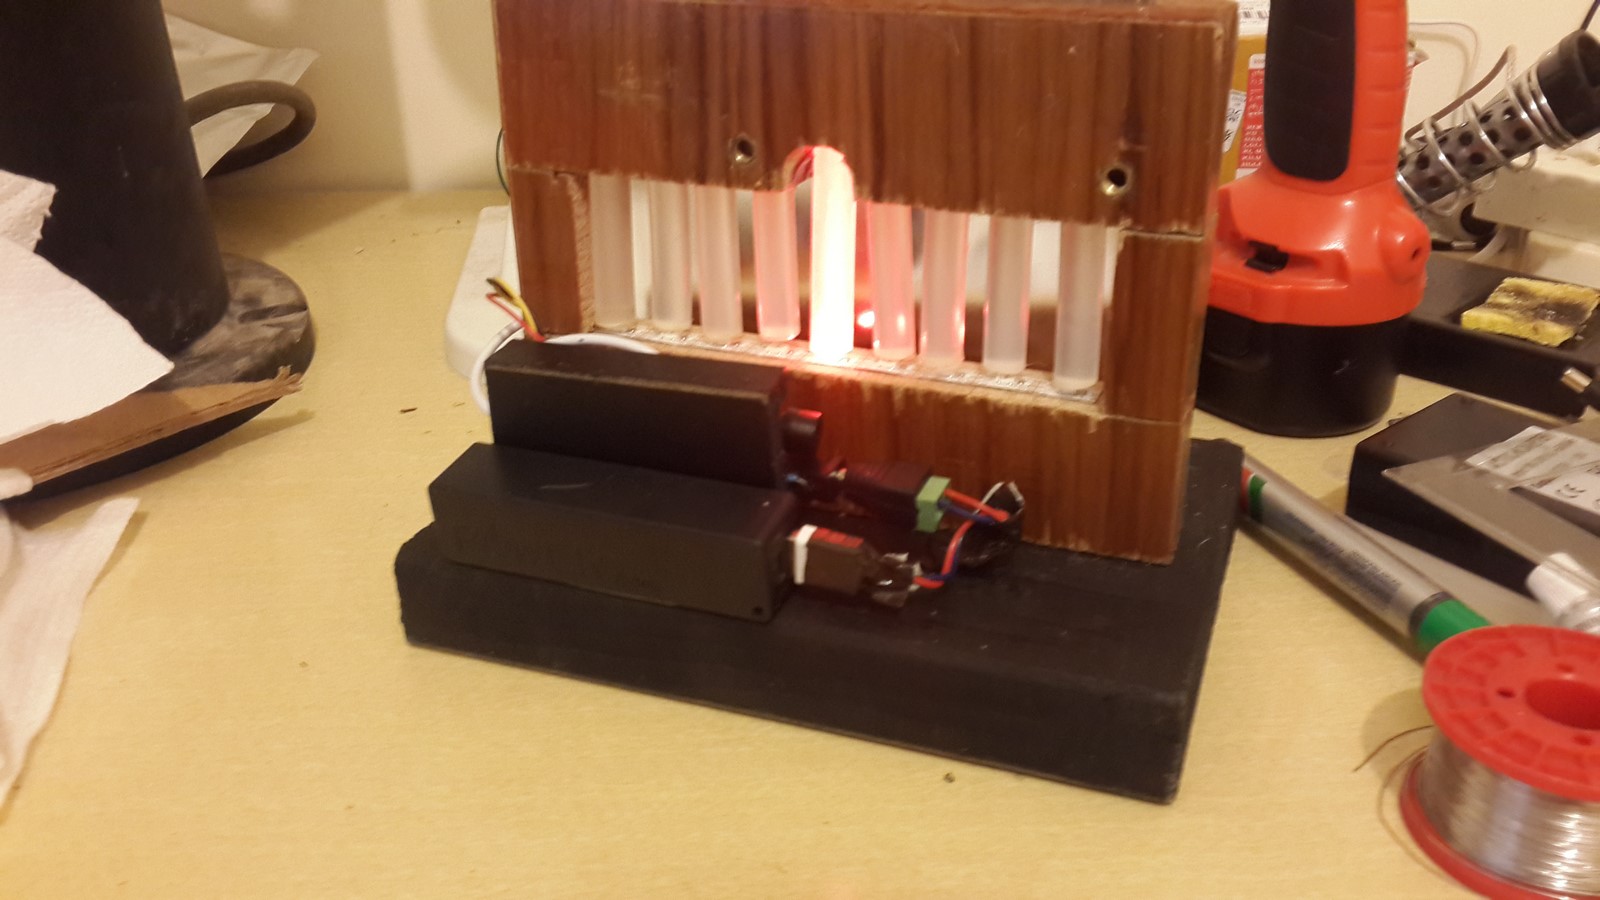
The power source is a single battery power bank, usually used to charge cellular phones, but any other power source of 5V can be used.
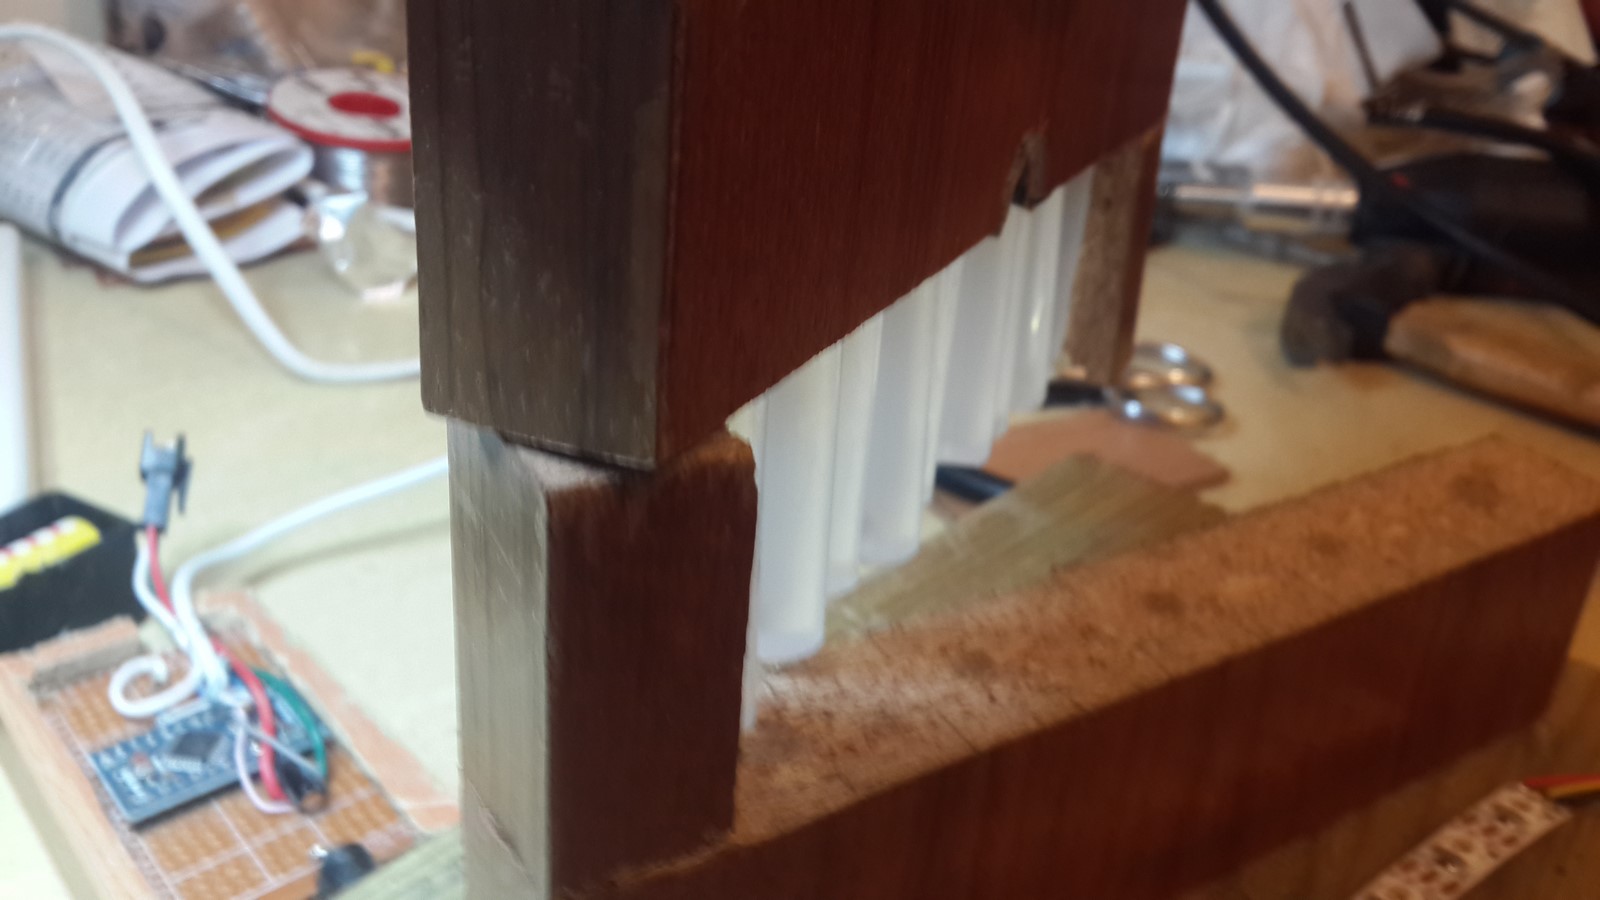
While waiting for the black spray paint to dry up I found a glass from a picture frame which was exactly on the right size to put on the front side of the hanukkiah. I didn't know which glue to use because I never glued glass to wood - Just knew it has to be strong and transparent. So I checked the website ThisToThat and the only glue I had from the suggested list was... hot glue! I've used the hot glue and it worked pretty well... Until a few hours later when I found the glass broken on the floor. Luckily I had another glass, this time I tried to use E6000 glue which done the job pretty good. If you are going to use it read about it first - it is highly toxic so you need to avoid using it in a not-ventilated area.
As a final final-step, I cut a small piece of thin bright board, paint it black and glued it to the top part of the hanukkiah in an angle, creating a nice reflection of the lights when standing in front of the hanukkiah.
As I wrote in the beginning of this step, I wanted to build it in a way I can disassemble it easily - So there you go, 30 seconds to put it back together:
Conclusion
For those who jump here after watching the video (tl;dr), here is the parts list you'll need for this project:
- Few wooden boards
- IR remote control
- 5V power source
- Hot glue sticks
- WS2812 led strip (9 leds, from 60leds/m strip)
- Arduino board
- Small PCB
- Piezo-Speaker
- IR receiver
- Button switch
- 3 x resistors (330Ohm, 15KOhm, 220KOhm)
- 1 x 220uF capacitor
- Tools: Jigsaw, dremel, chisel, hammer and a screwdriver
The code and a circle sketch can be found here
Overall it was a fun project, which also connected to a holiday so after it is ready it can be used every year when the holiday arrives. If you have any ideas about upgrading this project or you build one yourself publish your thought on the comments. Happy Hanukkah!