Yep, another post on the ESP8266 is here (By the way, Have you heard about our Facebook page already? Like us and get updates! We tend not to spam :P).
It Seems like the ESP8266 community getting larger everyday and great people develop great tools to make the ESP8266 easier to use. (What is the ESP8266? Read some older posts: Flashing, Connecting a relay, Spectrum Analyzer).
The last projects were programmed using the NodeMCU Firmware, which creates a very simple operating system on the ESP8266 and let you write and execute LUA files. It has a lot of advantages which were described in those posts but some disadvantages as well such as memory problems and firmware bugs which the average user cannot resolve.
Recently, some group from the ESP8266 forum published their code on GitHub. The code is an extension to the Arduino IDE which allows to flash programs to the ESP8266, making it kind of arduino compatible - HOORAY!.
As always, in order to try a new method I must decide on a new project which will encourage me to deal the new method with enthusiasm. The project I decided to build was a new code for the Water heater project posted here a while ago. Reviewing the old post, I found its code more or less a "proof-of-concept" code, where the emphasis was on the hardware.
The project description in a few bullets:
- The ESP8266 connects to my router via WiFi and serve as a web-client.
- A website consists of a manageable SQL database with the schedule of the water heater with a main page for the user. The user can add/erase queries from the database.
- Every 5 minutes the ESP8266 sends a GET request to the the website and receive the minutes left to turn ON/OFF the water heater. That way, even if the WiFi fails at some point the ESP8266 will still have the most updated schedule from the website. While sending the GET request, the website saves data of the time of request, the status of the GPIO and the ESP8266 IP address. In the main page the user can see when was the last GET request and identify failures in the ESP8266.
- In case the user can't wait the 5 minutes, the ESP8266 serve as a server as well. From the main page the user can send an "Update" request to the ESP8266 IP address (Which was save before), and the ESP8266 will trigger its update function immediately instead of waiting the 5 minutes.
- In case there's need to change the water heater status, the GPIO which is connected to the relay will change its status (LOW/HIGH).
- All the GET requests are password protected (As secured as my knowledge in the field) to avoid hackers messing around with the database.
Installing and Configuring
To get yourself a working environment go over these steps:
(EDIT 11/2015: I have updated the steps)
- Download the Arduino IDE.
- Go to File --> Preferences and add the link
http://arduino.esp8266.com/stable/package_esp8266com_index.jsonto the Additional Boards Manager URLS.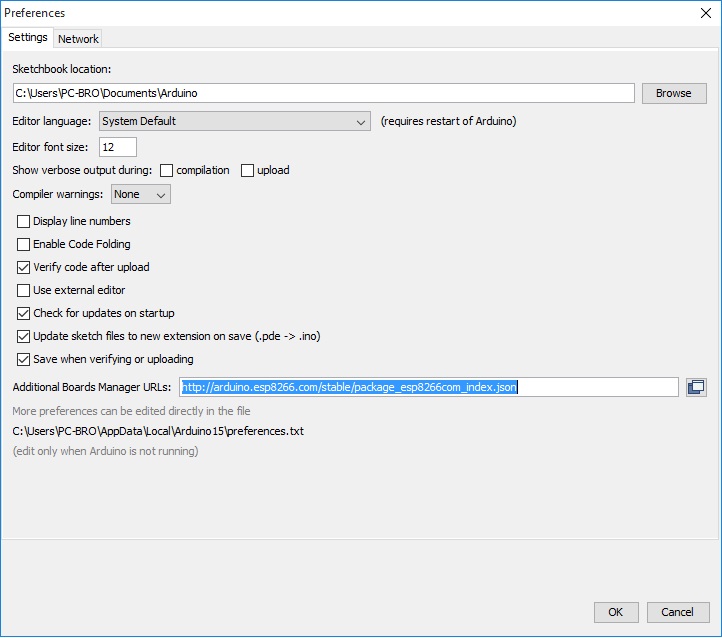
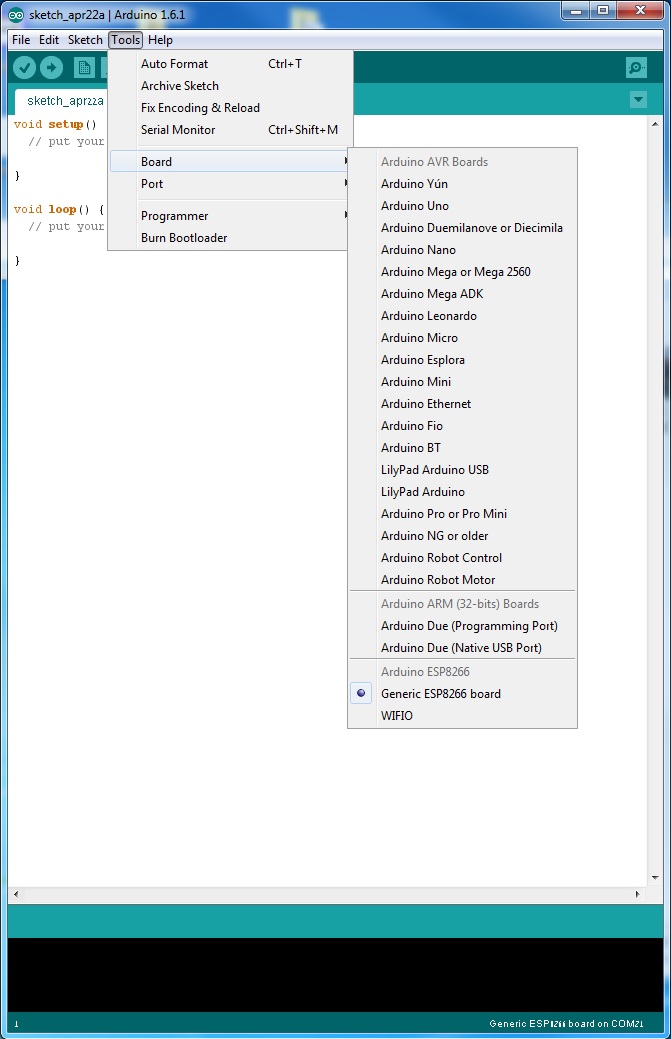
- Go to Tools --> Board --> Boards manager
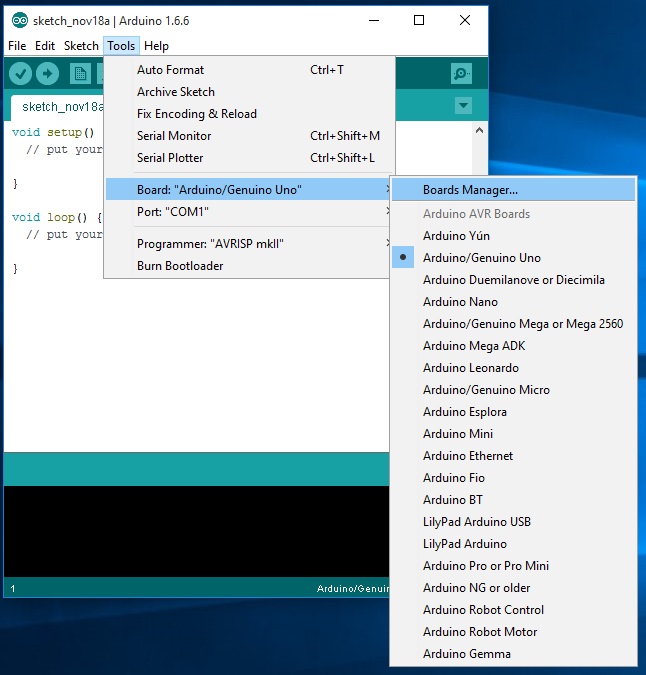
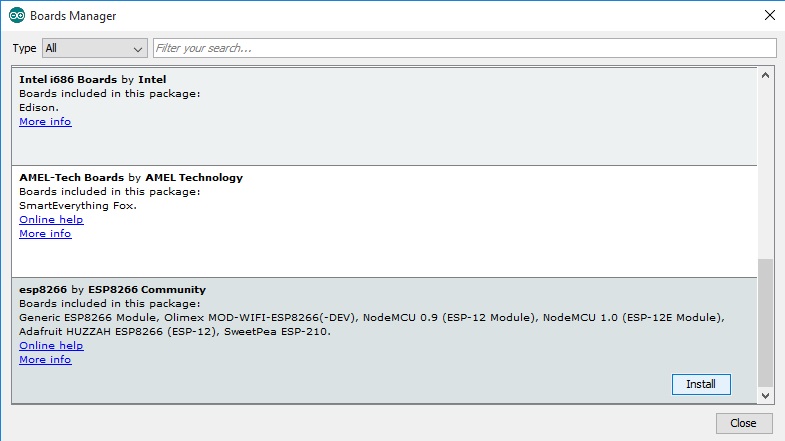
- You should now have the esp8266 as an option there since you've added it to the Additional Boards. Select it and press Install
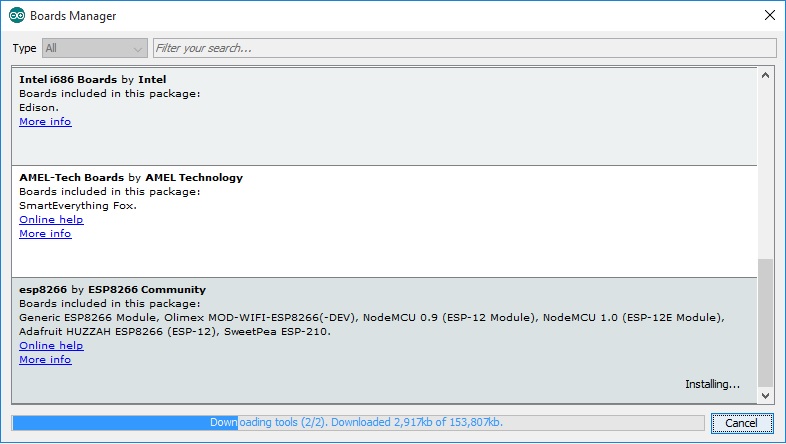
- Wait for it...
- Now, You have the ESP8266 boards configure. Choose the board you have, "Generic ESP8266 Module" if you got the regular module
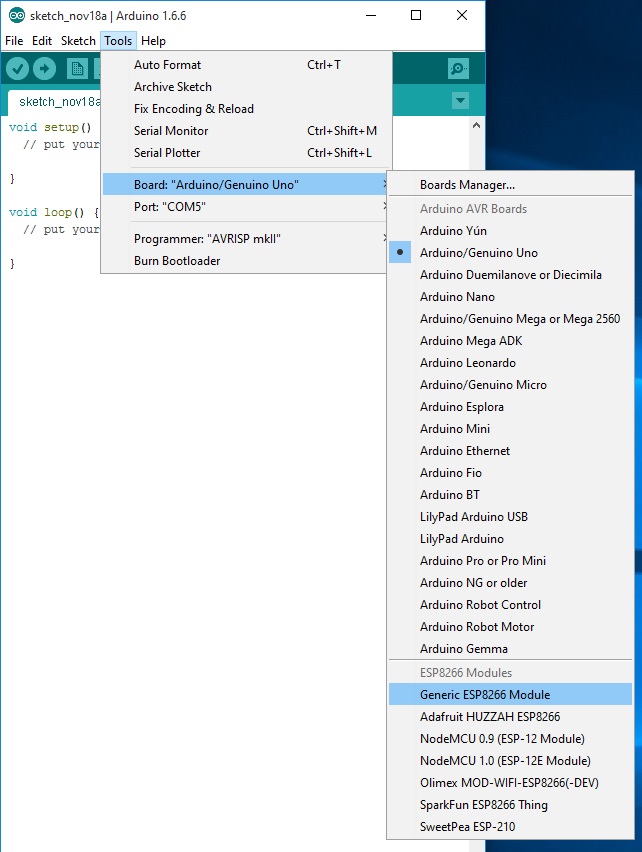
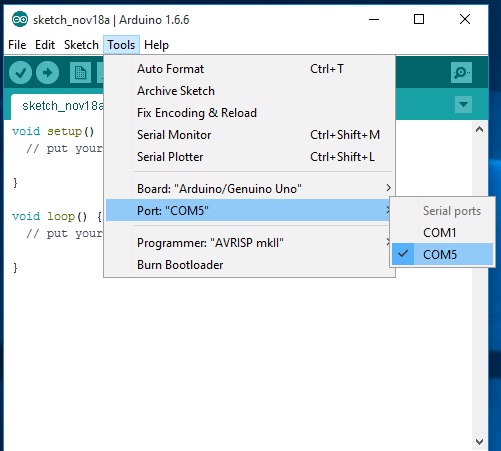
- Choose the ESP8266 port and you're done!
Option 2: Another option, which is less preferable but was the only way available when I first wrote this post is:
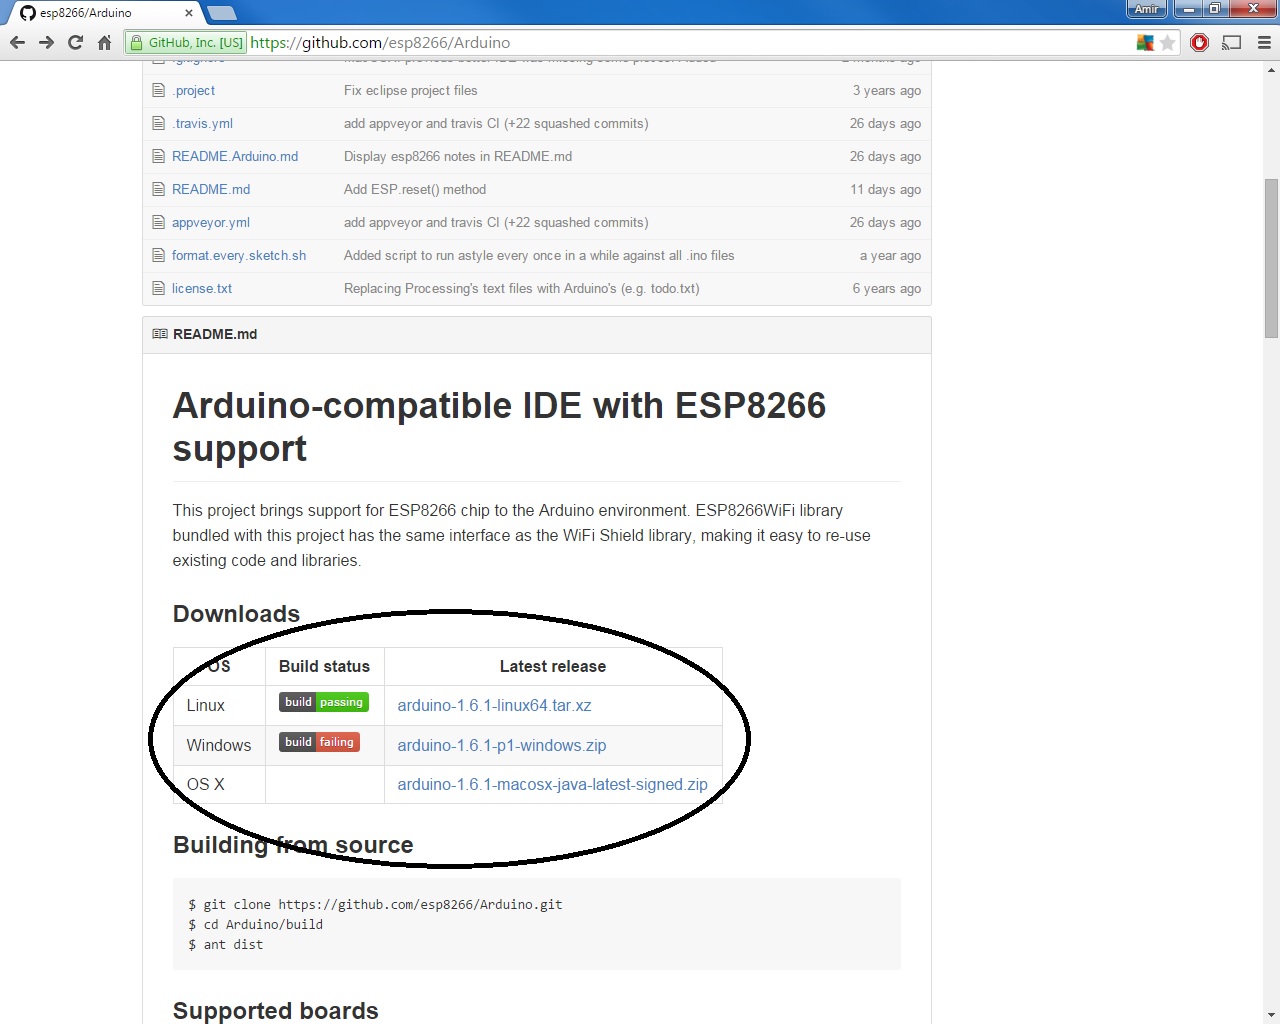
- Download the environment from GitHub (Linux,Window or Mac)
- Install the program. Personally, I use windows so no need for explaination here.
- Choose the port where the ESP8266 is connected.
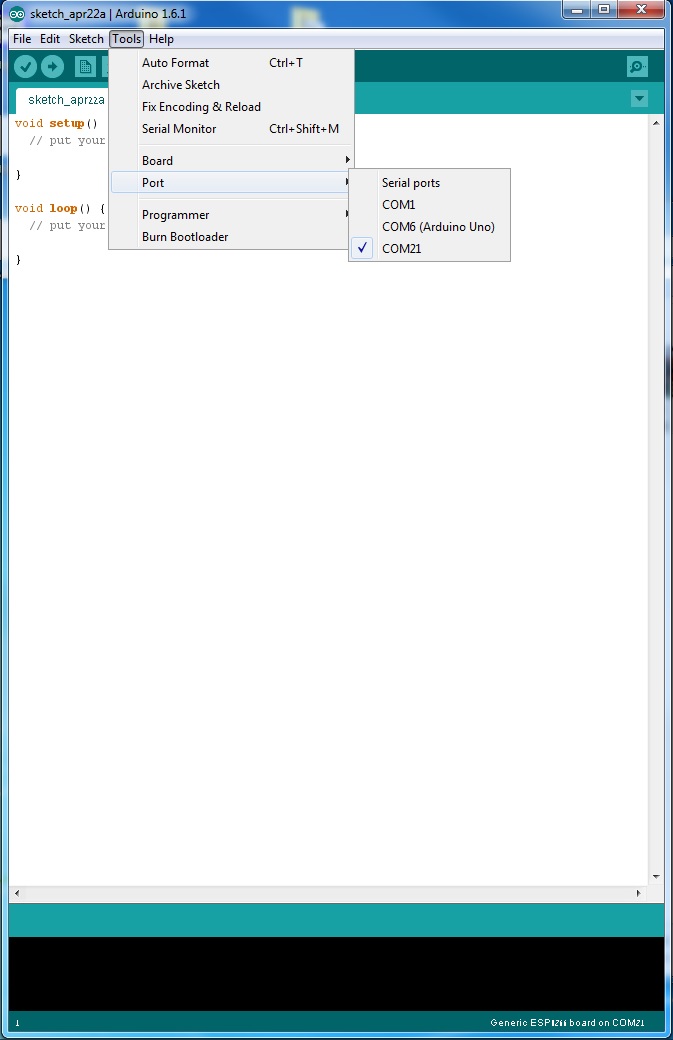
- Choose the ESP8266 from the board lists.
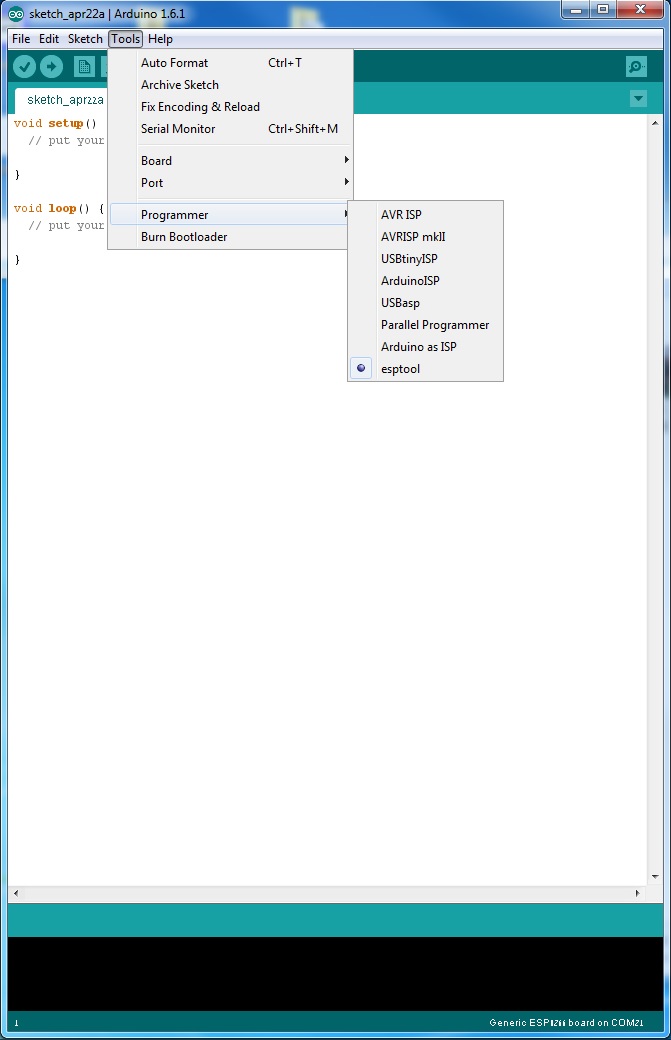
- Choose the esptool as programmer and you're done!.
(EDIT 8/2015: In the current version of this tool the programmer option doesn't exist, and doesn't needed to be configured - Just ignore this step)
And that's it, you are ready. From what I understood by digging through the files, the new code interpreting the common arduino functions into a clear c++ code, then using the esptool to create a new firmware and flash it on the ESP8266. How come nobody done it earlier ha?
Also, Option 3: Another way to get the enviroment, pointed out to me by the the redditor sej7278, is to download the files from this GitHub repository and put them under your "./Arduino/hardware/" folder. The next time you'll load your arduino IDE you'll have to define the port,board and programmer as explain before and you are ready to go. Some people will find this solution better since they would like to choose with which arduino IDE version they want to integrate with. EDIT 24/6/2016: It seems Option 3 Github link is broken - If you find the link let me know :)
Writing a program to the ESP8266
Flashing a program to the ESP8266 is a bit more annoying than flashing an Arduino. When flashing the arduino, all you have to do is press the reset button and release while you upload a program (or even not doing anything if you have FTDI such as in arduino UNO,MEGA) and the arduino will start uploading. With the ESP8266 you have to reset the micro-controller and start it in flashing mode using the GPIO0-to-Ground already mentioned in some older posts. If you don't have any ESP8266 development board and only the module itself I advice building the next circuit
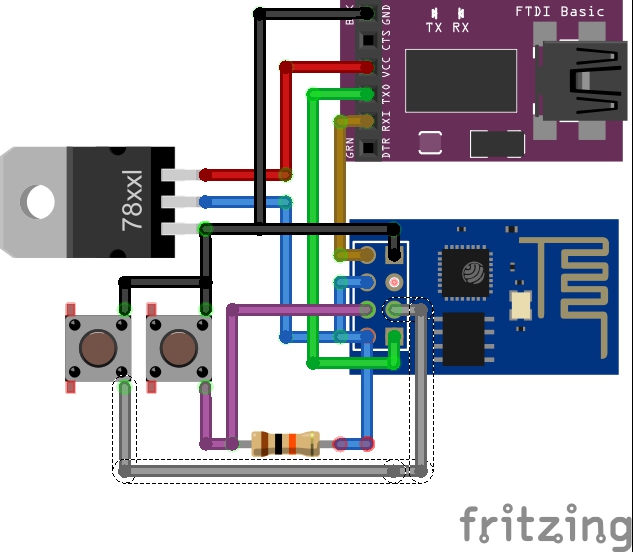 Which will make your life easier. NOTE: The "78xxl" part is actually LM1117 part, did not have it in the Fritzing library.
The sketch shows the formal way to connect ESP8266 to FTDI with a voltage regulator - However, two more buttons have been added. The right button, when pressed, connects the RESET pin to the ground and when it is released, connects the RESET pin to the VCC through a pull-up resistor. The left button, when pressed, connect GPIO0 to the ground. Using this two buttons you can do all the tasks you need with the ESP8266:
- Working on normal mode - Both buttons are released.
- Resetting the ESP8266 - Press the reset button and release.
- Start in flash mode - Press both buttons, release the reset button and then release the GPIO0 button.
My ESP8266 code can be found on GitHub. Check it and you can see it is very similar to an arduino code:
- Starts with a
setup()function. - Followed by a
loop()function. Serialcommands are supported in order to send data to the terminal- Other arduino commands are supported as well.
delay(),millis(),digitalWrite()etc.
In addition, I've included the header file <ESP8266WiFi.h> which completes the other commands needed, among them:
- WiFi library - To connect WiFi simply use the next code:
      WiFi.disconnect();
      WiFi.mode(WIFI_STA);
      WiFi.begin(ssid, password);
Client library - With this library you can connect a host (
client.connect()), send a GET request (client.print()), listen and receive data (client.available(),client.readStringUntil('\r')).Server library - Allows you to create a server, which upon request (
server.available()) creates a client that will handle the request and send a response.
The rest of the code is just the logic. It starts with all the initial definitions, taken from the TheDudeParams.h file, followed by a definition of the water-heater class which consists of all the useful functions, and then the setup() and loop() functions which handles the connections and the logic. In case of a WiFi problem, the ESP8266 will keep its last records and try to re-connect the WiFi at each time it begins the loop() function.
I'm pretty bad at writing comments in my code so if something is not clear just ask!
Creating the web server
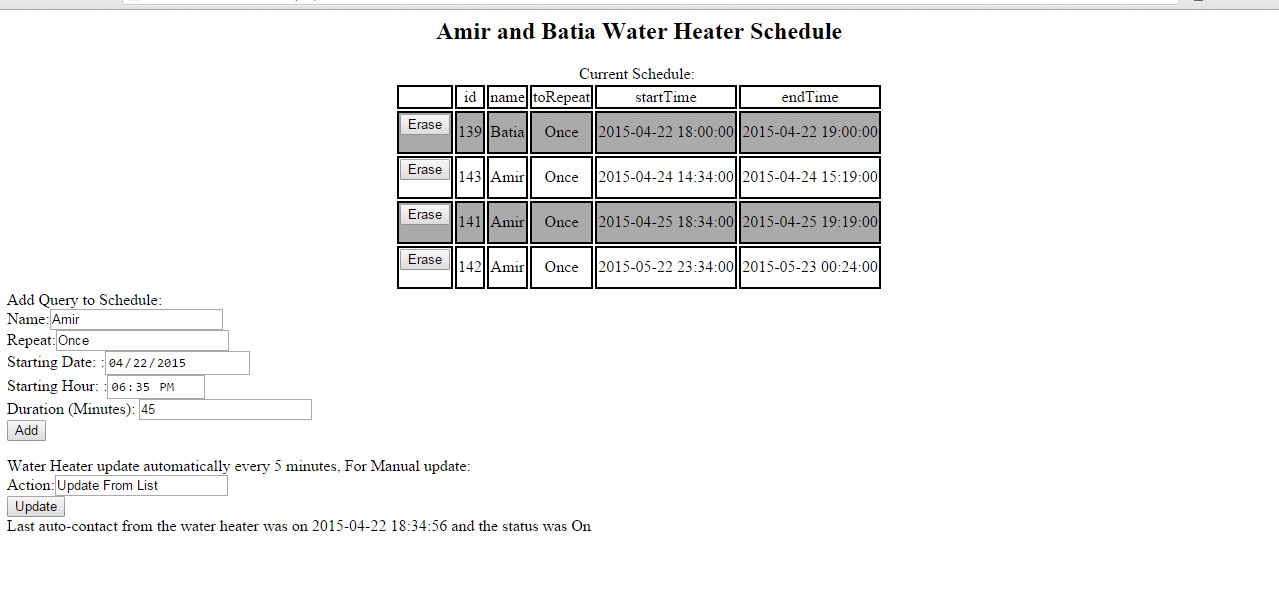
I've used to have some PHP skills which I almost forgot, and no skills at all with SQL so I thought it'll be a good time to learn everything again. I started by getting a domain and hosting-space at GoDaddy, then created there a SQL database. It is very easy to do so using their website but I know some people prefer to ssh-connect the server and do everything by themselves. The main file dude.php is the user page. It produces a web page like that:
 In the page the user can:
- See the entire schedule, ordered by time of activation.
- Erase records.
- Add a new record.
- Send an update request to the ESP8266.
- See when was the last time the ESP8266 synchronized with the server.
After pressing each of the buttons a password must be provided.
Another "behind-the-scenes" file is the getIP.php, which is the file the ESP8266 send requests to. Its main goals:
- Saves a file with the request time, GPIO0 status and the ESP8266 IP address.
- Handle Records:
- Update "Daily" past records to the next day.
- Deletes any non-relevant records (past records).
- Send a push notification if the GPIO0 state has changed (using PushingBox)
- Send response to the ESP8266 with the next ON/OFF schedule.
Both PHP files include the file function.php which consists of some useful SQL handling functions and includes init.php which is the definitions of all the names and passwords.
Final Thoughts
At the moment, the programs are running for a few days now, seems very robust. The idea of sending the ESP8266 only the relevant data was in order to keep its code simple and handle the more complicated code at a higher-level environment. The ESP8266 clock is not a precise clock such as using a RTC chip but if it synchronizes every few minutes with the web it is practical enough.
That's it. If you just received your first ESP8266 module I hope this post has helped you with an easy start. Any questions/thoughts/criticism? Just write a comment. By the way, have you "Liked" our Facebook page yet? :P
AA